
When we started working on the landscaping for our cottage in the woods, we were unsure of how to handle the hill that joined the side of the house with our country lane.
Initially I really wanted some stairs leading up to the front door, otherwise we would always have to enter the house through the garage/basement… unless we walked all the way around the hill & up to the front door.
After looking at the size of the project, the price that it was surely going to cost, not to mention not knowing exactly how to go about accomplishing the project, I was afraid that we were going to have to settle for something less that what we really wanted.
But… after going through lots of pictures, and discovering some new ideas to build a set of stairs ourselves, we finally had a new option!
You see, initially we tried to build the steps from stone that we gathered from around the property, but no matter what we did, we couldn’t get them to lay even. Because we didn’t want anyone to catch their toe & trip while climbing the stairs, we had to find another solution.
And we finally it!!!
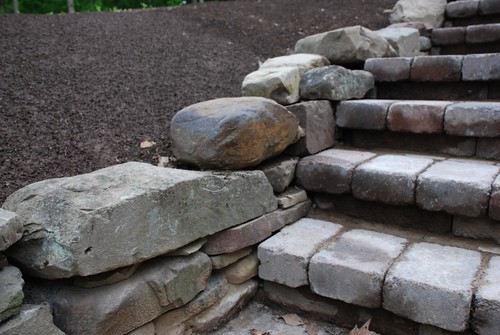
We would use manufactured cobblestones to build the steps themselves, then use the stone from the property to build the sidewalls of the steps, as well as the walls of the terrace garden.
This would not only allow us to have nice even steps and still give us the look that we wanted, but the cost would also be very low, because most of the supplies would be coming right here from the land!
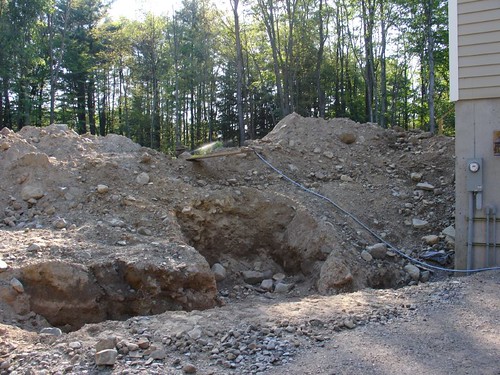
Lest you have the idea that the job was going to be an easy one… I wanted to start from the beginning to show you what we started out with (of course the land was initially all wooded & my husband & I cleared it ourselves – so even this picture isn’t from the “actual” beginning 😉
You can see where my husband grabbed his trusty shovel and starting roughing in the steps into the side of the hill. You can also see all of the rocks that he was pulling out & putting aside for later use.
After the steps were laid, we starting laying out the stone walls on each side to keep the soil from falling out. We also decided that it would be wise to lay landscaping cloth behind each row of stacked stone, then pile the dirt up behind it. This would keep the soil from simply washing through the front of the walls each time it rained.
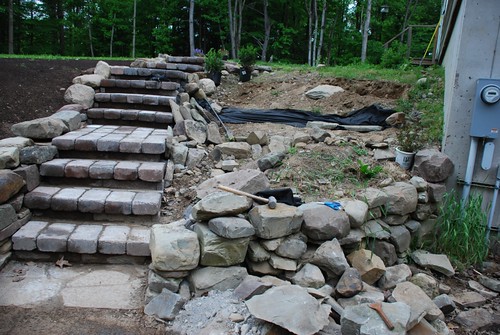
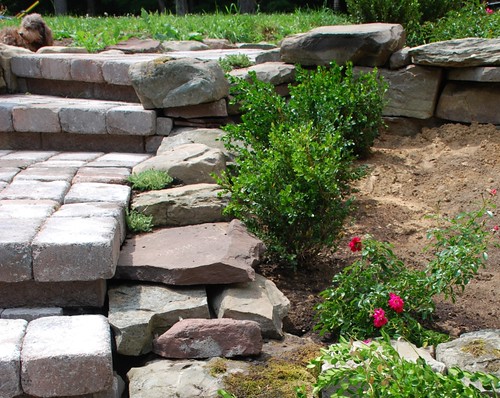
Now the steps were pretty much laid in and the bottom retaining wall was well underway. You can also see that we were FINALLY able to rake down the soil on the hill in the background – remove all of the stones – and cover it with a layer of top soil to prepare it for planting grass seed.
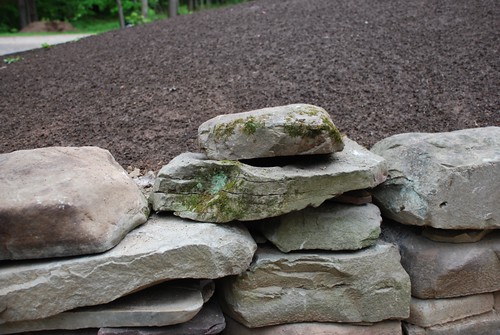
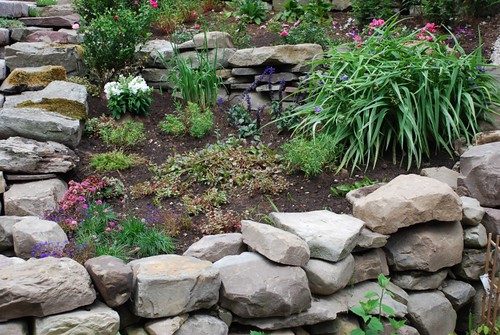
I love this close up of the bottom retaining wall as it was going up! Don’t you just love the character that stone gives!
The work of laying out a stone wall is not some sort of science, but you do need to take your time & be sure that everything is sturdy & sound.
I love a more natural look to the garden, and wanted things to appear as though they had been there for a very long time!
So… we picked the rocks that would be visible very carefully.
I also LOVE to visit different garden centers & look through the clearance racks for special deals. Last year, I found 20 large boxwood plants for around $1.25 each! I decided to plant some of them between the steps & the cottage garden for a bit of color and structure. You can also see how I started tucking small plants into different cracks and crevices here & there that we left for that purpose. There are so many different varieties of little ground covers, herbs, and sedums that you can use for that purpose.
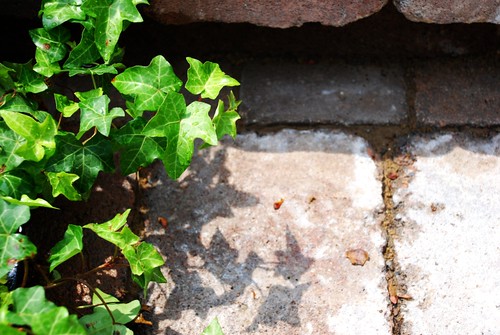
The ivy was another great find! Only $3 per flat, and what’s not to love about ivy & stones together!
After lots of hard work, you can finally start to see things taking shape. I’ve designed the garden to have 4 different planting areas.
Level 1. Shrubs such as hydrangeas (the very top)
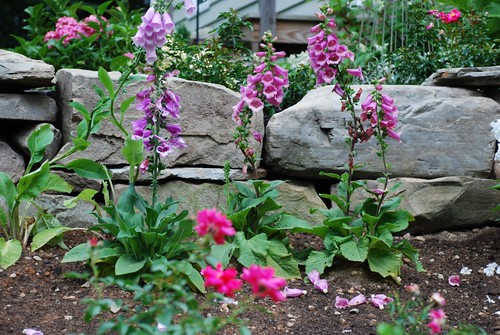
Level 2. Cottage Perennials – Foxgloves, poppies, garden phlox, etc.
Level 3. Ground covers & low growing plants – sedums, mini phlox, ajuga, etc.
Level 4. Hardy hibiscus (ground level)
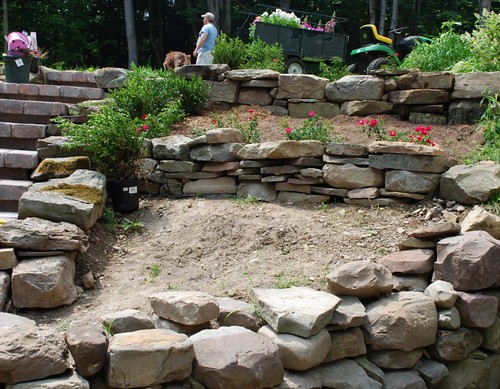
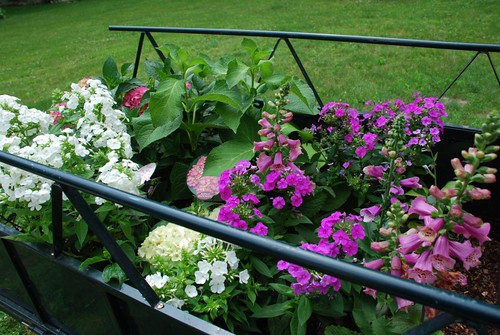
We loaded up some of my plant stash to take up to the planting beds. You can see that the wagon is filled with some of my favorite cottage garden plants!
Finally time to plant!
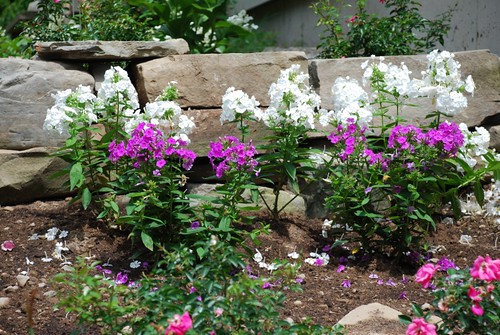
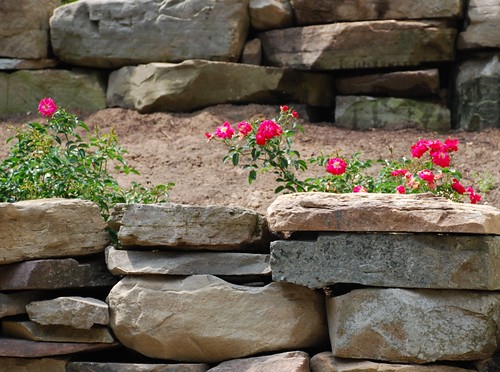
Behind each stone wall, there is also a nice bed of carpet roses. They will bloom all season long, and in no time at all will be approx. 4ft X 4ft… also draping over the stone walls just a bit!
Have I mentioned that Foxgloves are some of my favorites!
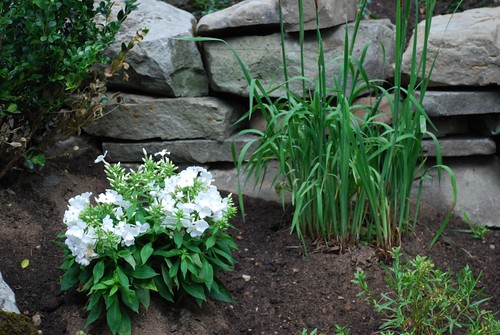
In the next tier down, I planted some miniature garden phlox. I’ve never heard of minis, so I’m really excited about these! I’ve also added some small iris for their nice color & shape.
Another bunch of roses peeking out from behind the moss covered stones.

The large hardy hibiscus were another GREAT deal that I picked up this Spring. We stopped at a local plant sale, and because it was later in the day, they were trying to get rid of things that they still had left (nice tip for you… go to plant sales both in the morning – then go back later in the day ;).
I saw a big box of roots – marked hardy hibiscus. I asked her the price… normally they are selling for $4-$5 each because they are such nice big roots, but we will give you the whole box for $10! Sold! So… I bought the roots in the Spring, but because the garden wasn’t ready to plant until later, the shoots had already started growing – which explains their legginess. Next year… they will be nice & full!

A few close ups of some of my plants
Saxifraga – my first ever… and I’m in love! The aroma is heavenly!
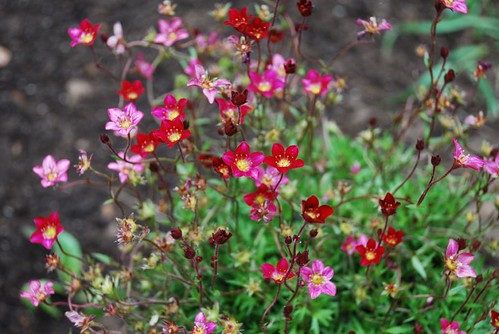
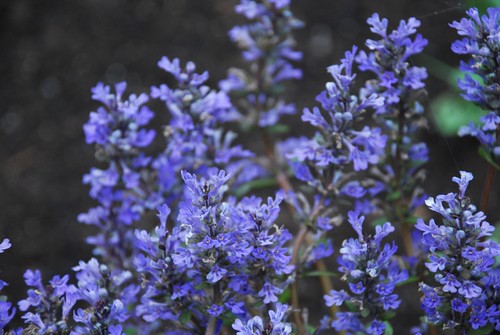
Ajuga – some people say…. oh be careful, that plants spreads so much… and I say… that’s exactly why I love it so 😉
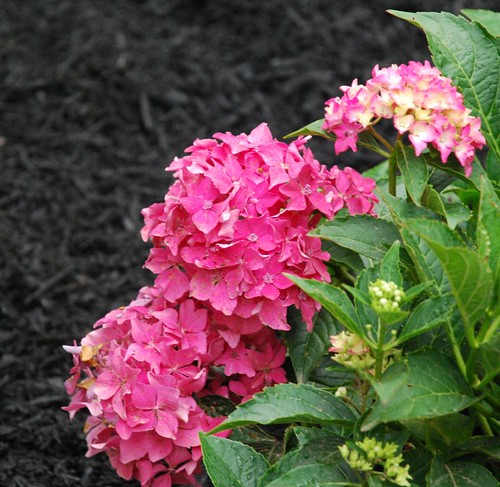
A couple of my pretty ladies (hydrangeas) from the upper level.
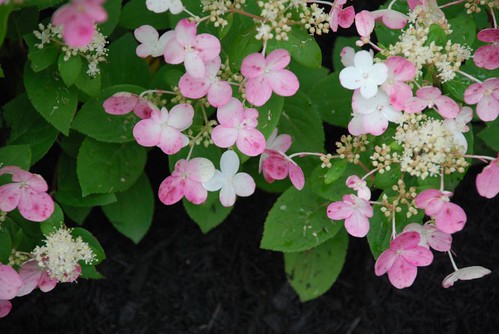
Because I am only planting shrubs in the upper level, I decided to mulch around them to keep the weeds down.
Another shot of the lower level
Our special visitor…
You might remember turtle girl from last year… yes… she’s back again!
This little lady comes to our hill each year to lay her eggs, and this year was no different! Hopefully we’ll see little babies coming out to enjoy the garden soon 😉

Even though our garden is only a few months old, we already see such growth in the plants, and we are all enjoying it immensely!
Was it worth all of the heavy work? You bet it was!
I will be sure to keep you up to date as to how this garden is coming along, as well as the other gardens that are currently under loving construction throughout the forest 😉
This is beautiful! Isnt it nice the wild life still loves it! Very nice job!
Sweet Pea… we just LOVE the wildlife… which is one of the reasons why we choose to move here in the first place. I can’t tell you how much joy we get out of seeing some little creature moving about in the gardens or forest… no matter how small… or how big… yikes 😉
Well done airtlce that. I’ll make sure to use it wisely.
Wow, your yard is already so stunning! I can’t wait to see how it looks when all those flowers fill in. You have done a huge project back there and it looks amazing!
Well done!
Thank you Sarah! Yes… lots of work… but SO REWARDING! We’re so thankful for our little slice of heaven 😉
Oh my – you did a fantastic job with the stone and with all of the plantings. Everything is looking so beautiful already, now sit back, relax and enjoy all of your hard work.
Beautifully done! Your reward for all your hard work will be enjoyed year after year and will become even more beautiful with time. Thanks for sharing!
I am new to your blog and I have to say I am quite envious! Haha I love the woods, cottage gardens and rocks too!. I know how hard that was to do. Congrats on a job well done and how nicely it all fits in to the landscape.
Thank you for sharing !
Michelle,
Thanks! I am VERY thankful to God for all He has blessed us with, and enjoy every minute in our little wooded paradise!
That was a huge undertaking and so beautiful! I love the way it turned out. You’ll have to show us again next summer..what a difference you will see.
Stacy,
I am looking forward to seeing how the garden does next year… but … I can’t believe how much it has grown in the 6 weeks since we’ve built it! WOW! Don’t you just love being able to see beauty grow all around you!
Pearl
Wow… this looks amazing.. it’s so beautiful!
What a great project! The stairs are wonderful. Just the right combination of stones. A dry wall is an amazing thing, and you guys did a great job. Nice curve to the stairs too. You must be VERY HAPPY with the results. The gardens are beautiful even in this beginning stage.
AndyLynne,
Thank you for your kind words! I just LOVE stone in the garden… and dry stacked stone walls are on my list of most favorite things 😉
I just love your design…what a stunning transformation! Great pictures of it all too. xox
Your stairs are absolutely gorgeous! What hard work, but so rewarding. The flowers look amazing. I can just imagine them next year. And that sweet turtle, can’t wait to see the babies…
Have a great week
Kitty
Kitty,
I’m with you… I can’t wait to see those precious little babies! Thank you so much for stopping by & for your kind words of encouragement!
Pearl
How beautiful! I’m glad the garden is coming along so nicely.
The stones look fantastic and what beautiful flowers!
tea
Thanks Tea! You should see how fast the flowers are growing already! I will post some more pics soon.
Pearl
I am very impressed. I know how much work goes into a project like this. You will enjoy it for years to come. Your photos are also very good. I am adding your blog to my favorites list.
Thank you for sharing.
Kat
Kat,
Thanks for stopping by, and for your kind words about the site! I dropped by your site as well… and I loved the “living art” in the streets! Wow – what a great idea!
Pearl
This project is one of those huge, overwhelming projects that can be put off for years – but once done, unbelievable. Glad you have done it so you can enjoy it yourselves (i.e., not in order to sell). It is as gorgeous as I am jealous! What a great entryway to the backyard.
Beautiful Garden!!! It is so enjoyable to see these plants/flowers we plant growing, so amazing 🙂 I know you will enjoy watching yours grow too!
The turtle is sooooo Adorable, how neat that she likes to come to your beautiful yard, she must feel right at home! She looks pretty big~!
Alice writes:
Hi Pearl. Love your rock walls. I am doing mine and I was wondering if your used cement to hold the actual bricks in place or just level it out with sand? I also was wondering if you used a rock chisel to get some of the bigger ones flatter to set better?
Thank you,
Alice
I respond:
Dear Alice,
You can most definitely use cement to hold everything together if you’d like.
For us, it was better to use sand for the walkway, due to the possible shifting
of the ground during the frost/thaw of the seasons.
For the stacked stone walls – those are of course dry stacked. We did in a
very few cases use a chisel to knock off a corner or two, but for the most
part, we have an abundance of flat rocks in our area … which can be good
or bad 😉
Please send me a pic if you tackle something in your own yard – I would
love to see it!
Pearl
Wow – what a great idea!
This is lovely. I have been searching online for information on building a brick walkway with a few stairs. I haven’t found any information on the technical end of things. Did you use mortar or just sand? We are on a limited budget but I have an abundance of old bricks. Do you have any suggestions on where I might find technical information on how to go about making a few steps on a brick pathway to go up a small rise in elevation?
Thanks
I happened onto your blog by a google search. This is so beautiful, I’m going to be a regular. Thankyou so much for sharing your love of the Garden with us! It never gets tiring to me to dream up plans for the yard. I will put some of your ideas to use!
I shall visit your site weekly and introduce it to my friends. Keep up the good work!
This is spectacular. We have a side yard with a similar slope and I love this idea. We are doing a French countryside theme. I just planted my first cottage garden in the front. The next one is in front of my porch. It will have climbing roses (zephyrine drouhine) and itoh peonies and candytuft for an evergreen. We have a flagstone path we put in that goes from the sidewalk to the front door and extends into the porch garden (there is another sidewalk that goes from driveway to front door between the two flagstone paths.). We wanted to take the flagstone path down the side yard as steps. I love the idea of the wall and separated gardens. What would I use to get along with the flagstone path and the river rock on our house? I built 13 vegetable garden bed. 4 garden beds out of river rock and 9 our of 12″ metal edging. It is a French garden formal design with English garden materials. I absolutely love it. It makes my heart so happy every time I look out the window and see it. We are going to build a fire pit with river rock as well. The flagstone path will go down the side yard around to the patio as well as through the trellis tunnels, through the garden to the orchard. I’ve done much of it myself, though the steps and wall coming down a hill will have to be a professional. I have no clue how to do something that requires structural integrity. Our acre had no landscaping when we started, and we love how things are turning out.