Free Grape Vines for Your Garden Arbor

Grape Vines on a Garden Arbor


“Let us get up early to the vineyards; let us see if the vine flourish, whether the tender grape appear, and the pomegranates bud forth: there will I give thee my loves.”
Song of Solomon 7:12


There is something so romantic about a vine that is dripping with clusters of ripe grapes! Sight, smell, taste, thought, texture… somehow, all of our senses become involved when we come in contact with this beautiful vine!

My husband & I were out for an evening walk through our little Victorian Village on a chilly Autumn evening, minding our own business, when suddenly… the amazing sweet fragrance of ripe concord grapes started wafting around our heads, almost as if they were tantalizing us to come & find them! Following the sweet fragrance (one that reminded me of those yummy peanut butter and jelly sandwiches on a hot summer afternoon), we finally came upon the vine. I’m almost sure that God blessed the grape vine with it’s heady fragrance, just so it could beckon passersby, such as ourselves, to come & enjoy it’s splendor!

Words can’t describe the beauty of the leaves, that were now dressed in their Autumn finest. Deep reds, chocolate brown, purple, and orange are just a few shades of the colorful mix. Nor can they describe the beauty of the vine itself, twisting and turning, and winding around everything in it’s path, seemingly taking ownership of everything this side of the garden. The brown splintered bark and corkscrew shaped tendrils, were reminiscent of the beautiful wreath that hangs in my cottage welcoming our guests. But sweetest of all, were the clusters of deep purple grapes that seemed to be layered at every twist and turn of the vine.

There’s nothing quite so romantic as a cottage garden path covered in vines that are dripping with grapes to welcome every guest into your home. And, contrary to what you might think, these precious vines are very easy to grow!

Here’s a way that you can have your own vines to dress your garden free of charge!

Perhaps you have a friend, or friendly neighbor, that will allow you to use this method with their vines this fall. If not, you could put out a request on one of your favorite lists such as; craigslist.com, gardenweb.com, freecycle.org, etc. I’m sure that you will be able to find a willing gardening partner!

Start a new grape vine from an old one

In late autumn (you can usually tell the right time, because it is no longer necessary to mow the grass), take a section of a grape vine & bend it down so it can touch the ground. With a fork or other small gardening tool, lightly rake up the soil a bit to make sure that the vine will be able to root properly. Holding the vine down to the ground, brush some of the soil on top of the vine. Then, use a small stone or branch to hold the vine in place. Be sure not to use something heavy enough to smash the vine, but just heavy enough to keep it from becoming dislodged. For now, that’s all you need to do. Then, come early spring, clip the section of vine from where it is attached to the main branch. Now, all that’s left to do is… plant your new grape vine in your cottage garden. You can continue to use this multiplying technique using your new plant, and in a few years, you could have a whole vineyard!

* To make more than one plant at a time, simply bend a longer section of vine down to the ground, weight it down to the soil in several places. Then, cut each section apart in the spring.

Now… it’s time for you to go out, take a walk, and have the sweet fragrance of the vine come and find you 😉

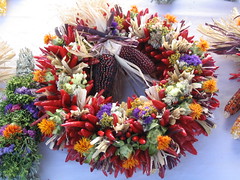
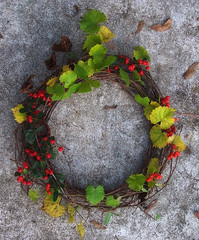
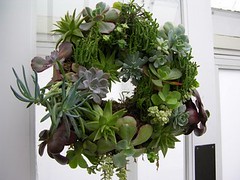
Make a beautiful Fall Wreath Free by Using Natural Found Items

Nothing says welcome like a beautiful wreath!

hops wreath

Wreaths are beautiful anytime of year, but during the Autumn season, you can fill your wreath with anything found in nature for a wonderful look! You don’t have to spend any money, and using items found around your home & garden, you will have a gorgeous wreath in no time!

I like to start my wreaths out with a vine base. Simply take your pieces of vine, and start shaping them into the shape that you want. Any kind of vines can be used in wreath making. I’ve used both grape vines, and bittersweet vines to make my wreath bases. Using a vine base allows you to simply weave your decorating material into the wreath, intertwining the stems with the vines.

The items that you can use to decorate your wreath with are only limited to your imagination! Here are just a few ideas:

– twigs
– leaves
– acorns
– bittersweet berries
– milk pods
– feathers
– rusty tin wire or shapes (star, heart, pumpkin, crow)
– Indian corn
– small gourds
– dried hydrangeas or other flowers
– berry sprigs
– herbs from the garden
– dried grasses
– cinnamon sticks
– cat tails
– small succulents from the garden
– bird’s nests
– pine cones
– fungi (the kind you see growing on the side of a tree)

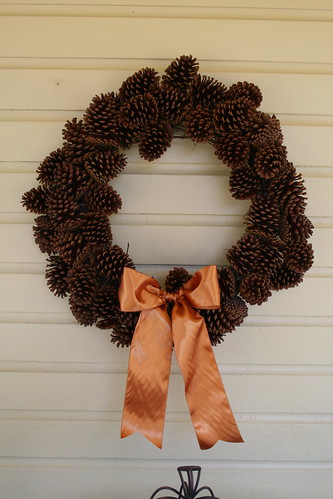
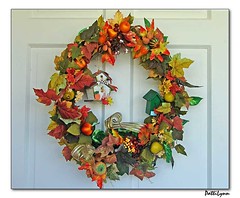
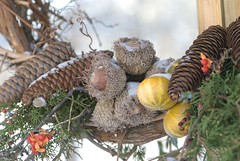
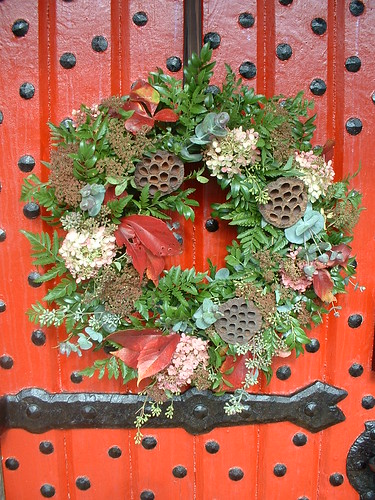
Here are some inspiration pictures to help you get started!

pine cone wreath 2

bird house wreath Fall wreath

door wreath

hydrangea wreath

red wreath colorful fall wreath

berry wreath succulent wreath

front door wreath

twig wreath cottage wreath

Backyard Bling – Using Candles, Glass Beads, and Chandeliers to add Sparkle to Your Outdoor Space

colorful garden candle holders

I recently received a letter from a reader in response to an article that I had written about decorating with chandelier crystals.

After Rebecca saw the idea, she sent me this question…


Dear Pearl,
I think that your idea is so creative! But I am having a bit of a problem. Instead of taking crystals off of a chandelier, I want to put crystals on one. I have a really cute patio set that’s just begging for a little bit of light. I already have a wrought iron chandelier with some candles on it. I burned the candles for a while so they would get that cool drippy look, and now I would love to hang some crystals on it. I just can’t seem to find a place that sells them. Do you know of any places where I could buy some? Also, what do you hang them with? I want something a little more artsy than fishing line, but I don’t think that ribbon will hold up outside in the California summer. Any thing you can suggest? Thanks so much for your wonderful idea, I will have to try it sometime!
Rebecca


So… I thought I would share a few ideas to help get even more creative ideas flowing.

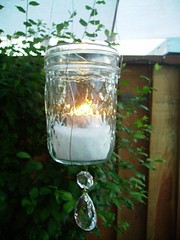
This sweet little candle holder is a simple glass jelly jar. I like to save jars from our pickles, jelly, and other sauces to use for other uses such as flower vases, candle holders, and pencil holders, etc. A simple jar, metal wire, a crystal bead, and a tealight candle can pull this look off for under $1! These little lights would be beautiful hung throughout your garden.
hanging candle holder with crystals

This display is made even more special by using different colors. It also appears as though the crystals are hanging on ribbon. The other beads that are threaded on the ribbons also make a very nice touch.
crystals with ribbons

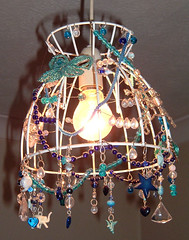
This is a nice example of a chandelier that someone has tied on different crystals and glass beads using different colored strands of metal. Also notice the use of tealight candles where electric fixtures may have once been.

lampshade chandelier

Many ideas come to mind while looking at this piece. You could take any metal lampshade – strip off the fabric – and use the frame for building your new artsy light fixture. Simply hang a jar from the center – or several jars around the outer edge for holding your tealight candles. You can then build your fixture by adding all of your special touches.

Also, you don’t have to stop with your chandelier crystals! You could also add any number of other items that you might have around the house such as; spoons, forks, vintage keys, strands of beads from old necklaces & bracelets, large seeds, buttons, shells, marbles, beach glass, small ornaments, charms – or anything else that pops into your creative mind 🙂

To hang your objects, you could use fishing line, metal wire, copper wire, ribbon, twine, or anything that will hold up outside. You could twist, knot, drill small holes, glue, or any number of different methods of holding everything together.

Make sure that any electrical element is made for outdoors if you plan to use it outside.

The final look of your piece will totally depend on your personal taste, and what kind of look & feel that you’re trying to accomplish. Just remember, the rule is… there is no rule! It’s your “nest” so use your imagination to feather it in any way you choose 😉

[Added Note]
* You can pick up crystals & other objects for your creations in a number of places. You can look in the local paper, yard sales, thrift stores, craigs list, or online stores such as ebay.
Below I’ve included a sample of things that you can find currently on ebay.

Build Your Own Garden Pond

I wanted to share a few letters from readers with you today. After reading some of the articles about building your own garden pond that I’ve written over the last few years, they wanted to let me know of their success. A water garden (no matter how large or small it is) can add wonder to your garden space! I also wanted to share links to some of my articles about water gardens as well.

Build Your own Water Garden for Under $10

Garden Pond Directions & Pictures

Water Gardens for Small Spaces

Pond Liners – Creative Garden Pond Liner Ideas (that means cheap 😉

……………………………………………………………….

Just saw your page on the net. I have a new house with a big yard, few ideas and even less money. I’ve always wanted a pond, but thought they would be too expensive. I want to thank you for the inspiration and the first in a line of many projects. Monica in Buffalo, New York
…………………….

Hi Pearl, I recently came across your article on building a pond – most informative & helpful!! Thank you so much for sharing with everyone! I must say though, I did gasp with the frozen goldfish and yes, I did “calm down” with a sigh of relief at their amazing “thaw” – hehe

I too, did not know that that was possible and we live in northern Indiana where the winters can also be rather nippy, so to speak – bbrrr!!!

Again, thank you so much for your most helpful information!! Kind Regards, Phyllis
…………………….

Thank you so much for the pond instructions. It is truly wonderful. I have been wanting one forever but they are really expensive to buy the kits. Now I can build one with your wonderful instructions at a fraction of the cost. Linda
…………………….

I’d love to share your pond pictures & ideas! Just send them in!

Flowers for the Cottage Garden

This week I made a stop at my local Lowe’s garden center. I try to stop in frequently throughout the summer, because there are always so many unadvertised specials to be found! While I was there this week, I overheard a sales person talking with a customer, trying to explain the over abundance of plant material. She said – they have a contract with a large wholesaler, and they receive a certain number of plants whether they need them or not. This usually means that they have way to many plants & need to mark them down – or else they will risk loosing the plants due to lack of proper space & care.

There is almost always a rack of plant mark downs when I stop in. I routinely find deals of 50-% – 75% off!

I am so thrilled with my latest finds!

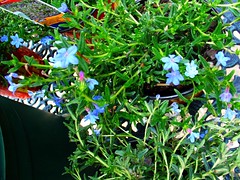
This is an evergreen ground cover called: Lithodora – Grace Ward
Lithodora Ground Cover

It flowers in May & June, only gets approx 6″ high, and is one of the best blue flowering ground covers available!

This little beauty is a wonderful option for; ground covers, rock gardens, spilling over walls, hanging baskets, or edging your flower garden borders. I think this plant would look wonderful with the white version of this plant which is called “‘White Swan”. I think I might also mix mine with some ajuga.

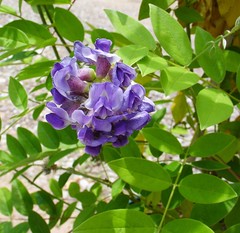
I was VERY excited to find this Longwood Wisteria plant with a few flowers already on it, especially when some types of wisteria plants can take up to 7-10 years to bloom!
Wisteria - Purple Longwood

They like to grow in sun or partial shade, and can reach 20 – 30 feet tall! It will grow in zones 5-9, and I was surprised to find out that this particular wisteria is a US native! Although this plant blooms from late spring to early summer, there are also reports of this beauty showing off again right through September!

Delicious Summer Pasta – and new visitors to the cottage garden

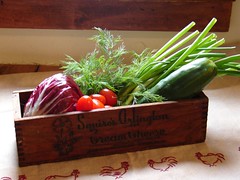
Salad Mix

This is a quick, easy, cheap, come back for seconds family dish!

Pasta salad is the perfect side dish for any summer meal! You can also change the recipe very easily by tossing in any of your favorite ingredients right from the cottage garden!

Cook your favorite kind of pasta while you’re making the sauce to save time! (we like using small pasta such as angel hair or bow-ties)

* Feel free to double the recipe – or add your own favorite ingredients 😉

While your pasta is cooking, mix together the following ingredients & let sit until pasta is done.

4 cups chopped tomatoes
1/2 cup chopped basil leaves
2-3 cloves pressed garlic
1 can sliced olives (I prefer mushrooms)
2 T. balsamic vinegar
2 T. olive oil
Add salt & pepper to taste

Top your pasta with this delicious sauce & be prepared for seconds 😉

Some ideas for extra favorite things to add:

– Cheese bits (or freshly grated parmesan cheese)
– Diced green, yellow, red, or hot peppers
– Broccoli
– Beans
– Sugar snap peas
– Celery
– Onions
– Chicken
– Pepperoni
– Bacon

I know your family will enjoy this one!

I also wanted to share some of the newest guests to our bird feeder with you!

……………………………………………………….

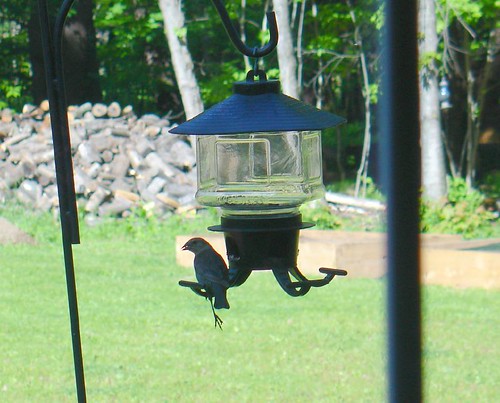
I call this little guy Fred 😉
I thought he had a piece of string tied to his tail! It took several days of seeing him at the feeder to realize that his little leg was broken. He gets around very nicely – even though he is “disabled” 🙂

My Friend Fred - At the bird feeder

My bird feeder gets lots of traffic! This wild turkey is our latest guest 🙂 Don’t forget… although we have several acres of land surrounding our cottage in the woods, we do live in a little Victorian village! Nice to see such a variety of “guests” come out even in the village 🙂


Wild turkey at the bird feeder