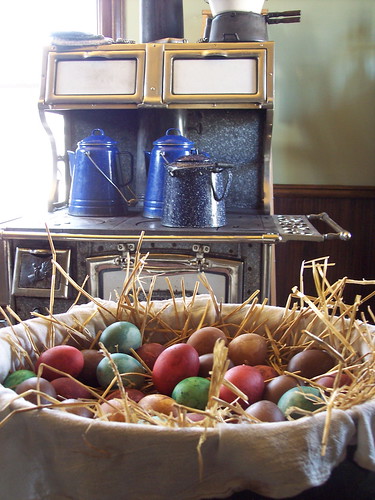
I don’t know about you, but for me, there’s nothing like a pile of freshly boiled eggs and the smell of vinegar to bring back wonderful childhood memories of the day before Easter… around the table with my family!
And… because eggs are so inexpensive this time of year, you should take a few minutes around the kitchen table, to create some memories… and a masterpiece with your little ones!
The number of ways to decorate an egg are limitless, but I thought I would share a few of my favorites with you today.
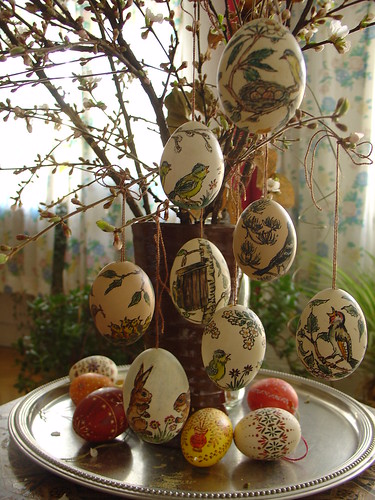
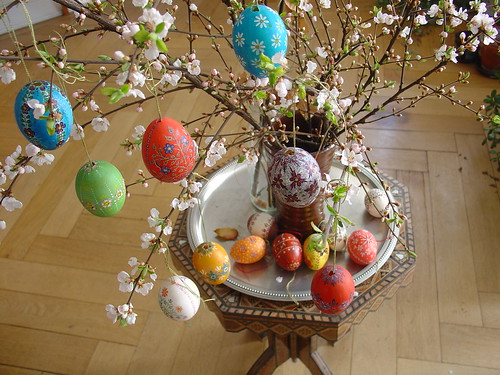
Painted Eggs
To keep your eggs to use every year, blow the egg out, wash & dry, then paint with regular acrylic paints. You could paint them to say “spring” with birds, nests, trees, and flowers, so you could leave them up all season… not just for Easter. Look at these BEAUTIFUL examples!
I love how these painted eggs were hung on a “blooming” apple branch!
Stick Ons
Decorate with stickers, stamps, or scrapbook notions.
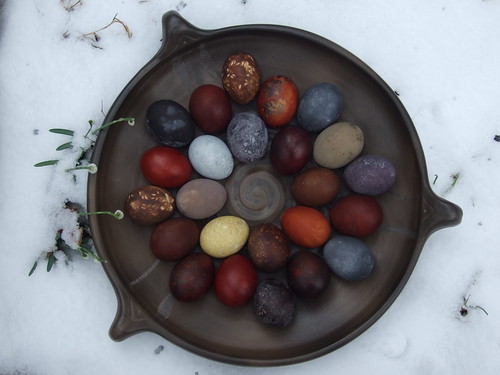
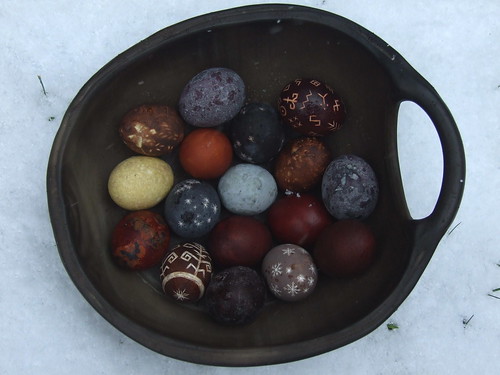
Natural Dye
This year, instead of purchasing a regular “same old, same old” egg dying kit, try using some of the food from your kitchen to color your eggs!
Spinach = Pale Green
Hibiscus tea = Green
Blackberries = Deep Purple
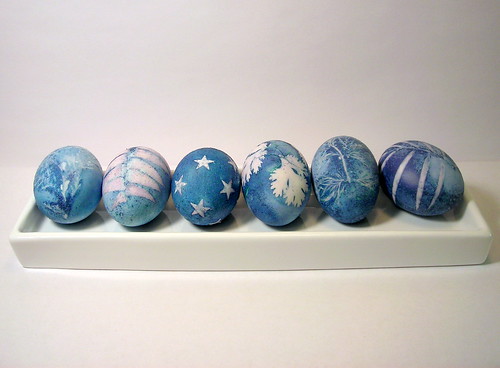
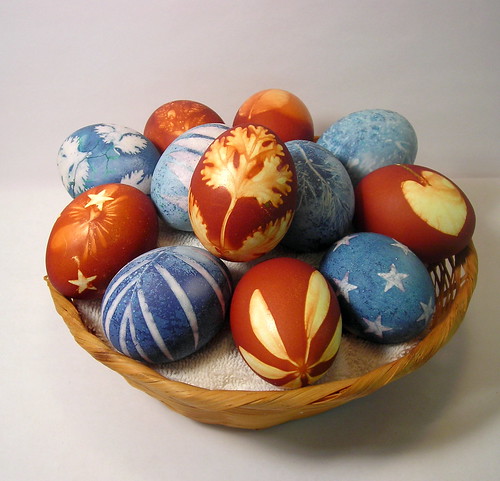
Red Cabbage = Robin’s egg Blue
Cranberries = Lavender
Beet Juice = Pale Pink
* The longer you leave the eggs in, the more the color changes
Decide what colors you would like to try
Depending on what color you’d like to try, add each item to it’s own small pot
Add enough water to cover eggs
Bring liquid to a low boil for approx. 10-20 minutes
Remove from heat & allow to cool slightly
Add 4 tablespoons of white vinegar
Gently add eggs and boil on low for 15 minutes
Turn off heat, cover, and leave eggs in dye bath until they reach desired color (can be 3 hours for deep shades)
Remove eggs with a slotted spoon and place on rack to dry
You can use a paper towel dampened with a bit of vegetable oil to rub the eggs & give them a slight shine, but I love the natural finish 😉
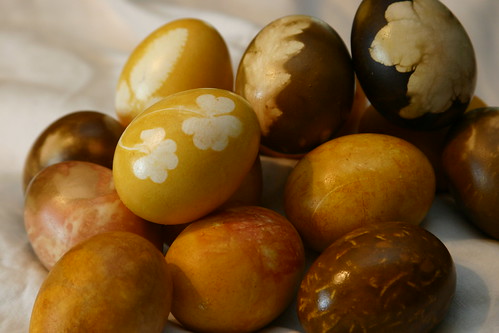
Optional: If you would like patterns on your eggs… wet a leaf of your desired herb (or other pattern), apply to egg, carefully wrap egg in a piece of old pantyhose & secure with a twist tie before placing in the dye bath to keep your pattern secure. Then, carefully unwrap after you remove the egg (using the directions above), and remove the item used for your pattern to reveal your beautiful design.
These eggs were colored with purple cabbage.
Yellow Onion Skins
I love the natural red color that the onion skins give to these eggs!
Grandma’s Quilt Eggs
Cut tissue paper into small squares – make sure to use lots of different bright colors. Dip the boiled egg in water to make sure that it’s wet – apply the pieces of tissue paper – allow to dry – peel off paper to reveal that the dye was left on the egg for a beautiful patchwork quilt effect!
Kaleidoscope Eggs
Pick out some of your favorite colored crayons & sharpen them. Save the shavings & lay them out on a plate. Boil your eggs. While they’re still hot, take them out of the water, then roll them into the wax bits. The wax melts & sticks to the egg, giving it a special kaleidoscope effect.
Mosaic Art
Keep those beautiful colored egg shells that you worked so hard on! As you’re peeling your Easter eggs, be sure to keep the shells in a bowl. On a thicker piece of card stock paper, glue the colored pieces of egg shells into a pattern. The picture will turn out looking like a tile mosaic. Now you will be able to admire all of that time spent coloring your eggs for many years to come! * The kids love this project!
I receive so many requests for ideas, help, how-to, etc., from our readers, that I’ve decided to start sharing some of those requests & my answers, with the hope that I can help many others in the process.
Here is a recent request from a reader:
Hi Pearl,
I am desperately trying to surprise a dear friend of mine with a back issue of Victoria Magazine that he lost. I see that you were a big fan of all the old magazine which is why I am reaching out to you.
All he can tell me is that there is a section on all things cream, and that there is a wonderful oatmeal recipe in the issue.
Can you help me?
Thank you in advance for anything that you can do.
All my best,
Amber
Added Note from Amber: I worked at the magazine in 1996 and 1997 and feel very strongly that it is in those years. Please add that information to the post as readers may have those issues and be able to find it.
…………………………………………………………………………….
Answer:
Dear Amber,
Thanks for taking the time to write.
Because your friend does not remember exactly what issue the magazine was, these are the ideas that I have come up with to still help you find it.
First of all, does your friend have any idea what “year” his beloved issue was published in? If so, you could pick up the collection for that year for $19.95. That way, even though you’re not sure which “issue” it is, you will still be sure to have it, when you pick up the whole year’s worth of issues…and $19.95 is not a bad price…plus the fact that you’ll have lots of other nice magazines as well!
I tried looking up the issue based on the 2 items that he remembers, but
unfortunately, they do not have any sort of contents listed for each issue
on the website. BUT, I am sure they would have that info in customer
service.
You could call customer service & describe the issue to them:
(877) 675-5361
Another way to go is…ebay! You can pick up a whole “lot” of magazines very inexpensively. This would be perfect if he could recognize the front cover – or knew what year the magazine was published! In any case… if he is a “Victoria” lover, you can’t go wrong by picking up a bundle of past issues 😉
** Readers – do you have any help for Amber? Do you remember an issue of Victoria with lots of info about “all things cream”, and a special oatmeal recipe? If so, post your thoughts in the comments below!
Here is a note that I just received: from an ebay seller that I contacted to see if she could help us:
“Hello Dear Pearl,
Finally! I have a friend who runs a Victoria Magazine fan forum, and she had all of the “girls” looking. It is November 1997. I have verified in my personal collection, and see the theme was oatmeal and cream. There are a few oatmeal recipes, such as oatmeal scones..
I hope this helps!
Victoria”
* Thank you so much Victoria! And… to all of you Victoria lovers out there, check out Victoria’s ebay store, she carries MANY back issue of Victoria Magazine! How wonderful that you have the opportunity to pick up so many GREAT issues that you might have originally missed out on!
I think I can speak for anyone who has had the privilege of enjoying a meal at the Red Lobster restaurant by saying… their Cheddar Bay Biscuits (or garlic & cheddar biscuits as some call them) are one of the most delectable items on the menu!
So… today I thought I would share a quick & easy recipe with you, to show you how you can enjoy a similar treat at home for your family dinners.
First, I wanted to include this how-to video from Kraft, to teach you how to make a really nice “basic” cheddar biscuit… just in case you don’t like garlic.
Ingredients:
1 cup flour
2 tsp. baking powder
1/4 tsp. cream of tartar
1/4 tsp. sugar
1/4 tsp. salt
1/3 cup milk
1/4 cup (or 1/2 stick) cold butter, cubed
1 cup shredded cheddar cheese
* Add ¼ teaspoon garlic powder if you want the Red Lobster version
TIP: If you would rather use Bisquick, you could substitute the first 6 ingredients with 2 cups of Bisquick & ½ cup cold water.
Mix dry ingredients together, cut in butter and add cheese. Pour in milk a little at a time. After you pat out the dough & cut into squares (as in video), place on an ungreased cookie sheet. Bake in a 450 degree preheated oven for 10-12 minutes, or until golden brown.
For the Red Lobster Cheddar Bay Biscuit version, also add this topping:
2 tablespoons melted butter
¼ teaspoon dried parsley flakes
¼ teaspoon Italian Seasoning
½ teaspoon garlic powder
a small pinch of salt, and a pinch of Old Bay seasoning if you wish
Mix together these ingredients & brush on top. If you like a softer biscuit, brush heated topping on after you cook them. If you like more of a crunch, brush mixture on before you bake the biscuits.
** I at least DOUBLE this recipe for my big family 😉
Today, as I sit at my window dreaming and gazing at such beauty on the other side of that thin piece of glass, I am again reminded of just how much God must love us! Not only am I thankful for the earth and all of it’s wonders, but I think the “wonder” of our little slice of heaven, The Queen Village, warms my heart just as much. I like to think of it as… my own little storybook world!
Today, I thought I would invite you to spend some time with me in our little Victorian Village. She is aptly named The Queen Village… because she is said to be fit for a queen!
Here are a few recent pictures of our winter wonderland! The little river tucked deep in the forest is a favorite place of mine. Even though the village had just been covered with a heavy blanket of snow, you can still see the steam coming up off of the water. The beautiful snowflakes that cover the river banks and the surrounding woodlands, almost look like someone opened up a window of heaven & scattered a wealth of tiny crystals for us to enjoy!
This is our secret place, where just up the hill, we decided to carve out a little knoll to put our cottage so we could be as close to the river as possible. You’ll also see a few of our country roads, where along each side stately pines and mature maples stand guard.
Here’s a little description about Camden NY… my storybook world 🙂
This little village is definitely something out of fairy tale land! The homes are mostly Victorian in style, and often there are some very special homes to be had for great prices!
In the center of the village is our village park. There you will see green lawn spread out like a blank for us to rest, surrounded by beds of flowers, benches, stately trees, and our quaint gazebo where most of our village socials and events are held.
Many evenings throughout the summer we are able to enjoy performances by area bands. The kids especially love the dancing tunes! It’s so cute to see the little ones arm in arm dancing in circles around the lawn.
Two or three times per year, we have large celebrations with parades down main street. You never know what kind of float you might see with all of the great talent around here 😉
During the Autumn season, you may hear the fire whistle going off a few to many times. This is our signal that rides are being given down at the fire house. While we’re waiting for our turn to ride atop the fire engine, free juice & doughnuts are served. It’s a great time to catch up on all of your visiting with the town folks, as well as a great way to celebrate fire prevention week.
Each Christmas Santa comes to the Queen Village in a horse drawn wagon (I think their jingle bells must be one of my favorite Christmas sounds!). As the horses take us through the village streets, our carols are accompanied by villagers who are putting the finishing touches on their holiday decorations. On this night, we all gather around the manger scene and sing Christmas carols, while we enjoy the sights and sounds of the season over hot chocolate and donuts.The thousands of little lights that encircle the trees, light poles, and street lamps are especially beautiful with a blanket of freshly fallen snow! Ever planted in our memories, are those joyful evenings spent with family and friends. We just love the 5th season of the year! What? You didn’t know there were 5 seasons? Well, around here folks call us “The Village With 5 Seasons”, because we celebrate Christmas in such a big way.
Our little library sits on the corner right off of the main street. On cold winter days, you’ll find a rocking chair pulled up to the big fireplace for a day of quiet lazy reading. The walls are always decorated with the work of local artisans.
One of my children’s favorite winter pastimes, is to go across the street to the “hill.” This is where we go sledding, tubing, and snowboarding. It’s a great way to spend time with the kids after a big snow. Of course, after all that “work” we need to come home & enjoy some hot coco beside the wood stove 😉 And while I’m on the subject, there’s something truly romantic about a night so cold, that the smoke from every village chimney is almost frozen in time – all of this against a backdrop of the full winter moon!
It’s wonderful to be a part of a small community where folks truly care about each other & work together for the good of all.
A friend of mine has a local TV show, where they take road trips to area villages. Take a ride with her as she travels home to Camden.
Forest park, as mentioned in the video, is a place that we enjoy as much as we can! It’s a wonderful place to talk walks, follow the nature trails, or to simply rest on the benches to do a little bird watching & enjoy the view of the river! A friend of mine has put together an awesome website about this wonderful public forest (thank you Chris ;)! Forest Park, Camden NY
I hope you have enjoyed spending some time with me today… and may your life be a storybook one!
With Christmas now behind us, most of us will spend the next week packing up all of the beautiful bits & bobbles that have dressed our home for the past several weeks. And although it’s kind of sad to see all of our little Christmas treasures get tucked away for another year, it’s also sort of nice to have our home “freshened up” for the new year. Even so… there is still a bit of an empty feeling, when we think about having to wait another full year to display those treasures again.
Here’s a great idea to help you prevent that “empty feeling” around your home, and to help you to look forward to each new season/holiday throughout the year.
Why not keep a few of your things out & “re-purpose” them to match each new season/holiday?
For example…
I love my grapevine wreaths! So, instead of putting them away because Christmas is over, why not take the Christmas decorations off of the wreath & put some other sort of decorations on it for the rest of winter? Or, you could keep everything off for a natural look.
This year, my husband bought me a little tree for Christmas. It fits on my kitchen counter just perfectly! Instead of putting it away, I am going to dress it with items that say “winter” – instead of “Christmas”. With simple decorations from your favorite home decor store or mail order company such as LTD Commodities, you could change your decor over to “winter” in just a few minutes!
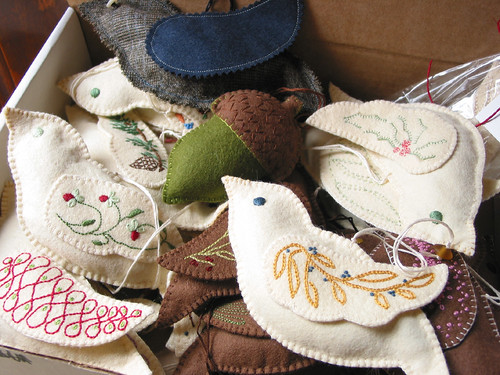
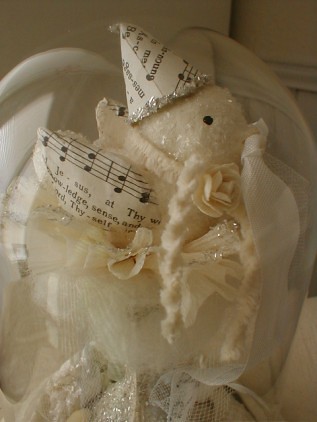
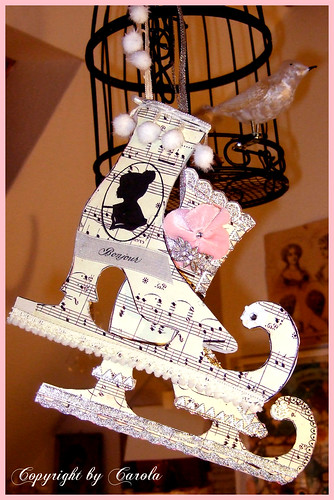
Here are some different things that say “winter” (not just “Christmas”), so instead of packing them away, you can keep them out all winter long.
Birds
We get to enjoy feeding our feathered friends during the cold winter months, so how about using little birds made from pretty paper or felt (like the ones above)? Using some scrapbook paper, you could make up beautiful little birds to match any style or color. Then use them to hang on a tree, wreath, light fixture, or across your curtain rod.
Ice Skates
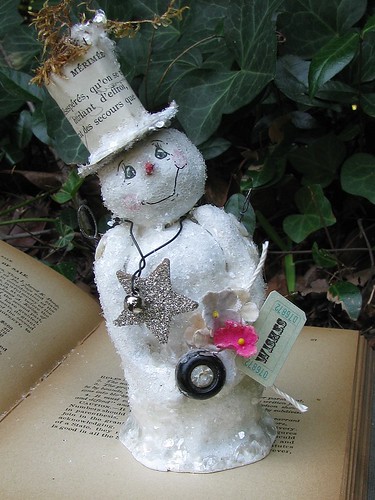
Snow-people can live in your decor all winter! 🙂
Snowman
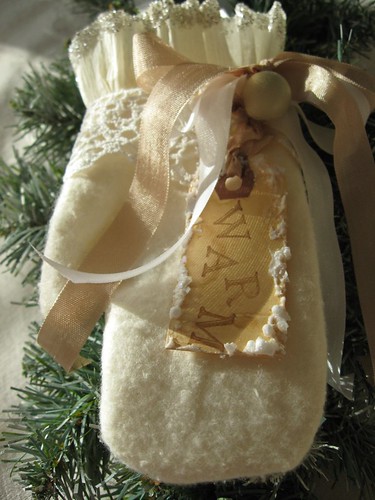
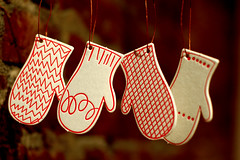
Mittens
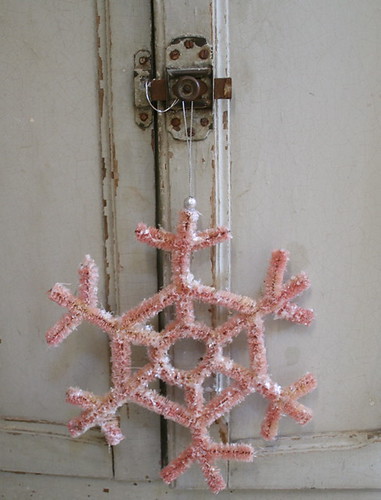
Snowflakes
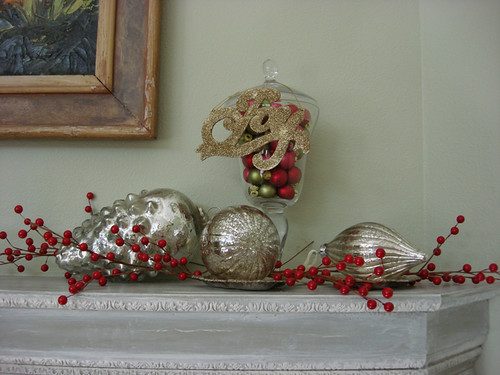
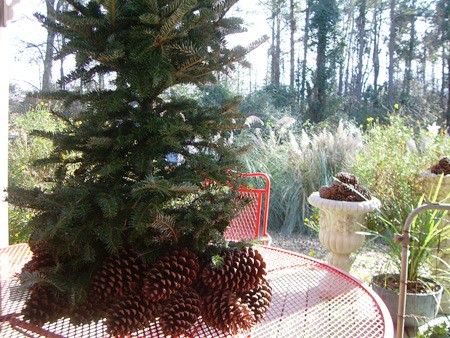
Berries
Greens
Also, if you’re having a difficult time deciding which colors to use, so your home says “winter” instead of “left over Christmas”, you can’t go wrong with white, silver, light blue, and green!