Free Grape Vines for Your Garden Arbor

Grape Vines on a Garden Arbor


“Let us get up early to the vineyards; let us see if the vine flourish, whether the tender grape appear, and the pomegranates bud forth: there will I give thee my loves.”
Song of Solomon 7:12


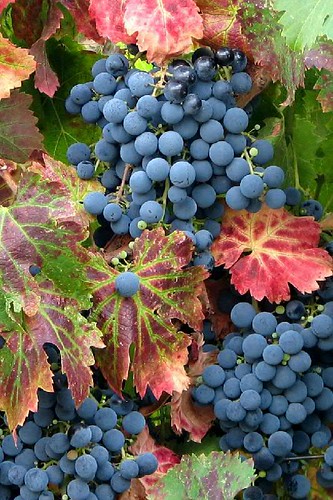
There is something so romantic about a vine that is dripping with clusters of ripe grapes! Sight, smell, taste, thought, texture… somehow, all of our senses become involved when we come in contact with this beautiful vine!

My husband & I were out for an evening walk through our little Victorian Village on a chilly Autumn evening, minding our own business, when suddenly… the amazing sweet fragrance of ripe concord grapes started wafting around our heads, almost as if they were tantalizing us to come & find them! Following the sweet fragrance (one that reminded me of those yummy peanut butter and jelly sandwiches on a hot summer afternoon), we finally came upon the vine. I’m almost sure that God blessed the grape vine with it’s heady fragrance, just so it could beckon passersby, such as ourselves, to come & enjoy it’s splendor!

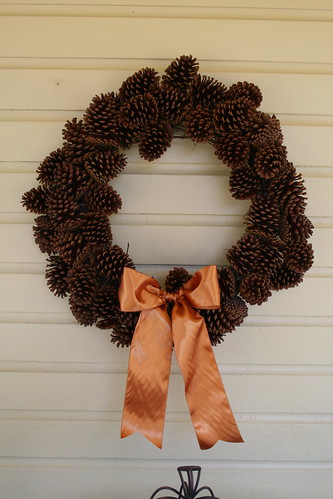
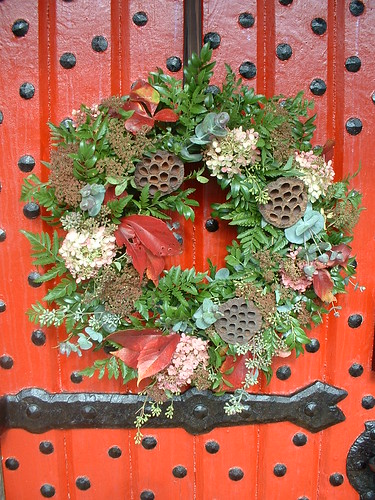
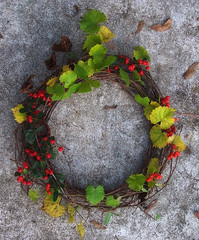
Words can’t describe the beauty of the leaves, that were now dressed in their Autumn finest. Deep reds, chocolate brown, purple, and orange are just a few shades of the colorful mix. Nor can they describe the beauty of the vine itself, twisting and turning, and winding around everything in it’s path, seemingly taking ownership of everything this side of the garden. The brown splintered bark and corkscrew shaped tendrils, were reminiscent of the beautiful wreath that hangs in my cottage welcoming our guests. But sweetest of all, were the clusters of deep purple grapes that seemed to be layered at every twist and turn of the vine.

There’s nothing quite so romantic as a cottage garden path covered in vines that are dripping with grapes to welcome every guest into your home. And, contrary to what you might think, these precious vines are very easy to grow!

Here’s a way that you can have your own vines to dress your garden free of charge!

Perhaps you have a friend, or friendly neighbor, that will allow you to use this method with their vines this fall. If not, you could put out a request on one of your favorite lists such as; craigslist.com, gardenweb.com, freecycle.org, etc. I’m sure that you will be able to find a willing gardening partner!

Start a new grape vine from an old one

In late autumn (you can usually tell the right time, because it is no longer necessary to mow the grass), take a section of a grape vine & bend it down so it can touch the ground. With a fork or other small gardening tool, lightly rake up the soil a bit to make sure that the vine will be able to root properly. Holding the vine down to the ground, brush some of the soil on top of the vine. Then, use a small stone or branch to hold the vine in place. Be sure not to use something heavy enough to smash the vine, but just heavy enough to keep it from becoming dislodged. For now, that’s all you need to do. Then, come early spring, clip the section of vine from where it is attached to the main branch. Now, all that’s left to do is… plant your new grape vine in your cottage garden. You can continue to use this multiplying technique using your new plant, and in a few years, you could have a whole vineyard!

* To make more than one plant at a time, simply bend a longer section of vine down to the ground, weight it down to the soil in several places. Then, cut each section apart in the spring.

Now… it’s time for you to go out, take a walk, and have the sweet fragrance of the vine come and find you 😉

Make a beautiful Fall Wreath Free by Using Natural Found Items

Nothing says welcome like a beautiful wreath!

hops wreath

Wreaths are beautiful anytime of year, but during the Autumn season, you can fill your wreath with anything found in nature for a wonderful look! You don’t have to spend any money, and using items found around your home & garden, you will have a gorgeous wreath in no time!

I like to start my wreaths out with a vine base. Simply take your pieces of vine, and start shaping them into the shape that you want. Any kind of vines can be used in wreath making. I’ve used both grape vines, and bittersweet vines to make my wreath bases. Using a vine base allows you to simply weave your decorating material into the wreath, intertwining the stems with the vines.

The items that you can use to decorate your wreath with are only limited to your imagination! Here are just a few ideas:

– twigs
– leaves
– acorns
– bittersweet berries
– milk pods
– feathers
– rusty tin wire or shapes (star, heart, pumpkin, crow)
– Indian corn
– small gourds
– dried hydrangeas or other flowers
– berry sprigs
– herbs from the garden
– dried grasses
– cinnamon sticks
– cat tails
– small succulents from the garden
– bird’s nests
– pine cones
– fungi (the kind you see growing on the side of a tree)

Here are some inspiration pictures to help you get started!

pine cone wreath 2

bird house wreath Fall wreath

door wreath

hydrangea wreath

red wreath colorful fall wreath

berry wreath succulent wreath

front door wreath

twig wreath cottage wreath

Enjoy Millions of Butterflies in the Foothills of TN

Butterfly Hollow Farm

Can you imagine what it would be like to have millions of beautiful butterflies flying around you as you walk through the woods? David & Sharon Rasmussen can! They are the owners of Butterfly Hollow Farm, which is found in the foothills of Tennessee. I thought you’d like to peek into their wonderful little piece of heaven, and perhaps plan a visit to their B&B sometime soon!

……………………..

Butterfly Hollow Farm – The Beginnings of a young couple who slowed down, changed lifestyles, bought an old abandoned farm and have found peace, love, happiness and good health in living a simpler life.

One spring day several years ago, the path Sharon and I were traveling led us to this country road and way of life. We followed it back into the end of a hollow and found an old abandoned farm and frame house, a couple leaning barns, and 85 acres of wild and overgrown forest, hills and pastures and somehow fell in love. We took a deep breath and a giant leap and have been blowing life back into Butterfly Hollow ever since!

Nestled in the foothills of Tennessee’s Cumberland Mountains lies a secluded and peaceful valley. Wind your way along the country road and meander beside the peaceful creeks and branches. You’ll find yourself drifting back in time to a state of mind that can only be found by being in places like these. As you travel down the one lane road that leads through this farming community you’ll see hillsides scattered with horses, cattle, goats, deer, and wild turkey. And if you look close enough you can also see the remnants of several old homesteads and fallen barns. It’s these bits of history that offer a window to the past, a place in time when life moved slower, family stayed closer, and land provided everything you needed to live a simple healthy life.

Read about our beginnings and the road signs that came up along our journey that turned us off the beaten path and onto the little gravel road that lead us up into Butterfly Hollow and a new way of living life.

See how the farm got it’s name and you won’t believe the pictures. Words and a snap shot just can’t come close to the feeling of standing among a million butterflies with at least 50 sitting on your head.

Butterfly found on Butterfly Hollow Farm

Our first major project on the farm was to restore the 1899 farmhouse into something livable again. Because of our changed lifestyle and small monthly budget, we knew we had to do most of the work ourselves and use recycled materials as much as possible. We took pictures along the way and have compiled our 4 year project into short stories about each segment of this major undertaking.

We keep journals and have included many stories about our daily adventures, from personal thoughts, the cattle roundups, and horse rides, to some poems, reflections, and a couple bad days.

Since our farm lies in the middle of a farming community, we naturally became part of a cooperative system and are getting more involved in the 300 head Beefalo operation and raising and training Paint Horses. There are sections for both of our furry hillside residents.

There is also a section for information on Preserving Farmland. This topic has become very important to us and we have created this section to help stimulate thought and concern about this important issue.

If after reading about the Butterfly Hollow beginnings, you feel a kindred spirit, realize you are on a similar path, or begin having visions of taking a similar adventure….. we would like to invite you to continue the journey further with us. The section on Sharing the Farm talks about our weekends from spring until autumn that we share the farmhouse and experience with friends.

These pages are windows into our continuing journeys here. They’re our simple attempt to share with other like minds the things we might have to offer, as well as connect us with those that can teach us and lead us further down the path. “Go with us” as we say here in the South.

– David & Sharon Rasmussen
Visit them at: http://butterflyhollowfarm.com

Penny Rugs – How to make these great gifts for pennies!

Vintage Style Penny Rug

Recently I received this email request from a dear friend. I wanted to share my response with you – especially since the holidays are coming up & this would be a nice gift to give – for very little cost!

Hi Pearl,

I was wondering if you had or know of a place where I can get some directions on how to make a Penny rug runner. I thought this would be an interesting project to make. I just don’t have a clue how they are made.

I love the look of the wool and the colors for fall. I’ve found places to buy them but I would like to try to make one.

Hope you had a great vacation.

Lois


Dear Lois,

Good to hear from you! Yes, we had a wonderful time visiting with family over the last few weeks. We spent our time participating in a youth conference at my parents church, resting, visiting, and a quick trip to Baltimore. We especially loved the aquarium! I’ll have to post some pictures here real soon.

I hope the information below will help answer most of your questions. I just love penny rugs, especially when they are made out of all of the vintage prime colors! I especially love to see them used during the Autumn season with all of the rich golds, browns, and reds!

What is a penny rug?

felt penny rug

As we all know, women are by nature extremely creative & very resourceful.

Ok…well, most women 😉

But back in the 1800’s most women had to make the best of the resources that they had, especially when it came to things such a splurging on decorations for the home. So, they would keep the small bits and pieces of the wool and felt that they collected from their clothing, hats, coats, blankets, etc., and then use these precious bits of fabric to make beautiful decorations for their homes.

When they had a nice basket full of little snippets of fabric to work with, they would sort them into piles of similar colors. Then, to form the desirable circular shapes, they would use a coin as the template to cut their fabric pieces from. Using something as small as a coin would insure that the smallest of scraps could be used in the project. This is how the term penny rug came to describe these little pieces of art.

What’s also interesting is, the penny rug was not normally used as a rug at all, but rather, as a decorative cover for a bed, shelf, wall hanging, or table runner.

Pink and black penny rugRobin’s Rug

After cutting all of the different circle shapes, each color was put into it’s proper pile, where it would wait for it’s turn to become a part of the finished design.

The finished size was determined, then a piece of fabric (wool or felt) was chosen as the base for the rug. Each circle was then placed on top of the base in the desired pattern, so the creator could decide what the final design would look like. Once satisfied with the design, each piece was then secured with a straight pin so it could be stitched together.

Although any style of embroidery stitch could be used, the one most commonly used to applique the individual pieces of fabric in the penny rug was the blanket stitch. Bright colors of thread, that were different from the piece of fabric being stitched, helped the pattern to stand out even more, and also added another creative layer to the piece. Depending on how intricate the creator wanted to be, the circles might also be stacked in several layers, each smaller and a different color than the one below it. Sometimes the rugs were backed with a piece of an old burlap bag or feed sack, and on special pieces, an actual penny was stitched under one of the circles to help weight it down.

Although circles were the main shape used in early designs, any shape imaginable could be used in current designs. I have seen some beautiful pieces made with shapes such as; stars, hearts, snowman, crow, and trees. There’s really no limit to the designs that you could come up with, you simply want to be sure that the pattern can easily be hand stitched around each edge.

wool penny rug

Materials to use in making your penny rug

Most penny rugs were made using wool, and felted wool. Although felt was handcrafted in years gone by, we are blessed to be able to buy felt by the square (usually a 12X12 square) or by the yard in most craft/fabric stores. Last year, I picked up some wonderful thick felt yardage, which came in colors such as dark mustard, chocolate, deep red, and cream. Check the prices, but I found that buying my felt by the yard was much cheaper than buying it by the square.

If you’re an adventurous soul, you could try your hand at felting your own wool!
Have you ever thrown a wool sweater into the washer/dryer without realizing it? Then, when you took it out, wondered who the tiny cute little sweater belonged to – only to realize that it used to be a human sized version of YOUR new sweater? Then you already have all the experience you need in felting wool 😉

Simply go to your local thrift store, yard sale, or your own closet, and pick out a cheap wool sweater (I suggest 100% wool) of your color choice. Keep your eyes open for sweaters with small holes or other damage, as these will turn out to be real bargains for you. First, cut down the side seems, separating the front from the back. Then, remove the arm sections, and cut down the long seem. Throw these pieces into the washer, and wash on the hot cycle with a bit of laundry soap. If you’d like, you could also throw the pieces into the dryer as well. You can expect the pieces to shrink up to 70% in size! When the material is dry, you can cut it into the desired shapes for your penny rug.

cutting shapes for your penny rug

Embroidery floss makes the best choice for sewing the pieces together, and you can buy nice large bundles of different colors at your local craft/fabric store.

How to Construct a Penny Rug


Free Penny Rug Patterns

Here are some free penny rug patterns, as well as a few how to articles to help you with ideas… but the best patterns come from your own creative ideas – just like the gals in the 1800’s 😉

Christmas Tree Penny Rug

Roosters & Flowers Penny Rug PatternThe Instructions

Circle Table Runner Penny Rug

Warm Hearts Penny Rug

Autumn Leaves Pattern

Penny Rug Coaster Pattern

Easy Fruit Cocktail Cake Recipe – and a new friend in the cottage garden

Orange Salamander on Pink Flowers

My granny used to make this wonderful recipe for us. This is a very simple cake using a can of fruit cocktail and a few other ingredients – and it is unbelievably moist & delicious!

FRUIT COCKTAIL CAKE
2 c. unsifted flour
1 1/2 c. sugar
2 scant tsp. soda
Pinch of salt
2 beaten eggs
1 (1 lb.) can fruit cocktail
1 tsp. vanilla

Sift together flour, sugar, soda, and salt. Add remaining ingredients. Beat well. Bake in greased and floured 13 x 9 x 2 inch pan at 300 degrees for 50 minutes. While cake is hot, pour icing over it. This cake freezes well. If cake batter looks thin, add a little more flour. Some fruit cocktail has more juice than others. Ice with Fruit Cocktail Cake Icing.

ICING FOR FRUIT COCKTAIL CAKE
1 stick butter
1/2 c. evaporated milk
1 c. sugar
1 c. coconut
1 tsp. vanilla
1 c. chopped pecans or walnuts

Cook together the ingredients. Pour over cake as soon as you take it out of oven.

*Pictured above – a new little friend in our cottage garden! I was coming out of my front door, and there he was… this beautiful little orange salamander having a peek around the garden! We couldn’t resist this little photo opp before sending him on his merry way 🙂

Flowers for the Cottage Garden

This week I made a stop at my local Lowe’s garden center. I try to stop in frequently throughout the summer, because there are always so many unadvertised specials to be found! While I was there this week, I overheard a sales person talking with a customer, trying to explain the over abundance of plant material. She said – they have a contract with a large wholesaler, and they receive a certain number of plants whether they need them or not. This usually means that they have way to many plants & need to mark them down – or else they will risk loosing the plants due to lack of proper space & care.

There is almost always a rack of plant mark downs when I stop in. I routinely find deals of 50-% – 75% off!

I am so thrilled with my latest finds!

This is an evergreen ground cover called: Lithodora – Grace Ward
Lithodora Ground Cover

It flowers in May & June, only gets approx 6″ high, and is one of the best blue flowering ground covers available!

This little beauty is a wonderful option for; ground covers, rock gardens, spilling over walls, hanging baskets, or edging your flower garden borders. I think this plant would look wonderful with the white version of this plant which is called “‘White Swan”. I think I might also mix mine with some ajuga.

I was VERY excited to find this Longwood Wisteria plant with a few flowers already on it, especially when some types of wisteria plants can take up to 7-10 years to bloom!
Wisteria - Purple Longwood

They like to grow in sun or partial shade, and can reach 20 – 30 feet tall! It will grow in zones 5-9, and I was surprised to find out that this particular wisteria is a US native! Although this plant blooms from late spring to early summer, there are also reports of this beauty showing off again right through September!