A Great Fabric Resource!

As I mentioned yesterday, last week my daughter & I took a little trip down to MD to spend a week with my mom & dad. While we were there, my mom took us to a wonderful fabric outlet store! The prices are very good, and most items are 50%-70% off! I don’t think I spent more than $5 per yard for any piece that I picked up! They have gorgeous choices piled from floor to ceiling!


Here’s the information about the store:

…………………………………………………………………………………..
The Interior Alternative Fabric & Bedding Outlet
3 different outlets in DE, NC, & TX
Phone: 302-454-3232

Description: Featuring Waverly, and other designer brands. Seconds & closeout fabrics, comforters, bedspreads, pillows, trims, and accessories.
…………………………………………………………………………………..

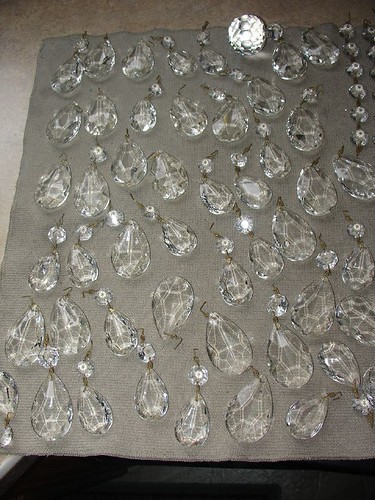
I thought you might like to see a few of my finds… and maybe you’ll want to discover a few treasures for yourself 🙂


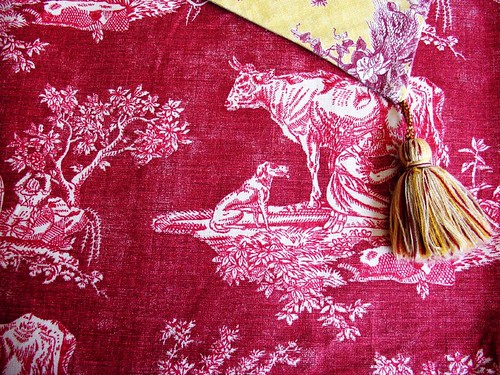
Blue & Gold Toile With Trim

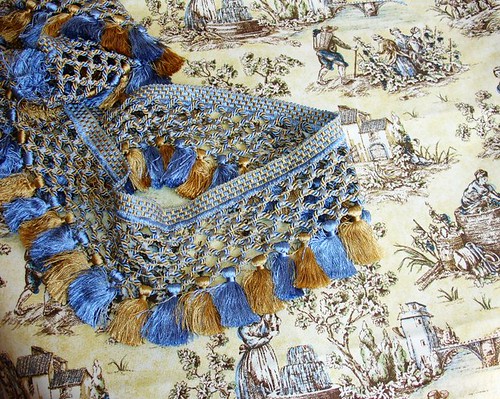
I will use this fabric & trim to make an inspiration board. I have lots of different fabric so I can also change it out for each season.


Fabric for my Harvest Table


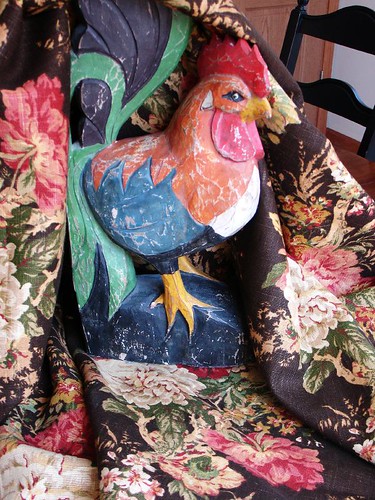
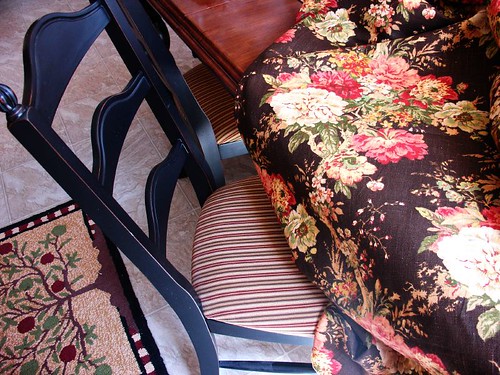
It already matches the seat covers perfectly!


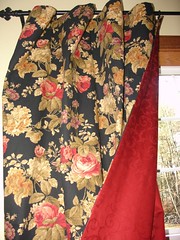
Red & Blue Vintage Style Checks & Roses

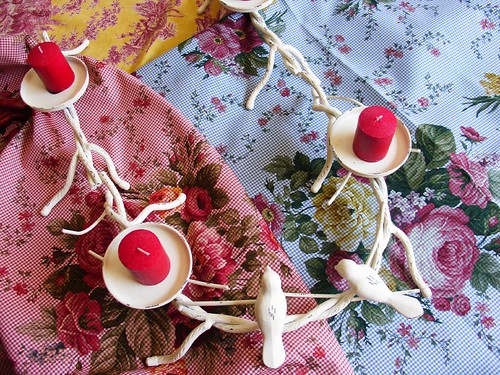
I want to use this fabric to make some vintage style aprons for my daughter & myself. I want to make a red apron with blue pockets & a blue apron with red pockets. And while we’re at it… why not add some ruffles as well 😉

Pink & Green Inspiration for Your Home and Garden

Are you in love with pink & green? If so, I thought I would share some great pictures to help give you some inspiration for your home & garden.

I especially love the center picture! I’ve decided to use a color similar to this one on the walls in my creative space. Here are my thoughts as of right now.
Walls – lime/chartreuse
Trim – white
Accent Fabric – Black & white toile
Accent Colors – Red, Deep Blue, Black

I will share the pictures as I progress 🙂

Take a minute to share your upcoming project ideas with us!

How to Give Your Room a Designer Touch Using Old Chandelier Crystals!

A few years ago I was given an old (but not vintage) brass colored chandelier. The gal who gave it to me said she simply hated the piece & couldn’t wait to replace it with a more modern style of light fixture. Of course, when she offered it to me, I gladly said yes, because I knew that I could think of someway to use it.

Fast forward a few years after the chandelier has been waiting in my basement for just the right project… A few days before Christmas, I came up with the idea of removing the crystals and finding a way to hang them in the window. I wanted to use all of the pretty pieces of glass, so nothing would be wasted. So… after putting my brain in creative mode, I decided to make a sort of window mobile / curtain of glass.

Step #1 – Remove all of the crystals

crystals

Crystals have been removed & are in a bucket waiting to be cleaned.

Step #2 – Clean
I put all of the pieces in a small cleaning bucket & soaked them in water/dish soap/ and a bit of alcohol. The alcohol helps to keep water spots from forming on the glass.

Step #3 – Lay out to dry
crystals drying

Step #4 – Hang curtain rod inside of window casing.
* Be sure that hanging crystals will not interfere with opening the window – or opening curtains.

curtain rod

Step #5 – String the Crystals
I didn’t want to see the string used to hang each strand of crystals, so I used clear nylon sewing thread (you could also use fishing line). Because I didn’t want to stand up on a ladder & string each crystal, I decided to lay the rod across 2 chairs & stabilize each end with a pair of heavy books. For my project, I wanted the height of each piece to be a bit random, but you may choose to make everything more even.

Step #6 – Hang the rod in the window
* VERY CAREFULLY 🙂

I am really enjoying my new display – even before I have my curtains up… that project will be for another day (soon I hope 🙂

Simple “Free” Decorating Solutions – Basket of Hydrangeas

Sometimes the best ideas for decorating our home comes from the natural world around us.

When you’re hard pressed for ideas on how to bring your home to life, perhaps taking a peek outside at the “living world” around you will give you just the decorating tip that you’re looking for 🙂

There’s something very comforting about walking into a home that has a “bit” of nature there to greet you. I like to call it “feathering my nest” 🙂 When you think about it, you are actually bringing life into your home when you bring in items from the outside.

So many times, people automatically reach for what they already know (such as a bouquet of flowers) and their creativity seems to stop there. The next time you’re looking for a new little touch around your home, try to look past the things that automatically come to your mind & look for the unexpected.

This cabinet needed a little something on top, but I wasn’t sure what to use. I already had a nice basket that I was using to display some of my magazines, so I decided to fill it up with some dried hydrangea stems. I really like the way it turned out.

Here are a few other articles that you might like as well.

Grapevines for the in the Sitting Area

Lots of Creative (cheap 😉 Fall Decorating Ideas!

How to Make Easy – Beautiful Curtains

Easy Curtains For Any Space!

Nearly 8 years ago, my husband & I decided to look for a bigger piece of land to move our family onto. We did a lot of praying & looking before we miraculously found our “perfect” piece. So… for several years, when I would find something that I loved at a great discount, I would pick it up & pack it away “for the new house.”

The piece of fabric that I made this set of curtains from is no exception. When I saw the bolt of fabric in the Walmart craft section, I knew I needed to buy some – especially at the $3 pr yard price!

When we were finally able to move into our new home, I had the perfect place to use that piece of fabric that I had secretly tucked away a few years ago.

There are 2 windows in the living room. Because the windows flank both sides of the love seat, I decided to make one panel per window. During the day I open them up to the outside of each window which makes them look like a “pair” from the other side of the room.

This type of window treatment is very easy to make! They remind me of a big pillowcase (except the opening is sewn shut 🙂 I like to line the curtains unless both sides of the fabric are pretty to look at. After all, you want the folks outside to see something pretty as they look at your house.

Here are the simple instructions.

– Cut each piece of fabric to length that you want
– Be sure that the pattern of the fabric is not upside down
– Put the right sides together (the side you want showing) so that the wrong side is facing out on the front & the back
– Pin down the sides for easy sewing
– Sew down both sides
– Sew across the top
– Sew across the bottom leaving an open space in the middle of the seem big enough to turn it right side out – Press flat
– Hang with sliding round hook clips

After looking everywhere for the cheapest hooks, I found JoAnn Fabric to be the cheapest. They have a 10 pack of iron ring hooks for $4.99! There are lots of different types of round hook clips, but the iron ones are my favorite. Not only do they look nice, but they seem to be much stronger as well.

I made another set like these for my bedroom with NO SEWING at all! I simply used tablecloths that I picked up as an end of season sale for a few dollars each. They were the perfect length for a luxurious puddle effect at the bottom.

You could also use a flat sheet, which would make it very easy to coordinate your curtains with your bedding.

You can make these types of curtains for any space. They are quick, easy, and most importantly – easy to open 🙂