Little Things – Take joy in the little things, and your joy becomes a big thing

When you can enjoy the little things in life, each day will be so full, that you can lay your head on your pillow knowing you’ve left no joy unturned.

We made It! Here in Upstate NY, we’ve just lived through the coldest February in history. Everyday I hear people complaining about the temperature, the snow, and numerous other thing. All I can think of is… their days must be terribly exhausting! It takes so much energy to continually find fault with the world, when they could be spending their days with a smile on their face, and a heart that is not only thankful, but satisfied with the many blessings in our lives.

Today, even though it was cold outside (we had -24 last week, and that was not windchill!)… the sun was shining & I had eyes to enjoy it. The birds were singing & I was blessed to be able to hear them. Our home was filled with family & laughter, which is one of the greatest joys of all… and so much was right with our world!

Even though I realize that true joy does not come from “things”, I wanted to help inspire you to enjoy the little details of your life. So, I decided to take you for a walk around our home & share some little details that bring a smile to my face.

If we’re not careful, we can spend so much time waiting & looking for the big things, that we miss out on all of the wonderful little details & joys in our day.

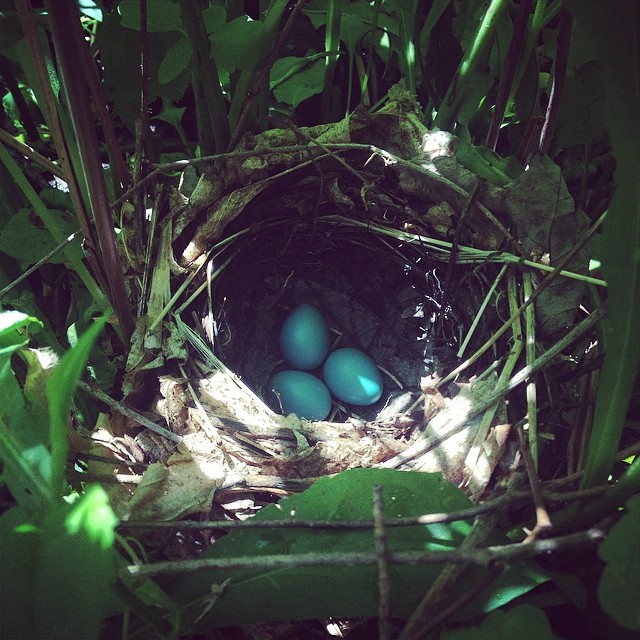
Beyond the windows on the back side of our home, we can watch the river as it flows through the forest. It has been so cold this year, that the top of the river has nearly frozen over. Add to that, the several feet of snow that we’ve gotten over the past few weeks, and we can now see what we’ve never seen before… the river totally covered over! But this has also given way to another sweet surprise, we can now see the footprints of all the animals that share our little forest!

River Footprints

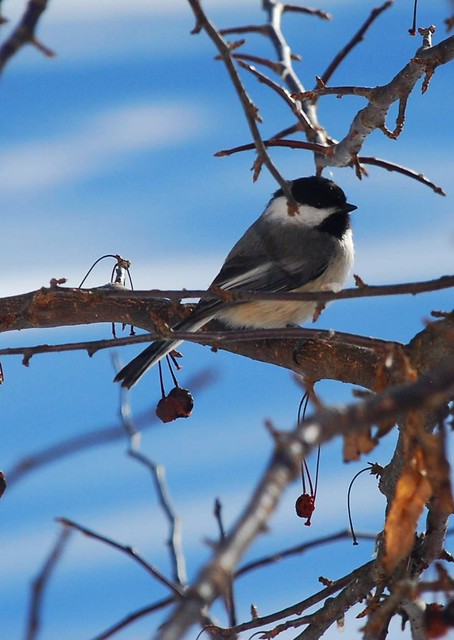
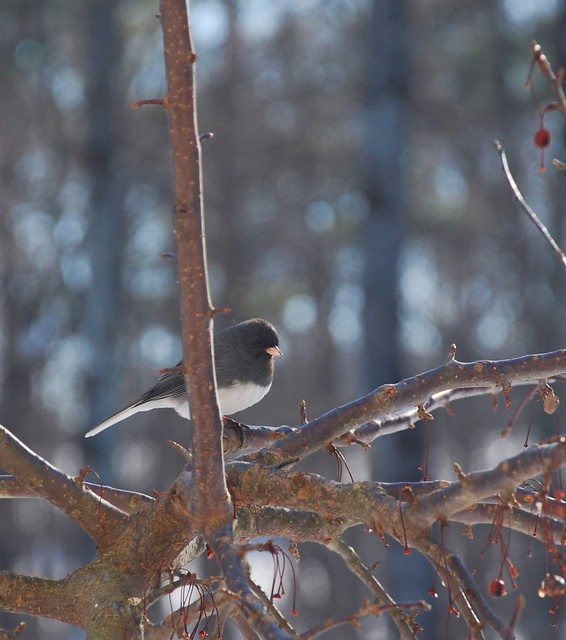
Cold snowy weather also brings lots of different kinds of birds to the winter feeders! How precious is this little chickadee!

chickadee

And this gorgeous little Junco.

Junco

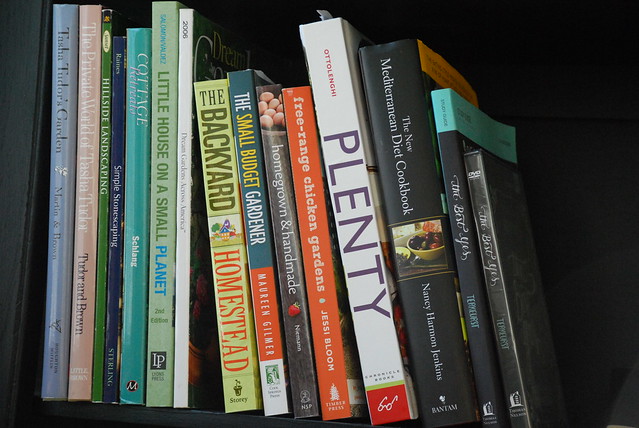
A shelf full of great books to read while inside.

Bookshelf

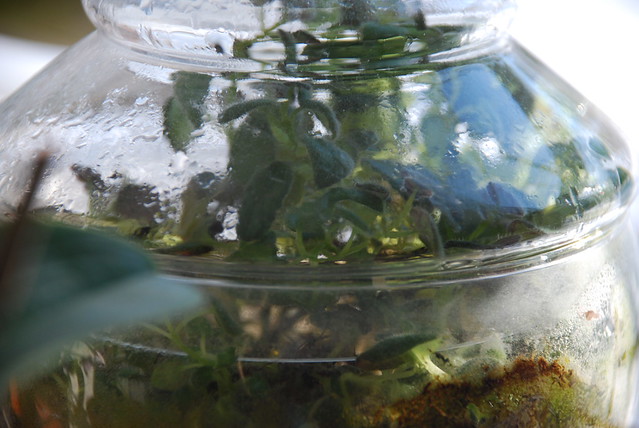
No matter how big or how small, there’s something so satisfying about having a terrarium! I like to imagine what it would be like to live inside…in a tiny little cottage 🙂 This one is filled with miniature sinningias… one of my favorite plants!
terrarium

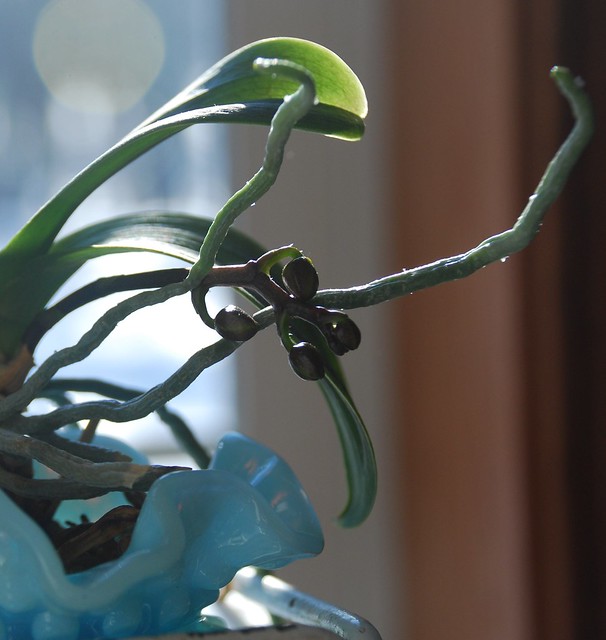
I have a shelf on my plant stand dedicated to my tiny orchids, and I just love the tiny little buds that they all have right now!
orchid buds

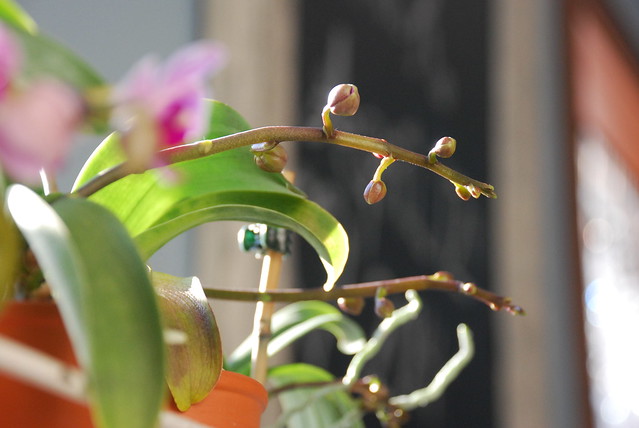
This wee little orchid, with wee little buds, in a wee little fenton glass vase… one of my favorite things.
orchid buds

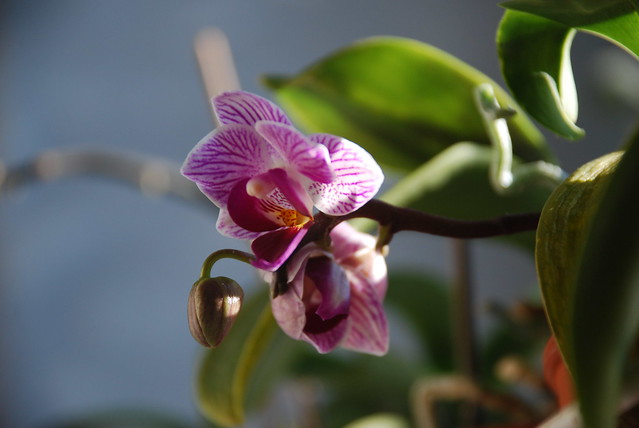
And the tiny little orchid flowers <3 orchids

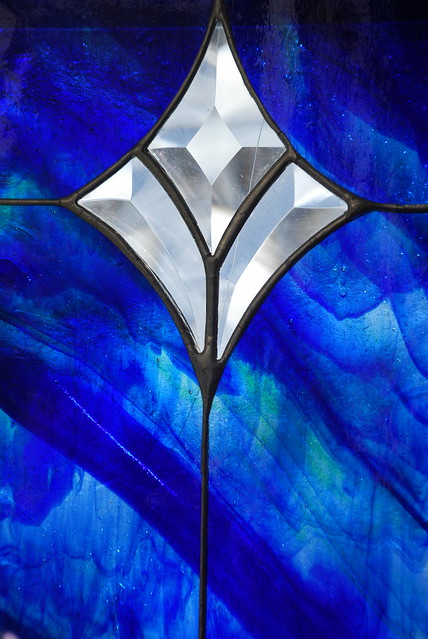
Don’t you love the deep blue colors of this piece of stained glass! My dear friend Diane made this piece, and we love the color it gives to the room, as the light spills through it!

stained glass

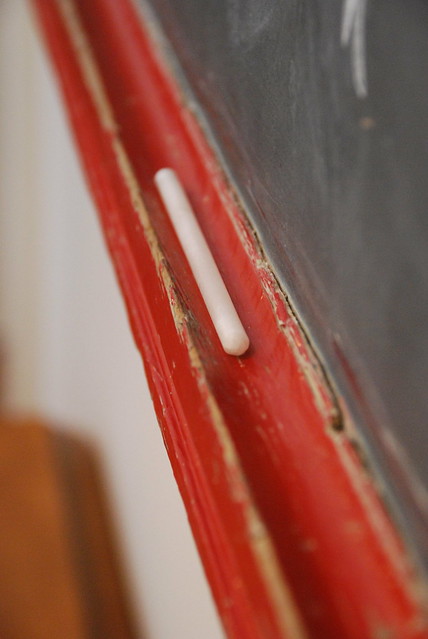
Soapstone chalk…one of my new favorite things. It was part of a gift given to me by my daughter Casey & her husband Zack for Christmas.
soapstone chalk

My husband made this set of shelves for our dining room, and every season I “shop” through my cabinets & find things to decorate with. In preparation for spring I decided on pear green as this season’s accent color, so my pottery dishes (another Christmas gift from my husband many years ago) are the perfect compliment.
Dining Room Shelves

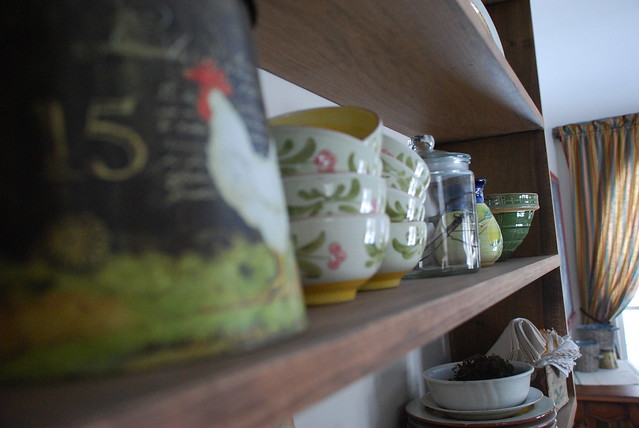
This was the first piece of McCoy yellow ware that I ever purchased. I spotted it at one of my favorite little shops & fell in love with the “earthiness” of the clay. But because it was a WHOLE $15, I didn’t buy it the first time I saw it. About a week later, since I was still thinking about it, I went back scooped it up 🙂
McCoy Dining Room Shelves

The deep green glazing on the rim of this little McCoy piece is so beautiful. I even love the little chips, where the yellow ware clay peeks through!

McCoy Pottery

I found this sweet little vintage tin & vintage postcards at the same lovely little shop. Since it has beautiful green markings, I had to use it.
vintage tin

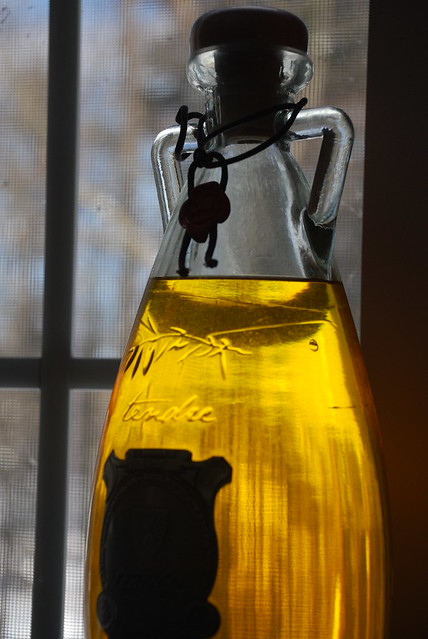
Olive Oil – there was something so beautiful & satisfying about this bottle of olive oil, that out of everything in the store, I used my gift card to buy it. I’m not sure if it is the beautiful shape of the bottle, the gorgeous color of the oil, the delicate wax seal, or the ornate metal label that caught my eye. I have a feeling it was all of the above! I just know I love the way it looks on my kitchen windowsill, with the light shining through the oil!
Olive Oil

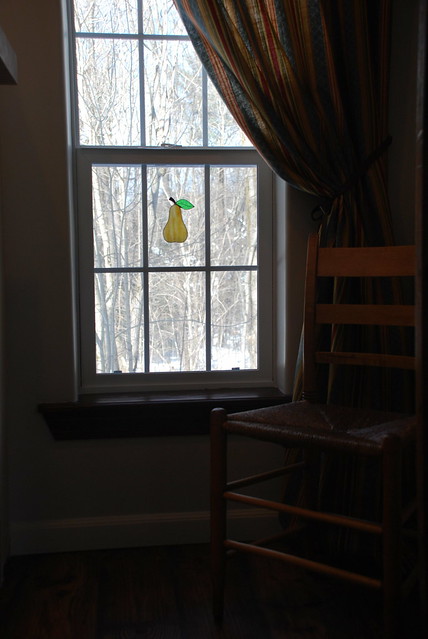
This little stained glass pear was made by the same friend who made all of my other stained glass pieces. Thank you Diane, for providing so much beauty & enjoyment in our home! And… since it IS a pear, it had to be here.
Stained Glass Pear

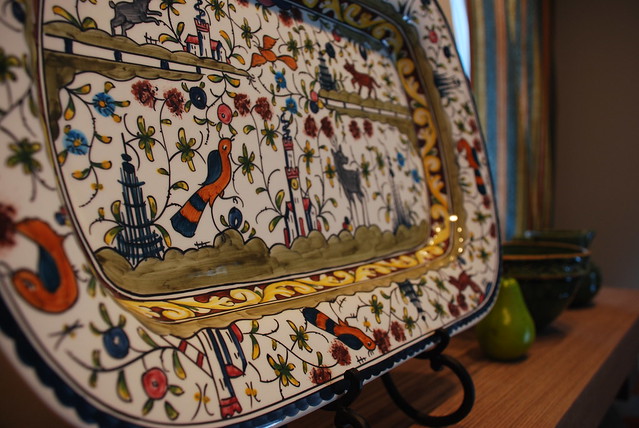
This lovely handcrafted platter was another Christmas surprise from my husband. A few years ago, we saw it while wondering around a beautiful kitchen shop. Noticing how much I admired the hand painted woodland scene on it, he went back & bought it for me! He’s such a love!! The scene is filled with animals surrounding a castle in the deep forest. The folkloric design is from the 17th century, & is handcrafted in a small Portuguese pottery. I also love the black matte finish of the wrought iron display rack. Each time I walk by, I admire the hard work of a skilled artist from a little pottery far away, and the love of my husband & joy on his face when he was able to surprise me with something so beautiful.
Provence Platter

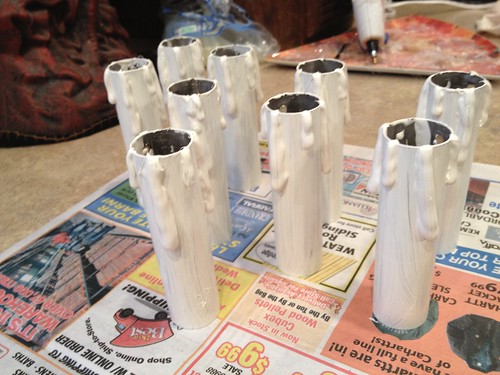
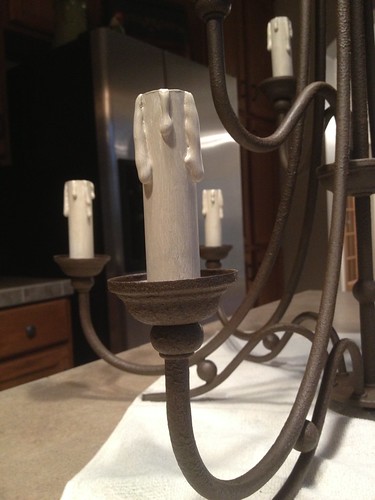
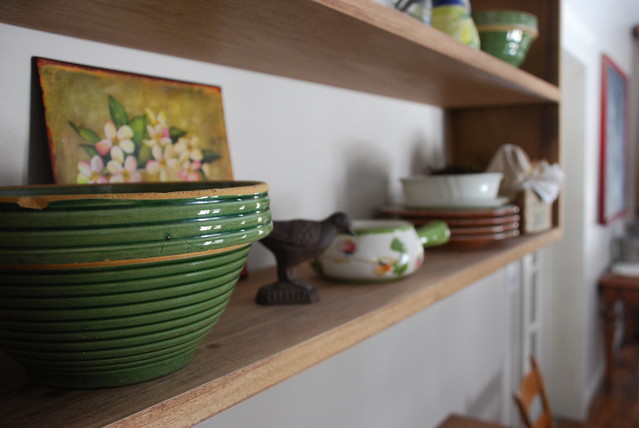
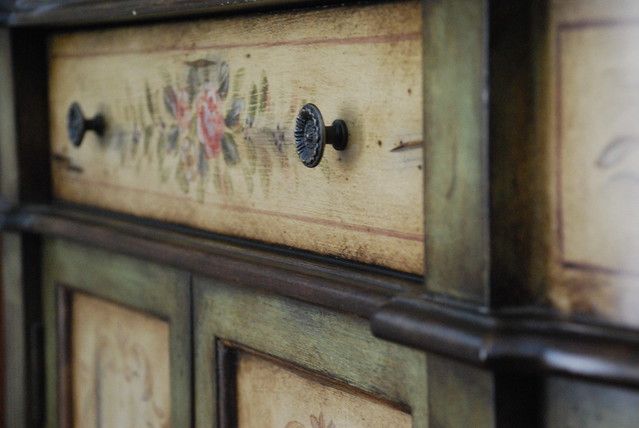
Painted furniture is one of my favorite things, and I love the details on this piece.
Painted Cabinet

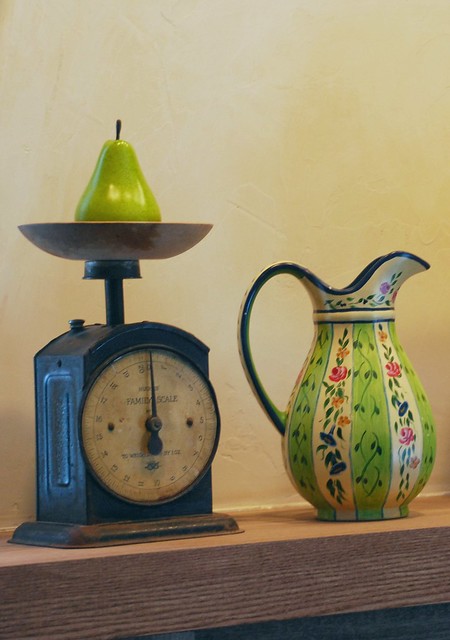
This handcrafted pitcher was a piece that I won in my early days on the web. Helping others build their business was/is my business, and this was a special gift from those early days. Don’t you love those pops of green! And of course…there is an actual pear sitting on top of a vintage scale that I found while digging through a junk store. The little wooden butter bowl was a surprise discovery in the bottom of a $1 box at auction.
Painted Pottery

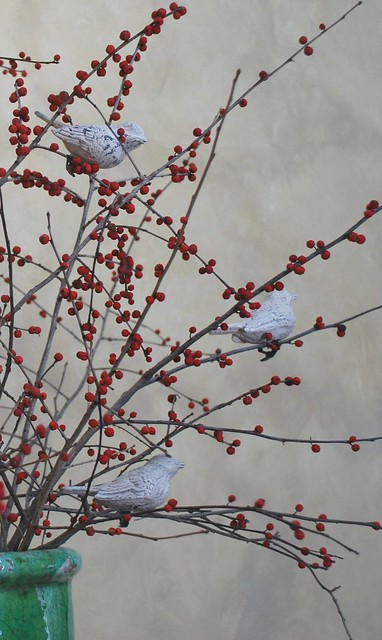
These lovely dried berries are some that I used in our Christmas decor, but displayed in this beautiful green glazed pot & enjoyed by these sweet little white birds…I had to let them stay a while longer! They also remind me of the special day my husband & I had while berry hunting together in the snow <3 Dried Berries

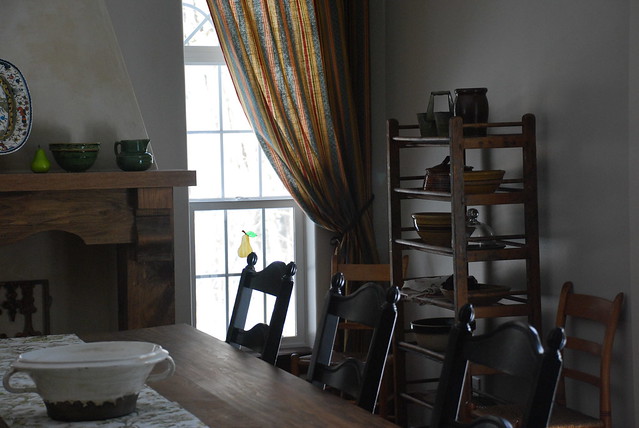
Here you can see the new curtains I made for the season. Years ago, I found a great discount fabric shop filled with beautiful bolts of fabric! At those ridiculously cheap prices, I had to pick up a few of my favorites, knowing I’d find a way to use them someday. Well, this pattern has finally had it’s someday as our new spring curtains! The gorgeous chalkboard was a favorite find at an auction last summer, and the picture is me pretending to be a chalk artist 😉 I do love it though, since the “bee in the wreath” graphic is one of my favorite things. The vintage linen with the green stripes was a $1 find last fall, and the table runner with the lovely shades of pear green was a new find.
Chalkboard Corner

And finally… this is a favorite corner in our dinning room. I love having the window to peek into the forest, the french baking rack filled with finds, the new mantel my husband & I made together, and most importantly … the table & chairs which means family & friends gather here <3 Dining Room Corner

Sometimes joy jumps at you with surprise, and sometimes you must go on a joy treasure hunt! While you’re spending these longer cooler days inside, they don’t have to be void of joy! And, it doesn’t have to come in big expensive boxes. Sometimes it can come in a surprise $1 from an auction, something you found on the curb & re-purposed, or even in something you’ve made yourself.

I hope you’ve enjoyed this walk around our home looking at a few of the “little things” that bring me joy each day, and may you take time to enjoy the little blessings in your home!
 

For The Love Of Autumn


Autumn Colors

As with spring, autumn brings with it a sort of nesting instinct. Kitchen gardens are giving up the last of their harvest, and cottage gardens the last of their blooms. The trees are now taking center stage with their coat of many colors, and pumpkins & mums are greeting you at every doorstep. Here and there are beautiful stacks of firewood, speaking of the cozy evenings by the fireplace yet to come, and the loving hard work that provided it.
 

Candles give off their spicy autumn scents, and birds are now showing up by the dozens at the feeders. Apple picking, pumpkin farms, cider, chili & corn bread, hay rides and fall festivals of every kind fill these sunny warm days, while the chill of evening is growing stronger. Squirrels & chipmunks scurry back and forth at a fevered pace not only collecting nuts & other foods for their winter pantry, but leaves and other bits for making their home more cozy place for their family during the colder season to come.
 
Where spring was a time of building & creating nests, autumn is a time for making the nest an even more cozy place for the family to spend their time together…kind of like snuggling into a cozy, protected, warm place… HOME.
 
I too feel the urge to bring bits of nature into our home. It think it reminds us to be thankful for the bounty of the season behind us, and while we’re snuggled up inside, it speaks life!
 
Here are a few of the beginnings of our Autumn decor <3   It has begun...   Here's a pile of Autumn goodness getting ready to be turned into our lovely fall decor. Autumn - pumpkins


I’m in love with all of the shades of white, yellow, and green that we’re seeing in the pumpkin patch this year!

Autumn - white pumpkins


My husband created this display area & mantel for me last year, and I love the light colored pumpkins mixed with a bittersweet crown & large bittersweet wreath. (bittersweet is one of my favorite things…can you tell? 🙂

Autumn Mantel


And here’s a close up of one of the little white pumpkins & her bittersweet crown on the mantel. I love the evening lighting in this room!

Autumn - white pumpkin and bittersweet crown


Even though it’s just begun, I’m excited about where it’s going 🙂

Chandelier Makeover – Shiny Modern to Rusty French Farmhouse


Chandelier Makeover

There’s something about old rusty bits from home & farm that warms my heart. Perhaps it’s the stories that a piece could tell, the work that it has seen, or maybe just the fact that it’s still here to tell the tale. In any case, when my husband & I decided to turn our standard builder’s grade family room in our new french farmhouse dining room, I knew we had to include some special rusty bits of our own to tell a story in our space.

As I took time in the room to try to visualize the finished space, every time I looked at the ceiling fan, I knew we had to have something else in it’s place. Something that would speak “french farmhouse” as our family sat around our soon to be harvest table.

But what would I replace it with? First of all, I couldn’t seem to find “the right piece”…not at a price I could currently afford anyway. So what was I to do? I had a chandelier downstairs that the builder left with us for another room, but because we picked something different, it was still in the box. It was not my style at all – shiny, modern, new… but perhaps I could do something with it, to give it more of a french farmhouse feel. It was worth the try. And after all, it had been sitting in a box for years anyway, so what could it hurt?

I wish I had taken a better “full” picture of the chandelier before I started, but you can get somewhat of an idea by this picture. The fixture isn’t terrible, it’s just not my style. Shiny. Modern. New.

Chandelier Makeover

Here was my plan…
– Remove the shades & not use them at all
– Pull off the 3 metal arms that held the shade up
– Remove the stickers from the metal arm covers
– Paint the chandelier some sort of darker color
– Use pretty light bulbs to go for a “candle” looking chandelier

I removed all of the shades, and as I was pulling the metal tubes up, I realize that they were all welded together! How was I going to get all of these little metal arms off of the tubes?

I decided to go for it & just pull it back & forth until it popped off. WHOOPS…
I didn’t expect each arm to leave a hole in it’s place. Now what?

Chandelier candle tube Makeover

I had no idea if this would work, but I decided to get out my hot glue gun, & make what looked like wax, dripping down from each hole. It stuck well enough, and I think it might work! All I need to do now is paint the tubes to look like candle sticks. I found a small bottle of antique white craft paint that I had & tried that.

Chandelier tube painting

They looked nice, but still needed a little something. So after the paint dried, I dry rubbed a little bit of antiquing glaze over each tube, that really did the trick!

Chandelier tube antiquing

Remember my love of rusty bits? Well, I found this amazing rust spray paint at the department store, that adds YEARS to whatever you paint with it! I can see a lot of things becoming rusty in my near future 😉

The can of spray paint is the only thing I had to spend money on, as I already had the other bits of paint & hot glue left over from other projects.

Before you paint a light fixture, be sure to protect the electrical areas with something. I used tinfoil because it was so easy to do. Be sure to protect the area from over spray & paint in a well ventilated area. I did mine outside.

Chandelier Makeover

Here’s a close up of the top. You have to be careful to cover all parts of the fixture when you’re painting. I used a cardboard box to sit mine on while I was painting it, that way I had both hands free to work.

Chandelier Makeover

Here’s a close up of the metal light tubes – glued, painted, antiqued, and put back on the fixture. I love the way they came out!

Chandelier Makeover

Some more rusty details

Chandelier Makeover

Chandelier Makeover

The chandelier is now installed & the bulbs are in!

Chandelier Makeover

What an amazing difference a little creative thinking, paint, and other bits can make… and for very little money I might add!

Chandelier Makeover

What can you think of in your home, that just doesn’t seem to fit with your vision of how you want the space to look?

Can you give it a makeover to make it work? Of course you can!!!

Tell us about it & share this DIY with your friends to help inspire them as well!

Nest – a hope for the future

Nest graphic

Bird Nest

I’ve always loved nests, eggs, & birds! My earliest memories of life in the nest, was on my great grandmother Pearl’s farm. She had lots of trees in her orchard, and she would encourage us to explore & peek at the developing homes among the branches. I’ve always loved everything to do with birds ever since. We even raised different types of parrots for many years, and each baby was a joy for our family to watch hatch & grow.

Recently, my husband & I were exploring the forest & the little stream that runs through it, when all of the sudden, a tiny bird flew up from in front of our feet. I think she was as startled as we were! As we looked down, there in the green leaves was a tiny little nest… filled with 3 very tiny blue eggs.

My heart still sings every time I see a momma bird filled with hope & preparing for her future, and today was no different.

To me, a nest resembles our lives … a place to gather your family, and call home.

From the time I was a little girl, the thing I prayed for the most, was a man who loved God & loved me, and many children to share our lives with. When Daniel & I started dating & talking about our dream of children, we both had been praying for exactly the same thing – 4 children of our own, then possibly adopt 2. Well…God has answered our prayers, and He blessed us beyond measure. And the blessings keep coming!

Our little nest started out with just the two of us. Then one by one, we were blessed with four little ones. Now, those little ones have grown into beautiful young adults, who are some of the most wonderful people you’d ever want to meet. They have found loves, and now our nest is bursting at the seems with wonderful children!

“Children are a gift from the LORD; they are a reward from Him. Children born to a young man are like arrows in a warrior’s hands. How joyful is the man whose quiver is full of them! He will not be put to shame when he confronts his accusers at the city gates.” Ps 127:3-5

Our oldest son Daniel. We are very proud of him!
Daniel

Our baby girl Casey Chere’ married her love Zack back in April!
Our Baby Girl Casey Chere'

Our youngest son Ryne & his love Hannah got engaged last month!
Ryne & Hannah

Our son Cameron is waiting for his love – she’s coming soon we can feel it!
Cameron

And just last week, our baby girl Casey & her love Zack announced to the world… that they are starting a nest of their own & will be having their first little one next winter!
Casey & Zack

With Spring all around us, and life bursting forth in every direction, I can’t help but stop & thank God for His blessings in our lives! Thank You Lord for our little nest, & those of us who have already started to build nests of their own.

What a wonderful journey this life is…when you take time to feather your nest <3

Savory Sausage Stuffing With Secret Ingredients!

Stuffing Recipe

At your first glance over this stuffing recipe, you might find yourself with at least one raised eyebrow. I know I did the first time I heard what was in this dish during one of our family gatherings. But, to my surprise, I absolutely loved it! As a matter of fact, everyone loved it!

To be honest, I just wasn’t used to having fruit as an ingredient in a main course, so I had no idea how tasty it was! Of course, my taste buds have certainly grown & expanded in the last few years, and I now enjoy all sorts of fruit, meat, and salad combinations!

This recipe is not exactly like the first one that I tasted, as I’ve added a few more “goodies” here & there.

Feel free to add, take away, or change amounts of any of the ingredients as well. My mother tells me that I am a lot like my great-grandmother Pearl, who never really used recipes or measuring utensils, but rather added different ingredients until it looked & felt right! So, with that being said, I hope you enjoy this special recipe!

Savory Sausage Stuffing Surprise

12 Cups bread cubes
8-16 ounces ground pork sausage (I use Jimmy Dean Maple sausage)
1 1/2 Cups chopped onion
1 1/2 Cups diced celery (save inner leaves, dice & add as well)
2 larger cans of chopped mushrooms
1 1/2 Cups chopped granny smith apples
1/2 Cup coarsely chopped walnuts
1 Cup dried cranberries
4 teaspoons poultry seasoning
1 teaspoon salt
1 teaspoon pepper
1 cup chicken broth (more if needed)
1 cup butter

You could buy pre-made bread cubes, or make your own with a loaf of your favorite type of bread. To make your own, simply break the bread into small bits (1-2 inches), spread on large cookie sheet, place in 250 degree oven for about 10 minutes – just to dry them out. Then remove bread & set it aside.

Brown the sausage in a large skillet, being sure to break it up into smaller pieces while cooking. Using a slotted spoon, drain the drippings from the sausage before you place it into a large bowl. Add the butter, onions, celery & celery leaves, mushrooms, and all seasonings to the pan & cook until tender. Add chicken broth and simmer for approx 5-10 minutes.

In the large bowl, add the walnuts, cranberries, and apples to the cooked sausage and mix well. Then, stir in the bread cubes and mix until well blended. Lastly, pour contents from the skillet into the bowl & mix until all the ingredients are coated & moist. You can add more chicken broth if the mix is to dry.

Place stuffing in a buttered baking dish, sprinkle with poultry seasoning, and bake until thoroughly heated and golden brown.

I know that you will enjoy this wonderful new twist to your traditional holiday dinner as much as we do!

Best Apple Pie Recipe

Best Apple Pie Recipe

Some days are just meant for baking pies, and today is one of them!

We’ve been so anxious for apple season to get here, so as soon as we could, we picked up some beautiful honeycrisp apples! We’ve already been enjoying them as snacks with a bit of peanut butter, I’ve made a few batches of apple crisp, and today is pie day 🙂

If you’re like me, you have a special Pinterest board set aside just for the special dessert ideas that you want to try! Well, I’ve had a pin that I’ve been waiting to try as soon as apple season got here. It’s called Cider Caramel Apple Pie. I got my initial inspiration from Hannah’s pin below, and have added my own tweaks to it.

Cider Caramel Apple Pie

The pie has three parts to it – Crust, Cider Caramel, & Apple Filling

We’re going to start making the caramel, and let it simmer while we’re making the crust. You could also make it ahead & use it for other recipes as well.

Caramel:

4 Cups Apple Cider
1/2 Cup Brown Sugar
1/4 Cup Unsalted Butter (I used sweet salted, because I had it on hand)

Simmer cider in a heavy sauce pan until it reduces by half – approx 20 minutes (you can make the crust while it’s simmering)
Add sugar & butter, stir occationally & reduce again to approx 1 1/4 Cups – until it thickens slightly. Then turn of the heat.

Pastry Crust:
This pastry crust recipe was given to me by a friend – be sure to follow her on Instagram @pottersarms
She loves this recipe so much, that she doesn’t ever use any other! I can tell you, it was very easy to make!

2 Cups Flour (sifted or lightly spooned – if it’s packed it could come out dry)
1/2 Cup Butter – cold but soft
2 Tablespoons Castor Sugar (finely ground sugar – I just used my emersion blender to make reg sugar more fine)
1 Egg Yoke
3 Tablespoons Cold Water
* For pastry topped pies such as this one, simply double the recipe & keep the top half covered until ready to roll out & finish pie.

Mix flour & butter with fork or pastry blender until they resemble fine crumbs. Mix in sugar. Make a well in the center, and add egg yolk & cold water. Mix gently until it’s mostly together. With flour dusted hand, gently work pastry dough togehter. Don’t overmix, because the crust will be tough. Roll out gently on a lightly floured surface. Lift dough with your rolling pin, and place in pie dish removing excess. Place in fridge while making filling.
*To make a savory pie, you can simply leave out the sugar.

Apple Filling:
5-6 Cups Peeled/Sliced Apples
1/2 Cup Brown Sugar
1/4 Cup Flour
1 tea Cinnamon – I use Saigon for the absolute BEST flavor
1/4 tea salt
2 tea vanilla – I use Pure Madagascar Vanilla Extract for the BEST flavor
1 Cup Warm Cider Caramel

Mix spices, then mix in flour & sugar. Sprinkle over apples in the bowl & mix. Stir in vanilla & caramel, and pour into crust.

Best Apple Pie

Roll out crust & top pie, crimping sides. Using a knife, cut 4 steam vents in the top crust. Beat 1 egg and brush on top of crust, then sprinkle sugar & cinnamon. Bake for 45-60 minutes – until brown & juices are bubbly. If the edges of your crust start to brown more than you’d like, simply cover the edges with some tinfoil for the remaining baking time. You must allow pie to cool before cutting, or it will be too runny.

I LOVE this cobalt blue pottery pie dish that my mom bought for me years ago! It was made by a local potter – Mr. White.

Pottery Pie Plate

Enjoy & feel free to Pin & Share!
~ Pearl