How to turn an old picture or mirror into a magnetic chalkboard.

I just love finding new uses for old things, especially when those “new uses” add a bit of extra beauty to our home decor for very little cost! Recently my husband & I have been doing just that … taking found objects, or items that I have picked up VERY cheaply, and have turned them into our very own little works of art.
And I have to tell you, there is such a satisfaction that comes with seeing the possibility in something that others have discarded, then adding your own creative touches that seem to breath new life into it. Then… there is the added joy of actually using your new creation to feather your nest to add even more warmth and comfort to your home.
My husband & I have enjoyed watching several of our creative projects come to life in one of our home offices recently, and I know you will love today’s project as much as I do! After today, I promise that as you visit those yard sales, auctions, and thrift stores, you will never look at that old mirror or picture the same way again… I know I don’t 🙂
I’ve always had a love for beautiful picture frames, and I just seem drawn to them at every sale I go to. I’m not sure why, but perhaps it’s the fact that they have the ability to beautifully showcase any creative idea that your mind can dream up!
If you’re like me, you’ve looked at a picture in the thrift shop and said… I love the frame, but that picture doesn’t go with my style. Or maybe you’ve seen a nicely framed mirror, but the mirror had already outlived it’s original purpose, and you thought you had to pass on it.
From now on, I want you to try to look at things through a new perspective. Always remember, colors, textures, and contents within the frame can ALWAYS be changed into something that you love & that matches your home decor!
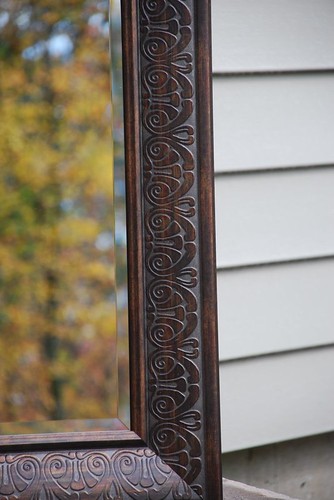
Here’s where our project began…

This was a nice mirror for someone, but it didn’t quite fit into our space.
– The color didn’t match our room
– We really didn’t need another mirror in that space
– It felt more like “eastern world travel”, instead of the “french country” feel that I was looking for
I decided to transform this mirror into a magnetic chalkboard that I could both write on as well as hang things on.
#1. Remove The Mirror
To do this, we had to first remove the mirror so we could give the frame a new look & feel.
With the new paints that we have available today, you could simply just paint right over the mirror with chalkboard paint, but since I wanted a magnetic chalkboard, I decided to replace the mirror with a scrap of sheet metal instead.
#2. Change The Look
After we removed the mirror (we will use that for something else), it was time to give the frame a new look with some different painting techniques. And, to be very honest, I had to paint it twice to get the look I wanted.
* It’s ok to just take a step & try something. After all, what’s the worst thing that could happen? With me, I just had to paint it again – no big deal.
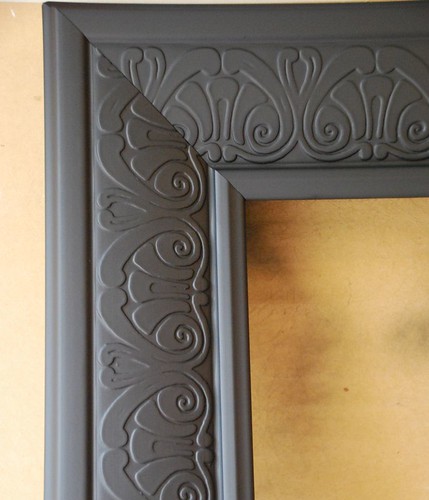
I started with a fresh coat of flat black paint. I used spray paint because it was easier & I already had some on hand.
Up close
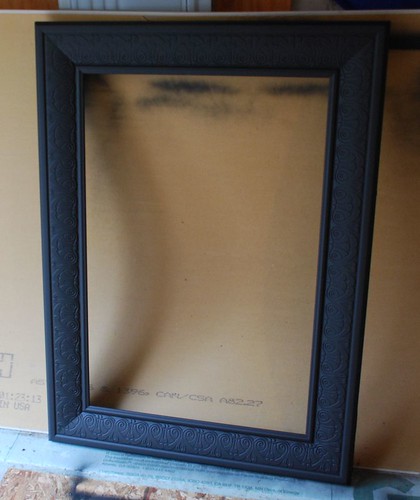
The whole frame painted black
#3. Prepare & Paint Sheet Metal
While my frame was drying, we started painting the metal with chalkboard paint.
You want to be sure that your sheet metal is clean & free from any oils or dirt before you paint, so the paint will be sure to stick to the surface. One of the best ways to do that, is to simply clean it with some regular white vinegar & a soft cloth.
Paint the piece of sheet metal with your chalkboard paint according to the product instructions. We decided to use spray paint to help eliminate any streaks or drips, but you can use whatever type of paint you feel comfortable with. You will most likely need 2 coats, maybe more, depending on the type of surface that you are covering.
#4. Add Crackle Topcoat
Because I wanted a crackle finish, after the black paint dried, I added a layer of crackle medium. Once that dried, I painted on a layer of antique white in a satin finish (I don’t want the finished product to be to shiny).
After the paint was dry, I rubbed on a very thin layer of antiquing glaze to give it that “old world” feel.
#5. Preparing The Chalkboard
Most chalkboard paints recommend that you prepare your new surface by “chalking” the entire surface before using it on a regular basis. You do this by rubbing a piece of chalk lengthwise over the entire surface several times, then wiping it off. Now you’re ready to go!
*Chalkboard paint tends to scratch when a clay based chalk is used, so I purchased mine from the office store instead of using crayola chalk.
#6. Bringing It All Together
Insert your new metal chalkboard & add a sturdy backing (like stiff cardboard or chip board) if needed.
#7. Decorate!
I decided to add one of my favorite family pictures, as well as a favorite scripture that says “As for me and my house we will serve the Lord” in French 🙂
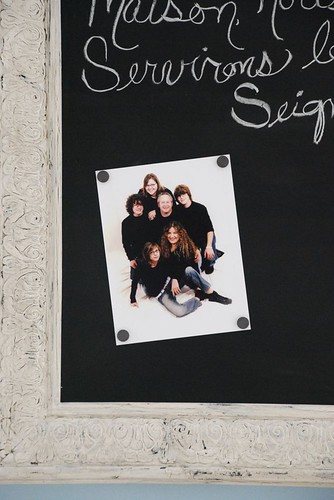
You could use decorative magnets, a collection of pictures, lists, menus, or whatever you’d like to dress up your new magnetic chalkboard!
Enjoy,
Pearl