Magnetic Chalkboard – How to make a beautiful magnetic chalkboard from old mirrors or pictures

How to turn an old picture or mirror into a magnetic chalkboard.

Magnetic Chalkboard

I just love finding new uses for old things, especially when those “new uses” add a bit of extra beauty to our home decor for very little cost! Recently my husband & I have been doing just that … taking found objects, or items that I have picked up VERY cheaply, and have turned them into our very own little works of art.

And I have to tell you, there is such a satisfaction that comes with seeing the possibility in something that others have discarded, then adding your own creative touches that seem to breath new life into it. Then… there is the added joy of actually using your new creation to feather your nest to add even more warmth and comfort to your home.

My husband & I have enjoyed watching several of our creative projects come to life in one of our home offices recently, and I know you will love today’s project as much as I do! After today, I promise that as you visit those yard sales, auctions, and thrift stores, you will never look at that old mirror or picture the same way again… I know I don’t 🙂

I’ve always had a love for beautiful picture frames, and I just seem drawn to them at every sale I go to. I’m not sure why, but perhaps it’s the fact that they have the ability to beautifully showcase any creative idea that your mind can dream up!

If you’re like me, you’ve looked at a picture in the thrift shop and said… I love the frame, but that picture doesn’t go with my style. Or maybe you’ve seen a nicely framed mirror, but the mirror had already outlived it’s original purpose, and you thought you had to pass on it.

From now on, I want you to try to look at things through a new perspective. Always remember, colors, textures, and contents within the frame can ALWAYS be changed into something that you love & that matches your home decor!

Here’s where our project began…

Magnetic Chalkboard Redo

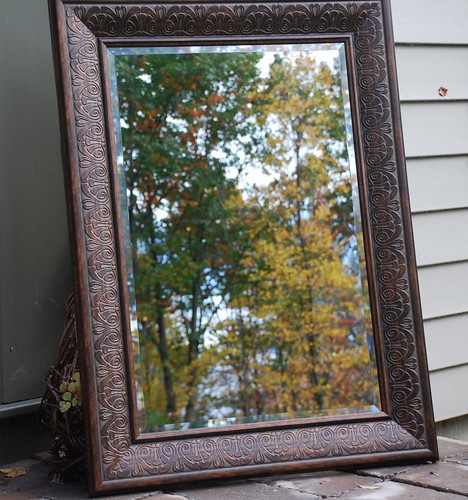
This was a nice mirror for someone, but it didn’t quite fit into our space.
– The color didn’t match our room
– We really didn’t need another mirror in that space
– It felt more like “eastern world travel”, instead of the “french country” feel that I was looking for

Magnetic Chalkboard Before

I decided to transform this mirror into a magnetic chalkboard that I could both write on as well as hang things on.

#1. Remove The Mirror

To do this, we had to first remove the mirror so we could give the frame a new look & feel.

With the new paints that we have available today, you could simply just paint right over the mirror with chalkboard paint, but since I wanted a magnetic chalkboard, I decided to replace the mirror with a scrap of sheet metal instead.

#2. Change The Look

After we removed the mirror (we will use that for something else), it was time to give the frame a new look with some different painting techniques. And, to be very honest, I had to paint it twice to get the look I wanted.

* It’s ok to just take a step & try something. After all, what’s the worst thing that could happen? With me, I just had to paint it again – no big deal.

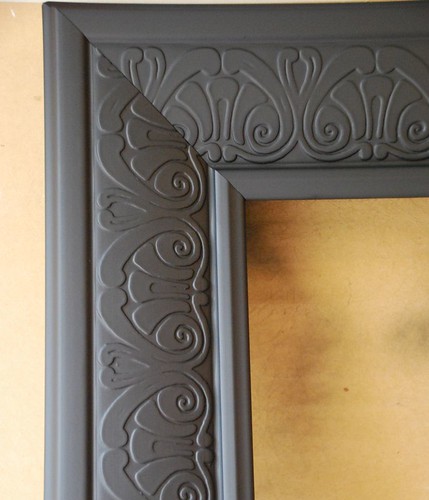
I started with a fresh coat of flat black paint. I used spray paint because it was easier & I already had some on hand.

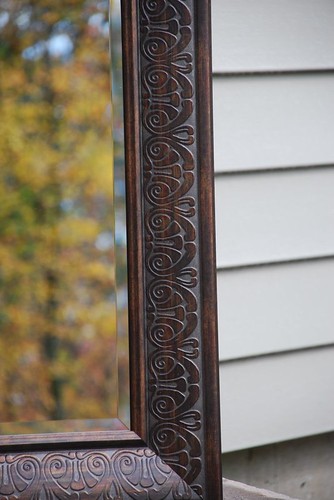
Up close
Magnetic Chalkboard Redo

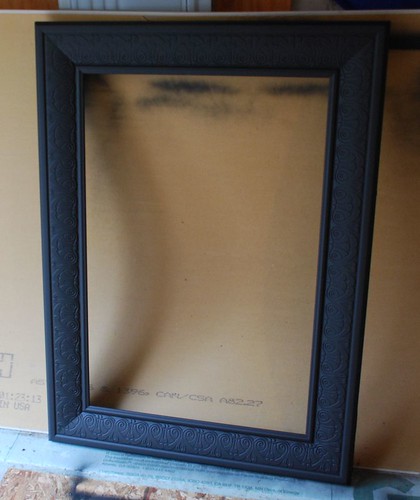
The whole frame painted black
Magnetic Chalkboard Redo

#3. Prepare & Paint Sheet Metal

While my frame was drying, we started painting the metal with chalkboard paint.

You want to be sure that your sheet metal is clean & free from any oils or dirt before you paint, so the paint will be sure to stick to the surface. One of the best ways to do that, is to simply clean it with some regular white vinegar & a soft cloth.

Paint the piece of sheet metal with your chalkboard paint according to the product instructions. We decided to use spray paint to help eliminate any streaks or drips, but you can use whatever type of paint you feel comfortable with. You will most likely need 2 coats, maybe more, depending on the type of surface that you are covering.

#4. Add Crackle Topcoat

Because I wanted a crackle finish, after the black paint dried, I added a layer of crackle medium. Once that dried, I painted on a layer of antique white in a satin finish (I don’t want the finished product to be to shiny).

After the paint was dry, I rubbed on a very thin layer of antiquing glaze to give it that “old world” feel.

#5. Preparing The Chalkboard

Most chalkboard paints recommend that you prepare your new surface by “chalking” the entire surface before using it on a regular basis. You do this by rubbing a piece of chalk lengthwise over the entire surface several times, then wiping it off. Now you’re ready to go!

*Chalkboard paint tends to scratch when a clay based chalk is used, so I purchased mine from the office store instead of using crayola chalk.

#6. Bringing It All Together

Insert your new metal chalkboard & add a sturdy backing (like stiff cardboard or chip board) if needed.

#7. Decorate!

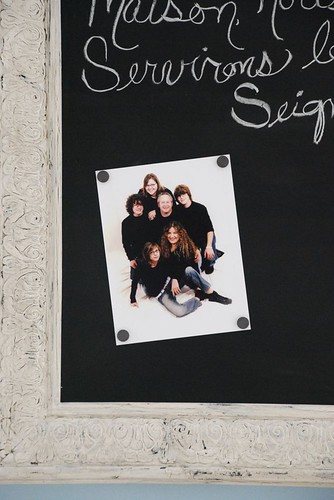
I decided to add one of my favorite family pictures, as well as a favorite scripture that says “As for me and my house we will serve the Lord” in French 🙂

Magnetic Chalkboard Redo

You could use decorative magnets, a collection of pictures, lists, menus, or whatever you’d like to dress up your new magnetic chalkboard!

Magnetic Chalkboard Redo

Enjoy,
Pearl
Build Your Own Vintage Style Storage Cubby

My husband likes to take me on little dates. Sometimes we’ll go for a ride around the countryside, or maybe we’ll share a meal together. Many times, he’ll choose the Cracker Barrel for breakfast, both because we love the food, and because he knows how much I love to peek around in the gift shop. He’s such a sweetie 😉 I can honestly say, that each time I walk into the gift shop, my eyes are immediately drawn to the tables, cubbies, and other display pieces!

I don’t know how many times I have walked into an antique shop or home decorating store, and fell more in love with the display pieces than the items that are actually for sale!

While the sweet little sales lady at the Cracker Barrel shares the discounts of the day with me, I simply smile while thinking… but I want the display unit! I remember actually asking one little lady about a particular display unit, only to have her say… honey, that would probably cost you an arm and your leg! And she was right (mostly anyway 😉

I recently came across some really cute display pieces in a well known catalog, and as my little sales lady predicted, the prices were meant for the wives of Kings (not that I don’t think of my sweetie as a King mind you 😉

I don’t know what it is about me… maybe it’s the creative thought process that my mind goes through… or maybe it’s just the “I know we could make that” syndrome… but whatever the reason, my brain kicked in gear!

I wanted to find a nice storage unit that could be used for multiple purposes such as the – kitchen, entry, hallway, or garden house. My hunt was a great success, because today I found this great project for a “chicken coop style” storage unit over at Sunset’s Fresh Dirt Blog.

If you’re style of decorating is…

– Country Farmhouse
– Cozy Cottage
– English Cottage
– Shabby Chic
– Primitive

Well, I should have just said ANY style, you will love this project!

Download The Project

Here’s another version from Lowe’s

As you can see from the picture above, Nina decided to leave the plain wood finish on her cubby, but I can see mine being painted with a nice thick coat of “chippy style” crackled paint!

There are so many color combinations to choose from! How about… cream & black, mustard & red, taupe & light blue… see what happens when I start thinking!

And you won’t believe how much stuff this type of unit can hold! I have a friend who keeps her’s right inside the front door. Then, when the daycare children come in, they put their shoes, hat, gloves, lunches, school papers, etc., in their own cubby!

Think about all of the different things you could fill your new cubby with…

– crafts
– videos & CDs
– books & magazines
– Plants, pots, and garden tools
– a pantry
– all of your quilts & other linens
– dishes & kitchen display
– scrapbooking supplies

I know you will enjoy this special piece!

* Share your special storage pictures with us in the comment section!

Pearl

Add Life and Beauty to Your Home by Decorating With Birdcages

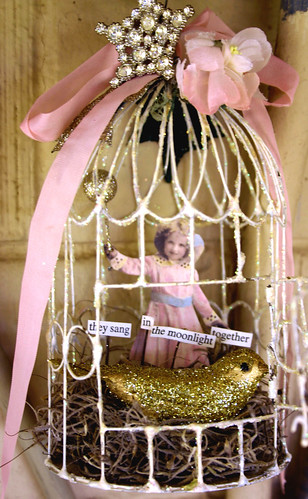
pink birdcage

Today the weather doesn’t want to make up it’s mind! First freezing cold, then snow, then sleet, then rain, then snow… then we start all over again! Needless to say, the kids were excited about their second snow day of the year!

This time of year seems to get a bit gloomy for some people, because the holidays are over, and now we are waiting for some “signs” of Spring… which won’t reach us for another 2+ months 😉

But… with the blessing of the Internet, we are able to travel past our doors & share so many wonderful pictures, ideas, stories, and far away places… without ever leaving our chair!

So…

I thought I would share some “eye candy” with you today, to help get your decorating ideas flowing!

There’s something very romantic about birds, their houses, nests, and cages. I’m not sure what the lure is for me, but I have always found them so very beautiful and intriguing.

Maybe it all started with a school field trip?

As a very small child, I remember visiting the Smithsonian Institute in Washington DC for a school field trip. While there, we were able to walk into the nature section, where we were amazed by the miniature birds that were not much bigger than a quarter! I’ve always remembered how fascinated I was that day with God’s beautiful creation (of course… He never ceases to amaze me ;)!

Not long after that… I remember standing in my grandfather’s garden in TN, and being startled by what I thought was a bee flying by my head, only to find out that it was indeed one of those beautiful little birds trying to get to the flowers that were teasing him from the shrub behind me! Oh how I wanted to pick him up & put him in my pocket 🙂

Then, there was my great grandmother’s farm in Md…
When you live on a farm, birds become a part of everyday life! There were always little birds flying in and out of the barns, and eating the insects around the gardens and the orchard. This meant lots of little nests in the trees, as well as the occasional baby bird who needed helpful attention. I was very happy when grandma would ask for my help!

My husband & I have always had some sort of birdie friend sharing our home (whether inside or nesting in our eaves ;), and for many years we even raised different kinds of parrots – which we really enjoyed.

But… you don’t actually have to have birds living in your home to enjoy their beauty! You can decorate your home with bird houses, decorative bird nests, pictures of birds, or perhaps a collection of vintage bird cages.

Bird cages, for example, can be found very inexpensively at auctions, yard sales, thrift stores, and even in garbage piles along side of the road! You see, most people look at an empty bird cage as something you would buy to house a new pet. And if they are not in the mood for a new pet, they simply don’t see the value in having it! This idea works to your advantage, because these cages, that are mostly unfit for a real bird anyway, would be beautiful additions to your home decor!

It doesn’t matter if the cage is in great shape or not, as a matter of fact, a little rust will help give it that vintage appeal! You can fill the cage with anything your heart desires. Also… don’t forget about outside of the cage!

Why not try some of these items to Here are some different ideas for items that you can use to decorate your birdcage;

– candles
– your favorite collection
– clay flower pots, pretty flowers, plants, or green vines
– pictures in pretty frames or placed between the wires
– a lace doily, ribbons, and bows for a shabby chic look
– a stack of pretty books
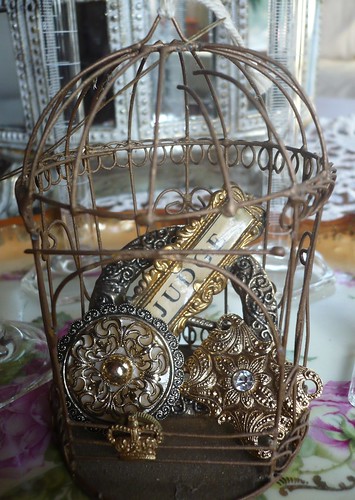
– hang bits of pearls, crystals, broaches, or other jewelry from the wires
– tea cups & pretty plates
– dolls, teddy bears, or other vintage toys
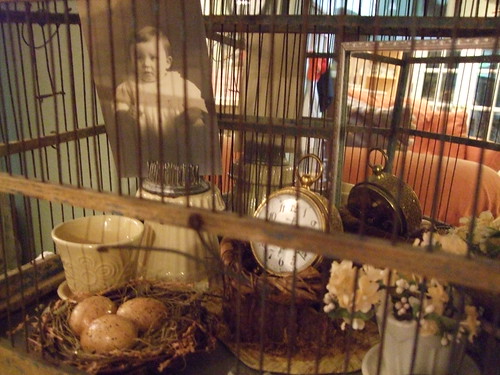
– a nest with eggs
– a little birdie from the craft store
– white lights
– items for the holidays such as Christmas ornaments, glittery hearts, or flags

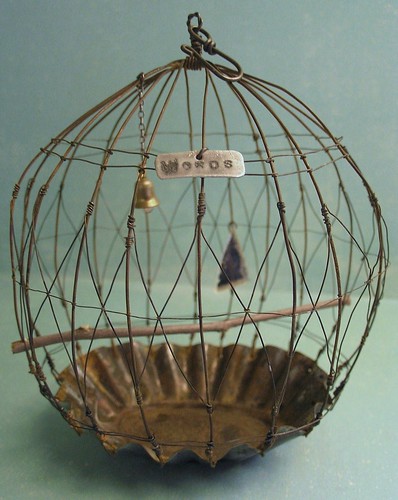
Here are some pictures of how other people have decorated their beautiful birdcages to help get the ideas rolling.

lights in cage

crafted vintage birdcage

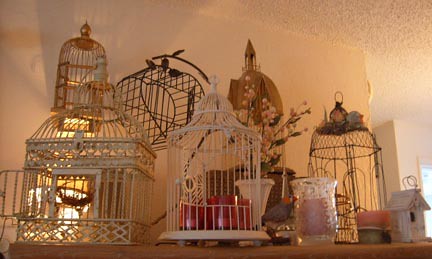
birdcages in living room

shabby chic birdcage

Think of removing the top of an old cage to use as a place to put magazines and things.

close up of birdcage decor

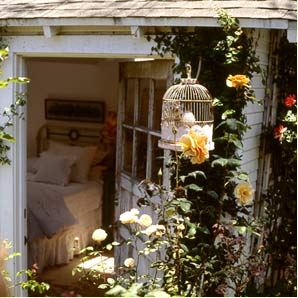
birdcage in the garden

birdcages with candles

birdcages on fridge

bird cage in dining room

tiny birdcage

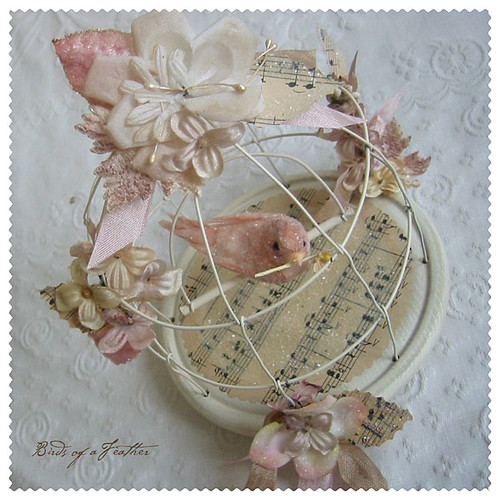
I love the sheet music that was used to line the bottom of this cage for the little singing canary!
decorated birdcage

Birdcages in the garden

black birdcage

holiday birdcage

Who Says Decorating Your Home has to Cost a King’s Ransom & Your Firstborn Child!

I wanted to share some simple ideas with you, to help get you excited about your home during this new year!

Have you heard the old saying “Necessity is the Mother of Invention”? Well, I’ve always thanked God for the opportunity that I’ve had to develop my creativity in a very special way 🙂

As a teenager, I remember a gal who would go into a very expensive department store and buy a whole room display. Then, she would comment on the “deal” that she was able to get, because she bought the whole thing! Of course it cost thousands of dollars, but to her, it was something that looked beautiful – and it was already “pulled together” for her. For some people, having the “work” done for you is a huge relief, but for some reason, I couldn’t be happy doing things this way! I think it’s because, although the end result is wonderful, for me, the creative journey of getting there is still such a thrill!

For many, the cost factor of “pulling a room together” keeps them from even getting started!

Well, no more!

I’m here to tell you… that you can have a beautiful nest the same way the birds do… by going out and finding beautiful tidbits here & there… and then weaving them together into one beautiful nest!

Something to remember

Your “I found this for only $” might be a very different price point than my “I found this for only $” price!

Example: I was talking to a person who was sharing their excitement about a recent find they had made. It was a vintage pine cupboard that they “only paid $1000” for. Although that was probably a GREAT price for that particular piece, my mind was wandering back to the 2 vintage pine cupboards that I had picked up – one was $2 at a yard sale, and the other was $17 at a local auction. Also, sometimes you find great deals like the ones that I found, and other times… not so much. The point? Use what you have, and find the best deals possible.

For this mantel display I brought in several elements from the cottage garden.
home-decorating

Try to have places around your home, that you can “re-decorate” very quickly & inexpensively.

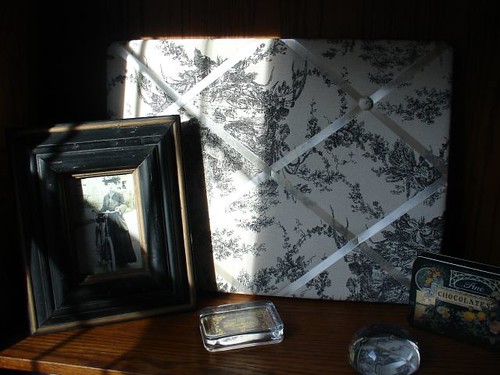
This helps you put off the urge to “re-decorate” a whole room, while still giving you that fresh look you crave 😉 Here’s a small example from an office in our cottage. I have a few things on a shelf that “speak the same message” – paper weights, black picture frame, a small tin with the same colors as the paper weights, and a black & cream toile covered inspiration board. This shelf changes very often depending on the holiday, season, or my mood 🙂

Office Shelf

This is the space during the summer – but between holidays.
Inspiration Board

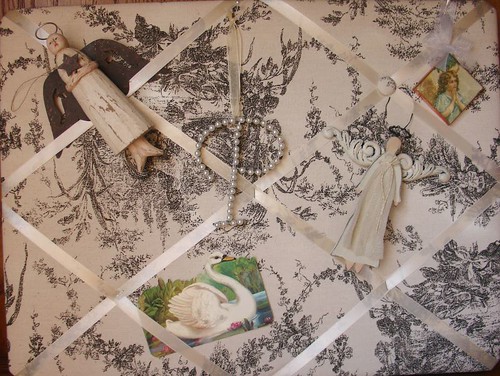
Here’s how I changed it up this Christmas.
Christmas Display

I have a box of different paper items, vintage post cards, broken pieces of jewelry, and other little bits & bobs that I can quickly pick through to change up the inspiration board. Keeping pretty little things doesn’t cost any money either! If I get a card that I like, I’ll be sure to keep the front, and write who it was from on the reverse side. Most of the time, people don’t write to much inside of cards but their name, but if they do, you could keep the whole card. I’ve been known to keep gum wrappers (especially the “5” brand – such beautiful metallic colors!), bits of wrapping paper, cut little pieces of calendars, etc., to use in my displays.

Here is a grapevine garland that I made using vines from my yard, then adding a few little clip on birds that I had in my Christmas decorations. Cost? $0
Victorian Home FSBO

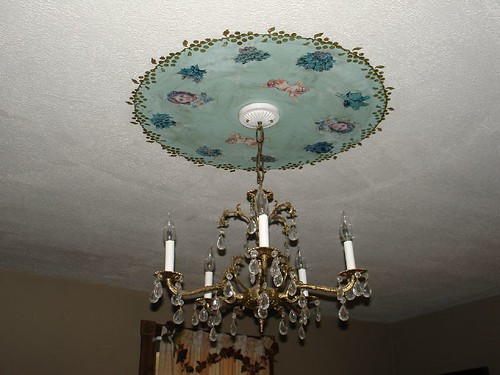
In my previous home, I decorated the ceiling around my chandelier by using some bits of craft paint that I had left over, a few pictures that I cut out of a magazine, and some stenciled grapes. Cost? $0
Victorian Home FSBO

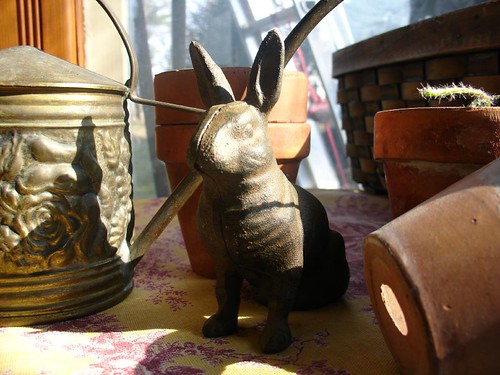
You can make a beautiful natural looking display on a table top or end table by grouping several things that “speak the same thing” – such as these clay pots, some plants, an old watering can, a cast iron bunny, and a basket. They all seem to say… life… well, to me anyway 😉
Garden Things Make Nice Indoor Displays

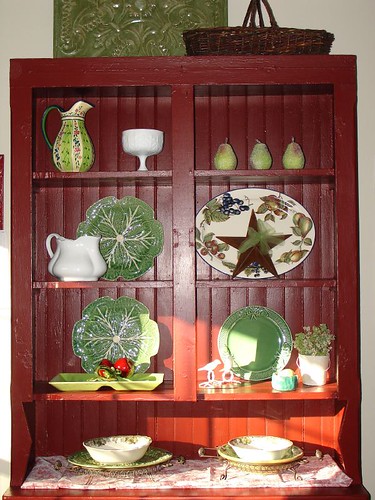
Here is a display made of items that are mostly from the $1 store, thrift store, yard sales, and discount stores. I some of my favorite items that were similar in color & theme. This is a Spring display.
Vintage Pine Cabinet

Here it is in Fall
Vintage Red Cupboard

And last Christmas
Vintage Pine Cupboard Redo

Here’s a little display that YELLS Spring. I used a little greenhouse that I picked up for a couple of dollars at “Big Lots”, an iron bunny, a few plastic eggs, a doily found in the bottom of a $1 auction box, and a picture of roses found at the thrift store for .99!
Bunnies & Blossoms

You might remember seeing the bunny’s sister in the clay pot display or in the picture above? That’s because… I’ve learned, that if you really like a piece like that and you can buy it for a reasonable price, you should probably pick up more than one. That way you can use the second one in other displays around the house.

By this picture, you can see that I decided to pick up more than one iron bunny, and several eggs (they look so real!). Now I have several to sprinkle around the house in different displays, yet they all help pull the current them together.
Bunny Display

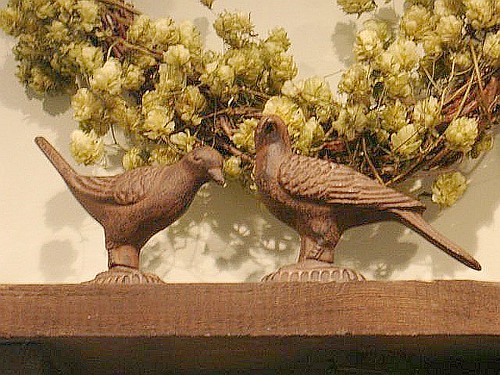
This works especially well if the two items have different poses, such as the pair of iron birds that I found for under $5. This display is a close up of one of the pictures above. The shelf was made by my husband, from an old board taken from a wall in our previous 1856 village home when we re-built that section of the room.
Love Birds

Here are some great ideas from others


Here is a beautiful kitchen island – made from a “found” dresser, with an added tile counter top.
Kitchen Island

Here is a beautiful bench made by Connie over at Life at Treetop Cottage. She used an iron headboard that they no longer needed, then added the extra pieces to make this beautiful bench!
Christmas Bench - Trash to Treasure

Here’s an old quilting frame that was turned into a BEAUTIFUL curtain rod from Home Again Vintage Treasures
Curtain rod

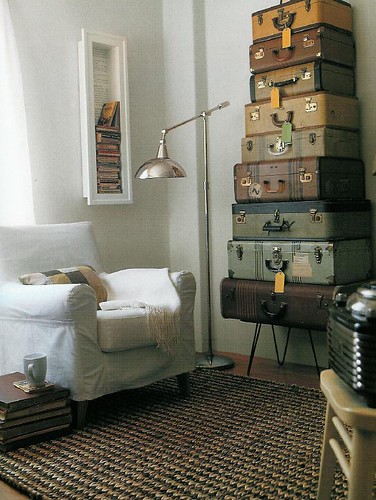
In this picture, several discarded suitcases were used as a new decoration – and new storage! Also notice the picture frame on the wall that now holds books!
Trash to Treasure

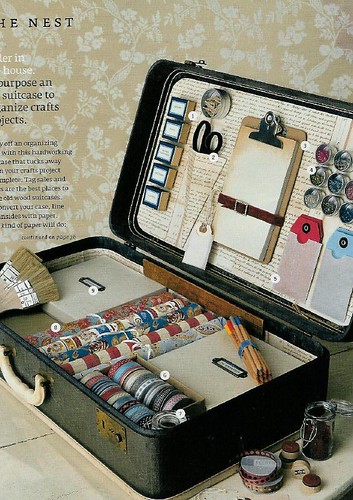
Look at what was done with this discarded suitcase! BEAUTIFUL!
trash to treasure

So don’t let the fear of getting started – or – the cost that others might pay keep you from pulling together beautiful rooms & displays in your home!

Our readers are so creative! Please share your ideas & pictures of your “nest” in our Home & Garden Forums!

Dressing Our Cottage For Autumn

Harvest Table
Today, I though I would share a few pictures of the Harvest decorations around our home. We’ve had alot of fun putting things together this year, and I think we’ve decorated more than we ever have! The kids keep saying… everything feels so warm & cozy! I feel the same way, as I love the warmth that all of the candles & warm colors bring!


Grubby Candle With Acorns
My husband & I picked up the acorns on a walk a few days ago.

Vintage Blue Cabinet
This is my “new vintage” cabinet (I’ll share more about this piece later).

Autumn Harvest Decor
I love the pink & green squash! I picked up the black wooden bowl for $2 a while back!

Smiling Pumpkin Pumpkin Boy

Friendly Spider
Such a happy little guy – and how sweet is that little candy sack!

Black & Orange Pumpkin
I decided to put this pumpkin on a candle stand.

Pretty Pumpkin Pigs with Pottery Platter

Stained Glass Light Black vintage chair with pumpkin

Smiling Spiders
Such a happy little family – the only way I like the little critters 😉

Turkey Needlework
I recently picked up this little needlepoint for $1.25!

Prim Kitty and Candle
The vintage looking bubble glass is actually meant for a light fixture. I picked this one up at Lowes for $3!

Vintage Red Cupboard
I loved the marching crows on these prim tea towels.

Dried Hydrangeas
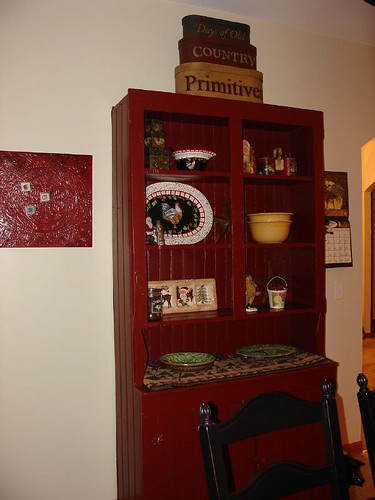
Here’s the top of my vintage dining room cabinet that we bought for $2 at a yard sale!

Vintage Red Cupboard
Putting it all together

Sheep Family
A little family of prim sheep that our good friends bought for us!

Sheep with rusty tin mustard star Prim sheep
Daddy Sheep

Harvest - Home Decor
Entry decor

Beautiful Pumpkin
Here’s a beautiful pumpkin that our friends gave us for a gift last week! I’ve wanted a pumpkin like this for a while, because I love how real they look!

I hope you’re enjoying your harvest decorations as much as we are!

How to Give Your Room a Designer Touch Using Old Chandelier Crystals!

A few years ago I was given an old (but not vintage) brass colored chandelier. The gal who gave it to me said she simply hated the piece & couldn’t wait to replace it with a more modern style of light fixture. Of course, when she offered it to me, I gladly said yes, because I knew that I could think of someway to use it.

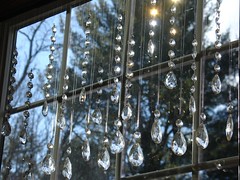
Fast forward a few years after the chandelier has been waiting in my basement for just the right project… A few days before Christmas, I came up with the idea of removing the crystals and finding a way to hang them in the window. I wanted to use all of the pretty pieces of glass, so nothing would be wasted. So… after putting my brain in creative mode, I decided to make a sort of window mobile / curtain of glass.

Step #1 – Remove all of the crystals

crystals

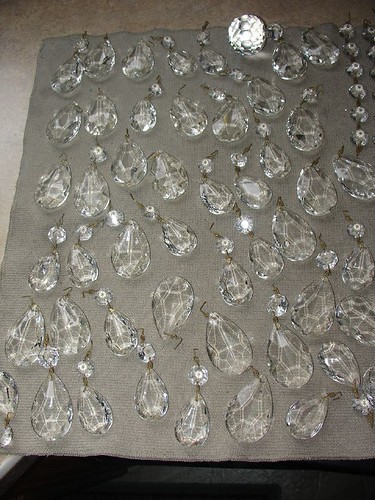
Crystals have been removed & are in a bucket waiting to be cleaned.

Step #2 – Clean
I put all of the pieces in a small cleaning bucket & soaked them in water/dish soap/ and a bit of alcohol. The alcohol helps to keep water spots from forming on the glass.

Step #3 – Lay out to dry
crystals drying

Step #4 – Hang curtain rod inside of window casing.
* Be sure that hanging crystals will not interfere with opening the window – or opening curtains.

curtain rod

Step #5 – String the Crystals
I didn’t want to see the string used to hang each strand of crystals, so I used clear nylon sewing thread (you could also use fishing line). Because I didn’t want to stand up on a ladder & string each crystal, I decided to lay the rod across 2 chairs & stabilize each end with a pair of heavy books. For my project, I wanted the height of each piece to be a bit random, but you may choose to make everything more even.

Step #6 – Hang the rod in the window
* VERY CAREFULLY 🙂

I am really enjoying my new display – even before I have my curtains up… that project will be for another day (soon I hope 🙂