Happy Thanksgiving

Happy Thanksgiving!

Lake Delta Rome NY
This is Lake Delta, a beautiful lake not far from our village.
 

I want to share one of my favorite writings with you today. It’s a short letter
that Fra Giovanni wrote to his friend in 1513. It’s called – “Take Peace”


I salute you. I am your friend and my love for you goes deep.

There is nothing I can give you which you have not got. But there is much,
very much, that while I cannot give it, you can take.

No heaven can come to us unless our hearts find rest in today. Take heaven!

No peace lies in the future which is not hidden in this present little instance.
Take peace!

The gloom of the world is but a shadow. Behind it, yet within our reach, is joy.
Take joy!

Life is so full of meaning and purpose, so full of beauty . . . that you will
find earth but cloaks your heaven.

Courage then to claim it, that is all! . . . And so I greet you, with profound
esteem and with the prayer that for you, now and forever, the day breaks and
the shadows flee away.


May your table be surrounded with love & laughter this Thanksgiving, and may your heart
be filled with thankfulness, as you’re reminded of the many blessings that God has
brought to your home.

Pearl

Happy Valentine’s Day – Conversation Heart Candy

Vintage Valentine's Day Postcard 3

Happy Valentine’s Day!


I wish for you a day of sweetness and joy… and may you be surrounded by those you love!

Exciting Post Tomorrow!

I have asked several friends to participate in a special segment that I have planned for tomorrow. It will be called “Creations Under Glass”

I just love looking at little displays of pretty things under glass, and you will be amazed at what these gals have come up with!

………………………………………………………….

The History of the “Conversation Heart”

conversation hearts

Ever Wonder How Long Those Little Conversation Hearts Have Been Around? As I was walking down the candy isle to pick up some candy for my teenagers to pass out to their friends today at school, I was asking myself that very question…

Nothing brings back memories like candy! And whether you’re only 9, or already 90, you’ve probably received your share of conversation hearts on Valentine’s Day!

Did you know… The new England Confectionery Company (or NECCO), is America’s oldest multi-line candy company, and it still produces 8 Billion candy hearts each Valentine’s Day! That boils down to 100,000 pounds of candy hearts every day!

From the moment they were introduced, the candy hearts were a huge success! The tradition of giving these sweet little treats as gifts on Valentine’s Day has been passed down from generation to generation, which the company says, is the secret to their success.

The original concept of the conversation hearts, which were originally called “Motto Hearts”, goes all the way back to the late 1800’s. Back then, the sayings were printed on colored paper, and placed inside of small crisp candies that were called “cockles” – because they were formed in the shape of scalloped shell. Then, in 1847, one of the founders of NECCO, Daniel Chase, invented the process that allowed the candy company to actually print directly on the candy itself.

Although originally cut in various shapes such as; postcards, horseshoes, and baseballs, the heart was the shape that had the most room for the longer sayings. And when I say longer… I mean longer! If you were to receive one of the original candy hearts, you might see a saying such as;

“Please send a lock of your hair by return mail”

or

” How long shall I have to wait? Pray be considerate”

Although today’s sayings are short & sweet, “Be Mine”, “Be Good”, “Be True”, “My Man”, “Kiss Me”, and “Sweet Talk” are some of the original sayings that are still used. In the early 1990’s, the company decided that every year, they would add new sayings to their familiar line up. Every year people from around the globe send in thousands of romantic suggestions. Although some people have a hard time seeing different phrases on their much loved candy, many younger fans welcome the new changes.

There’s nothing better than a good recipe that you can depend on, and NECCO feels the same way about their closely guarded secret recipe. However, they will share this much… they use; 90% sugar, a dash of corn syrup, gelatin, gums, and artificial colors and flavorings. The dough is rolled out, printed with the sayings, then stamped into the little heart shapes. After 45 minutes of drying, they finally reach the semi-hard consistency needed.

* If you’re a NECCO wafer fan…. Did you know… they use the SAME recipe for conversation hearts as they do the wafers?

If there’s one thing that you can always count on at Valentine’s Day, it’s seeing the colorful little conversation hearts in a store near you. And hopefully… a few of those 8 billion little candies make their way to your house 😉

Christmas All Through The House

Christmas in my living room

Christmas in my Living Room

Don’t you love taking walks through the village streets at night! It gets dark so early this time of year, but each little house shares glimpses of their decorations through well lit windows. Twinkling lights, beautiful wreaths, creative garlands, and wonderfully decorated Christmas trees all speak of the joy of those who dwell inside during this wonderful season!

I thought I’d let you peek in our windows & share just a few of our Christmas decorations with you 😉

Here are some of my vintage Christmas ornaments up close
Christmas Tree

For my dining room table I decided to re-purpose a wreath that I usually hang on the front door! I used a quilt with matching colors, the wreath, a large jar that I picked up on sale last year, and the wreath.
Christmas Table

Some new snowmen for our collection
Christmas Snowmen

I love these little boxes that our friends bought for our anniversary. The santa was my first try at wood carving.
Christmas Shelf

Here is some vintage ephemera that I found in a local shop, buried under some old books.
Christmas tin

Here is the poem up close so you can read it!
Christmas Poem - Vintage Ephemera

Christmas Shelf

Christmas Display

For my tree skirt, I just placed some $2 pr yard black & white toile around the base of the tree.
Christmas Tree

Some new pieces picked up at the local discount store for $5 each!
Vintage SnowmanVintage Christmas SantaVintage Christmas Girl

My “Prim” Christmas Tree

Primitive Christmas Tree

Primitive Christmas Tree

Primitive Christmas Tree

Christmas Bells


I heard the bells on Christmas day.
Their old familiar carols play
And wild & sweet the words repeat, of peace on earth good will towards man.

Here are some Christmas Pictures from last year.

Make Cinnamon and Applesauce Ornaments to Use All Year For Pennies!

Applesauce & Cinnamon Decorations

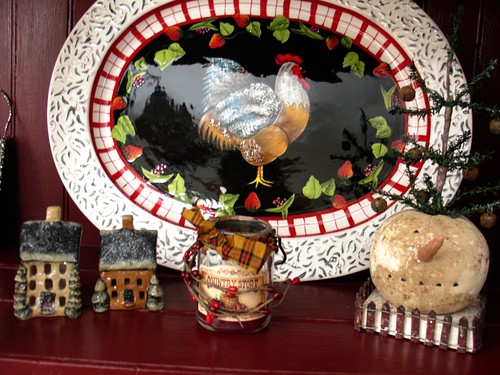
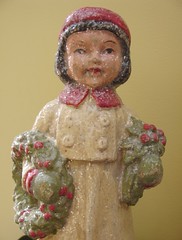
There’s something about the smell of cinnamon & spices at Christmastime! Perhaps it’s the rush of childhood memories of making cookies in the kitchen with mom, or the little gifts that we would make in school? Or maybe it is the smell of pumpkin pie our family would share every Christmas evening that I remember so well? Whatever the reason, nothing says we’re ready for the holidays better than something sweet & spicy being prepared in the kitchen!

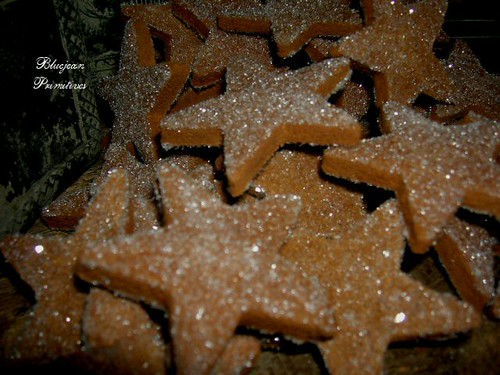
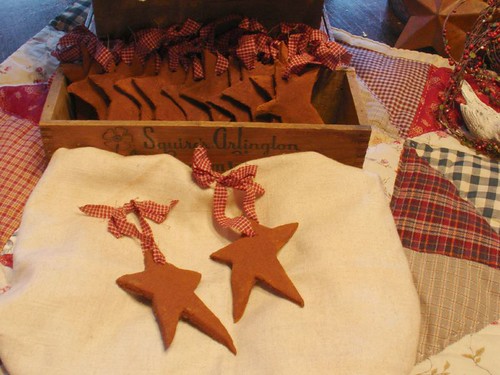
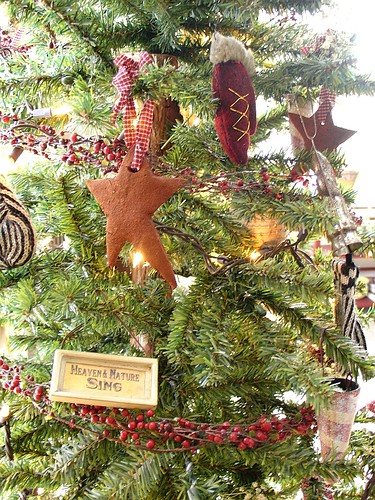
These little ornaments have been warming hearts & homes for many years, and with proper care, they can last a very long time. In fact, the ornaments pictured above are ones that I made several years ago that I still enjoy! All it takes is a simple mixture of applesauce & cinnamon to create beautiful items for your home!

To make these ornaments you will need:

Equal parts of cinnamon & applesauce – I suggest 1 cup each for your first time

Mix in a bowl and stir until well blended. Work mixture in hands for several minutes to form a ball. If mixture is to dry, add a bit more applesauce. If it’s too wet, add a bit more cinnamon.

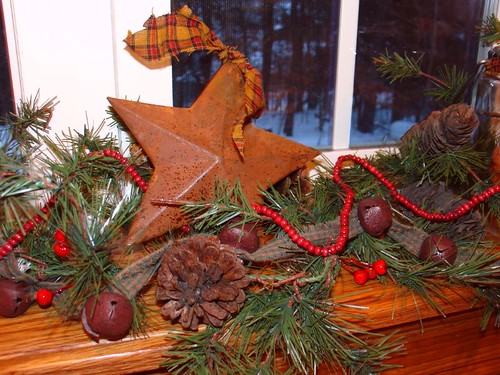
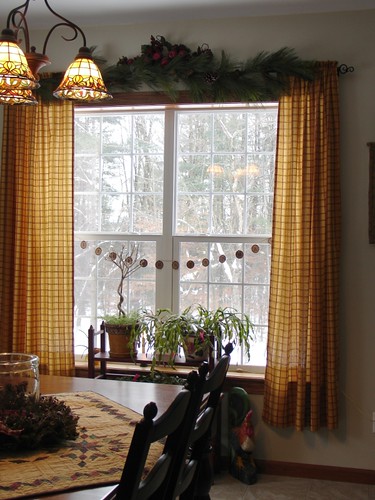
Knead ball on cinnamon sprinkled surface until it holds together well. Then, roll out using a rolling pin sprinkled with cinnamon. You can use your favorite cookie cutters, or templates that you’ve drawn yourself to cut out your shapes. As you can see by the picture, for this batch, I chose to use a template of some little primitive stars for our shapes. I like the ornaments to be a little bit thick. This helps keep them from breaking over the years.

Place ornaments on a cookie sheet that has been sprinkled with cinnamon. Use a drinking straw to cut out the little circle that you will use to hang your ornament.

Air dry for 24 to 48 hours – turning several times. You can also place the cookie sheet in a very low oven (around 200 degrees), which will help them dry much faster. Remember to turn several times.

When you pack the ornaments away, be sure to cushion them to keep them from breaking. And, if they start to loose their scent over the years, add a drop of cinnamon oil to bring back the wonderful aroma!

Primitive Christmas Tree

Save money and make this a VERY inexpensive project!

– Buy your applesauce in the large can in the bulk section of your super-mart

– Buy your cinnamon in the generic containers from the super-mart or the local discount store. I can usually find larger containers of cinnamon 2 for $1.

Use different materials to hang your ornaments

Try using things such as;
– yarn
– clear fishing line
– ribbon
– raffia
– twine or hemp
– strips of homespun fabric – my favorite, as I buy it at super-mart for $1 pr yard!

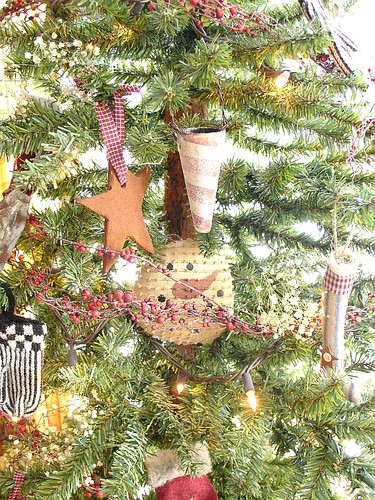
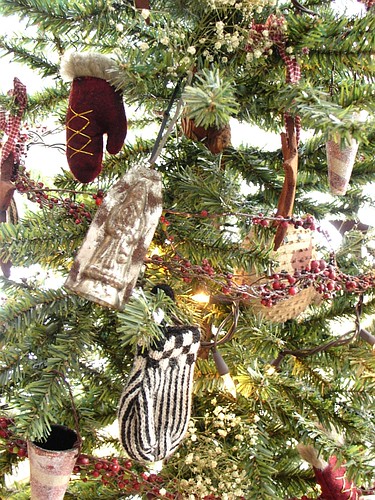
Different ways to use your ornaments

1. Decorate a small Christmas tree using only these ornaments, then as your guests leave, take an ornament off and give it to them as a little gift.

2. Use as gifts for teachers, the postman, your hairdresser, or any other person that you need to give a little special something to.

3. Use them as a gift tag or package decoration by using paint to write the person’s name on the ornament.

4. Do you make baked goods or jar mixes as gifts? If you do, add one of your ornaments to the jar or package by using a strip of homespun fabric to tie it on.

5. Use your ornaments to make a beautiful garland!

6. Add to a wooden bowl of things such as; potpourri, rusty bells, cinnamon sticks, whole cloves, apple rings, and dried orange slices.

7. You can add extra touches to your ornaments with acrylic paints, or glitter. You could also dip them in wax, then roll them in cinnamon for a wonderful “grubby” prim look!

Remember…
It doesn’t have to be Christmas for you to make these creative little beauties! How about hearts for Valentines Day, flowers for Mother’s day, and stars for the 4th of July! And, I know of many people who like to keep a little primitive style tree up all year long. They have the lights on it, and then they decorate it according to the holiday or season in which they are in.

You don’t have to make them yourself!

If you love the thought of using these creative little ornaments, but don’t have the time or energy to make them yourself, I still have the perfect plan for you!

There is a gal named Jean that makes these little beauties & sells them in her online shop. Of course, hers are a bit different than mine… as she uses her “secret recipe” to make the ornaments purely out of cinnamon 😉 She has a whole store full of beautiful things that she makes, and everything is priced very nicely! Her store is called: BlueJean Primitives
Check out all of the other wonderful things she has there – including some beautiful fabric covered primitive boxes!

Here are her beautiful little stars!
Applesauce ornaments

How to Create a Window Display in 15 Minutes or Less!

Christmas Garland in My Kitchen Window

When it comes to decorating for the holidays, or rearranging your home according to the different seasons, some people do not take kindly to change! I suppose it’s because we are said to be creatures of habit, and most people usually like things to remain the same. The minute you try to change things, or decorate differently, you might hear sighs that sound like this… “we can’t do that” or “we always do it this way”!

I’m not sure why, but I love to have things continually changing… especially when it comes to decorating our home! I look forward to creatively using what I have, adding little bits here & there as I find good deals, then bringing it all together to create something beautiful for our family to enjoy!

When it comes to changing things around for the season, one of the easiest & most rewarding ways to bring decorative change is by creating a display in your window. There are several reasons for this, a few being…

1. You can enjoy the display from the outside as well as the inside

2. Because you spend alot of time looking out your windows, the decorations will be a frequent source of enjoyment

3. You can use found objects and items from around your home to create your masterpiece

4. Changes are quick to do – 15 minutes or less

To help keep my decorating items organized, I like to use see through plastic containers for each season. Then, as you acquire different items for use in your displays, simply tuck them away in the box for that season. This will not only help you stay organized, but it will also help you put together beautiful displays in just a few minutes!

Here is one window display example from this year’s Christmas decorations. The window is over my kitchen sink, so I get to enjoy it quite a bit 😉

I like to use some sort of greenery to start with. You could use a piece of pine garland from last year’s decorations, or some of your trimmings from the yard outside. Then, intertwine some of your favorite things around the greens. Here are some of the things that I choose to use.

– Rusty bells – I picked up a bell garland at an end of season sale for $1.50

– Homespun fabric strips – $1 per yard at discount stores

– Berries – $.50 per bag last year – I twisted 3 at a time around the greens

– Pine cones – free from the yard

– Bigger rusty stars – $2 at end of season sale – I added a homespun bow

– Empty candle jars – I save my candle jars, add some homespun, and tuck in a grubby candle

– Wooden butter bowl – picked up at auction in the bottom of a $1 box!

– Red wooden bead garland – bought at end of year sale for $1

– Grubby candles – I pick them up when I find them on sale

Grubby Candle Tip: When you burn a grubby candle, the inside usually burns down faster than the outside. When my candles have a nice center that’s melted down, I tuck a tealight candle inside and light that instead of burning the bigger grubby candle. Now you have the best of both worlds… a beautiful grubby candle, that is lit by a tealight candle. Because you can buy tealight candles in bags of 100-200 for under $3.50 in your local discount store, this helps your beautiful (more expensive) candles last a VERY long time!

Grubby Christmas Window Garland

Because I have a counter right below this window, I decided to keep the display going on each end of the window. Here is the little “end cap” to the decorations 😉

Christmas Display

Vintage Snowman

To finish everything off, I give a few sprays of my favorite potpourri and now everything really smells like Christmas!

Here are a few other windows around our home.

Christmas Window

My Kitchen Rooster

Window Project
How-to for this window project


Ideas From Other Folks

Window display
A shelf made to look like a window display – using a mirror!

Paper garland
I love this simple & inexpensive idea! Simply use some newspaper cut into shapes, and add your tidbits to them! So pretty & so simple!

Christmas Front Door
Have a pair of skates that are not being used right now? Why not use them to make a beautiful creative display!

Christmas Window

Star Garland

Christmas card garland
Using old Christmas cards & some trim

garland

red Christmas

Christmas kitchen window

Christmas Tips and Ideas For Your Holiday

Vintage Holidays

Dickens Christmas Sleigh Bells Ring


Dickens Carolers

To help make your holiday a memorable one without the high expense, participate in local Christmas festivities! When we went to pick out our Christmas tree, we stopped down in the village to enjoy the Christmas celebration. There were carolers dressed in costume that looked like they stepped right out of a Dickens’ tale, horses with jingle bells around their necks giving sleigh rides around the village, and church bazaars and bake sales on every corner – filled to the brim with lots of goodies.

Look in your local paper (and online) to see what’s going on in your area.

Here’s an example of a Special Christmas Celebration that happens every weekend in a village near us. It’s called: Dickens’ Christmas in Skaneateles, NY

I’m sure that you will be able to find lots of great ways to celebrate with your family!


Here are some quick tips:

Snowflakes

Have the kids make paper snowflakes, lay them on top of a chocolate cake, sprinkle with powdered sugar, carefully remove snowflakes. You now have a beautiful snowy scene! This is a very inexpensive way to decorate your holiday cake!

Snowflakes

Make mittens out of fabric of choice & use in place of the usual Christmas stockings. You can make the mittens match your decorating style by choosing coordinating fabrics. I would use cream colored wool – lace – buttons & trims.

Snowflakes

Did You Know…
Christmas didn’t become a Federal Holiday in America until June 26, 1870 – by President Ulysses S. Grant.

Snowflakes

Organize your magazines by months, take out all of the Dec. issues & place them on a coffee table. You’ll love having so many Christmas ideas right at your fingertips!

Snowflakes

Lots of great Christmas gift ideas – Cheap!


Snowflakes

Did you know…
The Christmas tree industry employs over 100,000 people yearly between 21,000 different Christmas tree growers in the US?

Snowflakes

Did You Know…
A snowflake can take up to 2 hours to reach the ground!


Snowflakes

Christmas Decorating Idea…
Instead of using regular paper for your paper chain projects, why not use other materials such as; wallpaper scraps, decorative scrapbook paper, pieces of wrapping paper, or left over pieces of silk ribbon!

Snowflakes

To add some glitter & sparkle to your decorations, spray paint different kinds of nuts with your choice of colors! Silver & gold make stunning displays!

Snowflakes

Did You know…
The poinsettia is a plant that is native to Mexico. The plant got it’s name from Mexico’s first American ambassador, Joel Poinsett, who brought the plants back to America in 1828.

In the 18th century, Mexicans thought the beautiful red star shaped leaves were symbolic of the Star of Bethlehem. This helped the poinsettia to become a favorite traditional plant at Christmas.

Websites to Visit For Great Christmas Ideas!

Great Christmas Cookies Recipes & Pictures!
http://www.joyofbaking.com/ChristmasCookies.html

Everything You Need to Know About Beautiful Paper Snowflakes
http://www3.ns.sympatico.ca/dstredulinsky/home.html

How to Take Great Pictures of Christmas Lights
http://strobist.blogspot.com/2006/12/how-to-photograph-christmas-lights.html