I LOVE vintage pine cupboards! I’m not sure why they hold such a special place in my heart, but they do. There’s just something that feels so “heart & home” about them. Perhaps it’s the memories of grandma’s kitchen, scenes from some of my favorite movies, or captured ideas from magazines that have stayed with me. I’m not exactly sure, but in any case… I LOVE them!
I know these bigger pieces can be VERY expensive, many times costing $300 – $2,000 or more! But, out of my 3 largest vintage pieces, the most I’ve paid so far is $50… which is the piece I’m sharing with you today. I found my largest piece at an estate auction for $17, and another vintage pine step-back cupboard at a yard sale for $2! You can find great deals as well, if you’re the last to leave estate auctions (the best deals are to be had after the large buying crowd goes home & the auction heads to the garage, basement, or barn 🙂 ), and if you keep your eyes open at yard sales & curbside during trash day!
This new piece had a destiny of becoming my new “Cabinet of Curiosities”, and as you can see in the before picture, it started out being a bright blue. I know that many people would have left it just the way it was, but the room it was going into was a soft blue & antique white, with black accents… so I wanted this piece to have a softer feel to it.
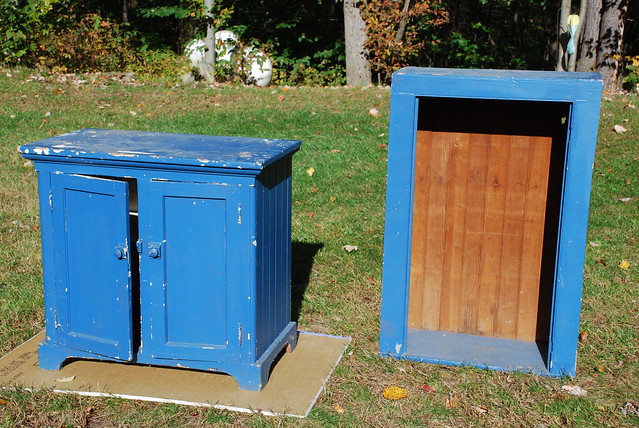
Because I wanted to use this piece to display special objects, I wanted the inside of the top to be painted dark, so everything inside would pop against the dark color. I finally decided to use flat black. As a matter of fact, we decided to give the whole cabinet a coat of flat black, then a coat of antique white. After it dried completely, I gently sanded off the antique white in some spots revealing the black underneath, to give it a more vintage look. To finish the piece off, I wiped the whole thing (except for the inside of the top) with a very small amount of antiquing glaze.
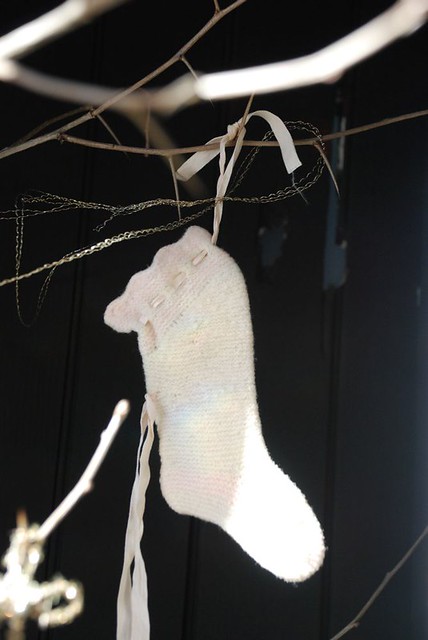
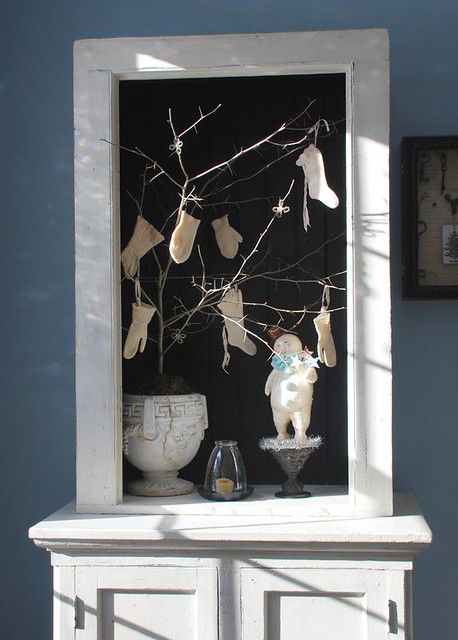
You can see how nice all of these vintage stockings & mittens, that I found for $3 at a yard sale, show up here in the Winter display.
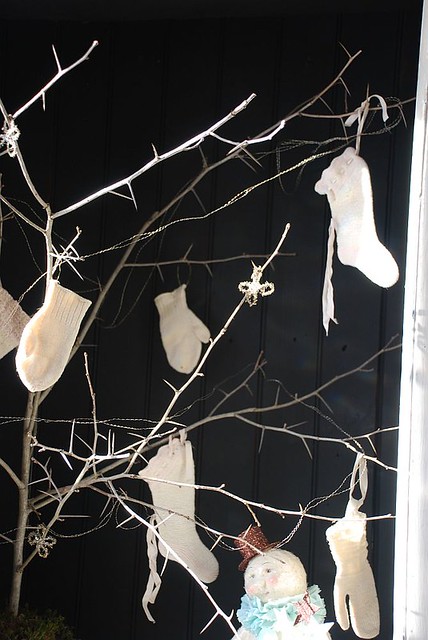
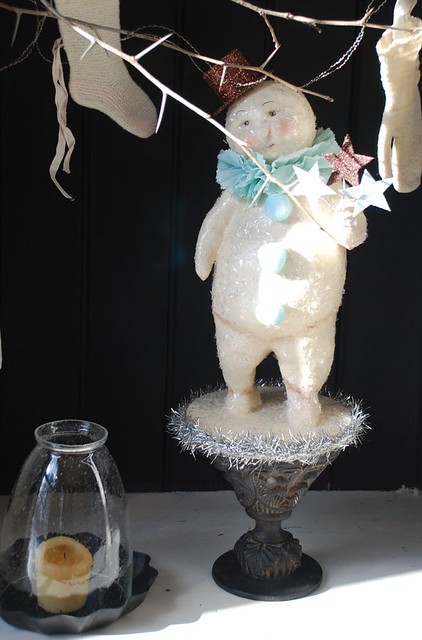
For the Winter display, I started with a vintage garden urn, added a branch from a thorn apple tree, tucked in some moss around the base of the branch, hung up my vintage mitten & stocking collection, strung vintage wire that I kept from a broken Christmas ornament, added a candle covered with a bubble glass globe, and let my vintage style snowman stand guard over it all.
Here’s a close up of my beautiful snowman. I love how his colors just pop against the black background!
Don’t be afraid to change up some of the pieces in your home. I hear from people all the time, that are afraid to use paint & go with new colors for fear of not liking the finished product. But I say… what’s the worst that can happen? Maybe you’ll have to paint it again, but then again… maybe you’ll love it! At least step out and try it, and let your creative ideas come to life in your home!
I really love the finished product, both the display space, and the storage space for all of my stationary & office supplies. I already have lots of ideas about how to change up the display for every season! What do you think? How would you decorate this piece? Let me know by leaving me a comment below 🙂
I just adore that! It’s like a huge shadowbox…..I’d love to change out that display seasonally…..well done.
If you have a minute, pop on over to my blog to see how I re-did an old pepsi crate, with a lot of inspiration from Vanessa Spencer on the Stampington blog..;).
Gail ~ I love your crate re-do…so cute & lots of space to display your little treasures 🙂
Pearl