Free Grape Vines for Your Garden Arbor

Grape Vines on a Garden Arbor


“Let us get up early to the vineyards; let us see if the vine flourish, whether the tender grape appear, and the pomegranates bud forth: there will I give thee my loves.”
Song of Solomon 7:12


There is something so romantic about a vine that is dripping with clusters of ripe grapes! Sight, smell, taste, thought, texture… somehow, all of our senses become involved when we come in contact with this beautiful vine!

My husband & I were out for an evening walk through our little Victorian Village on a chilly Autumn evening, minding our own business, when suddenly… the amazing sweet fragrance of ripe concord grapes started wafting around our heads, almost as if they were tantalizing us to come & find them! Following the sweet fragrance (one that reminded me of those yummy peanut butter and jelly sandwiches on a hot summer afternoon), we finally came upon the vine. I’m almost sure that God blessed the grape vine with it’s heady fragrance, just so it could beckon passersby, such as ourselves, to come & enjoy it’s splendor!

Words can’t describe the beauty of the leaves, that were now dressed in their Autumn finest. Deep reds, chocolate brown, purple, and orange are just a few shades of the colorful mix. Nor can they describe the beauty of the vine itself, twisting and turning, and winding around everything in it’s path, seemingly taking ownership of everything this side of the garden. The brown splintered bark and corkscrew shaped tendrils, were reminiscent of the beautiful wreath that hangs in my cottage welcoming our guests. But sweetest of all, were the clusters of deep purple grapes that seemed to be layered at every twist and turn of the vine.

There’s nothing quite so romantic as a cottage garden path covered in vines that are dripping with grapes to welcome every guest into your home. And, contrary to what you might think, these precious vines are very easy to grow!

Here’s a way that you can have your own vines to dress your garden free of charge!

Perhaps you have a friend, or friendly neighbor, that will allow you to use this method with their vines this fall. If not, you could put out a request on one of your favorite lists such as; craigslist.com, gardenweb.com, freecycle.org, etc. I’m sure that you will be able to find a willing gardening partner!

Start a new grape vine from an old one

In late autumn (you can usually tell the right time, because it is no longer necessary to mow the grass), take a section of a grape vine & bend it down so it can touch the ground. With a fork or other small gardening tool, lightly rake up the soil a bit to make sure that the vine will be able to root properly. Holding the vine down to the ground, brush some of the soil on top of the vine. Then, use a small stone or branch to hold the vine in place. Be sure not to use something heavy enough to smash the vine, but just heavy enough to keep it from becoming dislodged. For now, that’s all you need to do. Then, come early spring, clip the section of vine from where it is attached to the main branch. Now, all that’s left to do is… plant your new grape vine in your cottage garden. You can continue to use this multiplying technique using your new plant, and in a few years, you could have a whole vineyard!

* To make more than one plant at a time, simply bend a longer section of vine down to the ground, weight it down to the soil in several places. Then, cut each section apart in the spring.

Now… it’s time for you to go out, take a walk, and have the sweet fragrance of the vine come and find you 😉

A New way to flip through, search, and read books online before you buy

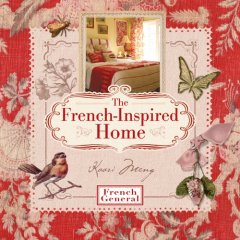
The French Inspired Home

I wanted to share a great new resource with you, that I have really been enjoying this month!

A while back I wrote an article on my website called: Great Ideas For Finding Cheap Books, Discounted Books, and Free Books

The article has lots of ideas for saving money buying & selling books. It also show you some methods of researching books before you buy them.

Since that article, I have been enjoying another new method of “flipping through the pages of a book” before I buy it. It’s similar to sitting down in a comfy seat at Barnes & Noble reading bits of the book to see if it’s something you’d like to take home with you or not.

This new method, is a brand new service offered by google called – google books. Although it’s still in beta testing, it is available to use fully right now – and it’s FREE of charge!

Here’s how it works:

You simply go to the book section of google, type in a book title (or keywords that you may like to look into – such as gardening, home decorating, etc.), and click search books. Then, a list of available books will come up for you to look through.

Even though you might not be able to read the entire book (they omit some pages to make you still want to go buy the book – as well they should), they usually have a large portion of the book online for you.

I have used this service to look through many different kinds of books, and have found it to be very helpful in determining if I want to go ahead & order the book through amazon. Although Amazon does have a service to allow you to “flip through” the book, the amount of content is extremely limited compared to the new google service.

Perhaps you’d like to look through some of my favorite books on topics such as; home & garden, home decorating, kitchen, art, etc., then go over & peek inside using the google service before you buy!

Finding New Uses For Old Things

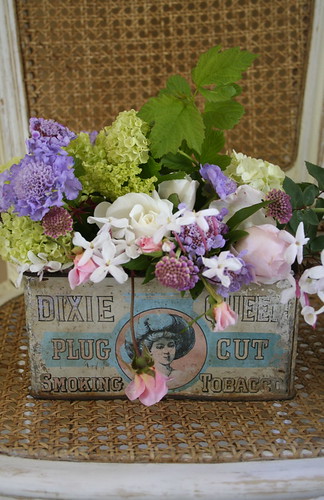
Using a vintage advertising box as a vase for flowers

vintage advertising and flowers


For those of you who might not know… I have had an online newsletter, and a home & garden website for several years now. Because of this, I tend to get lots of email from readers. I love to exchange creative ideas for our homes & families.

Feel free to respond in the comment section below. I’d also love to hear from you 😉


Letter from a reader:

Hello Pearl,

I hope that my frugal-living-goal may be helpful to you and your readers. Notice that I said “goal” as I’m still trying to achieve it. Here goes:

I live in an economically advantaged county, probably one that has a higher average family income level than other counties in the state. Whether it’s right or wrong, many households in this county have enough disposable income to want to update or upgrade their possessions. They feel free to either donate items to thrift stores or to throw the items away outright. I take advantage of this.

It is my personal goal to show that a person or a household can live in a comfortable and attractive way, with all possessions being second hand (with many items being free). I rescue items from the curb, I shop at thrift stores, flea markets, and yard sales. I take in many more items than I can use personally, so I fix things up and donate them to other families or to thrift stores.

Fortunately, I love the cottage and shabby look, and have small collections of pretty collectible items. I try to have all my possessions serve a double purpose, but some items are purely decorative.

I find that this is a very motivational goal – plus it’s FUN!

Hope you can use my idea – Best Wishes!

* Dear Reader,
I share your love of finding new uses for old things! Most of the time, items can be used in many more ways than one! If we would just look a the items that we come across with eyes of creativity, a whole new world of ideas would be opened up to us! Bravo for your efforts in helping bring new life to the old things you come across, and we WOULD LOVE to see some pictures of your creativity!

Here are a few ideas to get everyone started in thinking “outside of the box” – the garbage box that is 😉

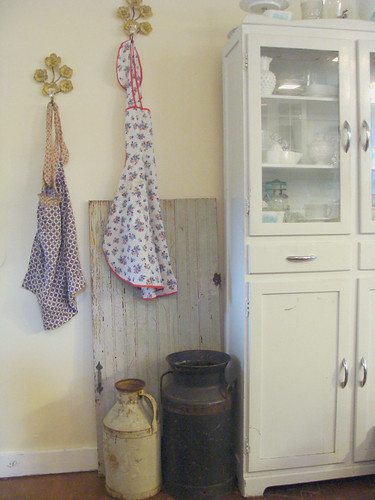
Vintage Aprons to decorate a bedroom
Aprons on the wall

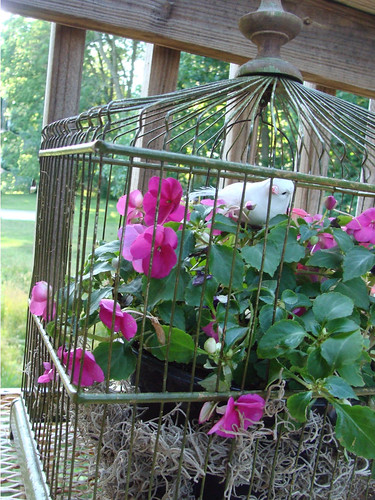
Vintage birdcage as an artful planter
Vintage Birdcage

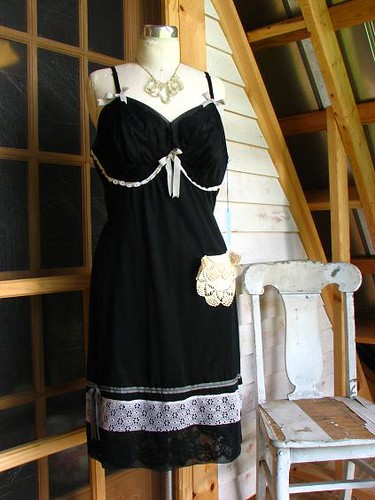
Vintage slip becomes an evening dress
vintage slip

Vintage glass bottles become a fabulous chandelier
vintage glass

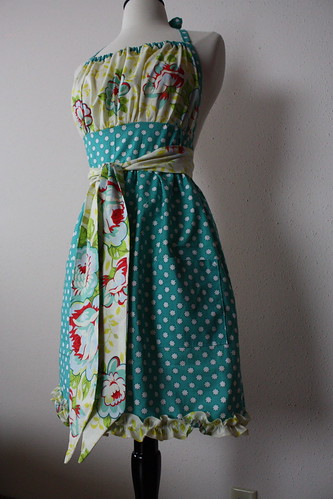
Scraps of vintage fabric come together as a wonderful apron!
Pretty Ditty Aprons

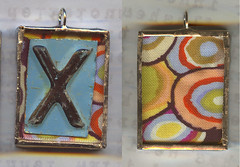
Licence Plates turned into charms!
jewelry

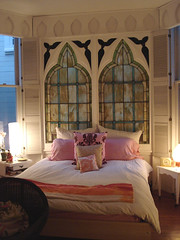
Stained glass windows used as headboard
stained glass windows

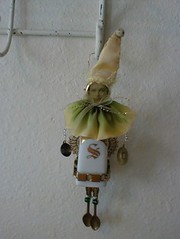
Vintage salt shaker turned into a beautiful little doll/jewelry
vintage salt shaker

Old soda caps made into magnets
Soda Bottle Caps

Penny Rugs – How to make these great gifts for pennies!

Vintage Style Penny Rug

Recently I received this email request from a dear friend. I wanted to share my response with you – especially since the holidays are coming up & this would be a nice gift to give – for very little cost!

Hi Pearl,

I was wondering if you had or know of a place where I can get some directions on how to make a Penny rug runner. I thought this would be an interesting project to make. I just don’t have a clue how they are made.

I love the look of the wool and the colors for fall. I’ve found places to buy them but I would like to try to make one.

Hope you had a great vacation.

Lois


Dear Lois,

Good to hear from you! Yes, we had a wonderful time visiting with family over the last few weeks. We spent our time participating in a youth conference at my parents church, resting, visiting, and a quick trip to Baltimore. We especially loved the aquarium! I’ll have to post some pictures here real soon.

I hope the information below will help answer most of your questions. I just love penny rugs, especially when they are made out of all of the vintage prime colors! I especially love to see them used during the Autumn season with all of the rich golds, browns, and reds!

What is a penny rug?

felt penny rug

As we all know, women are by nature extremely creative & very resourceful.

Ok…well, most women 😉

But back in the 1800’s most women had to make the best of the resources that they had, especially when it came to things such a splurging on decorations for the home. So, they would keep the small bits and pieces of the wool and felt that they collected from their clothing, hats, coats, blankets, etc., and then use these precious bits of fabric to make beautiful decorations for their homes.

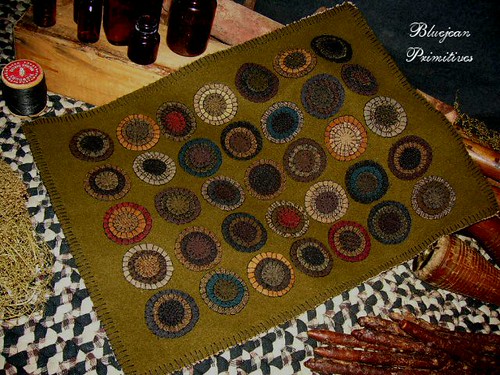
When they had a nice basket full of little snippets of fabric to work with, they would sort them into piles of similar colors. Then, to form the desirable circular shapes, they would use a coin as the template to cut their fabric pieces from. Using something as small as a coin would insure that the smallest of scraps could be used in the project. This is how the term penny rug came to describe these little pieces of art.

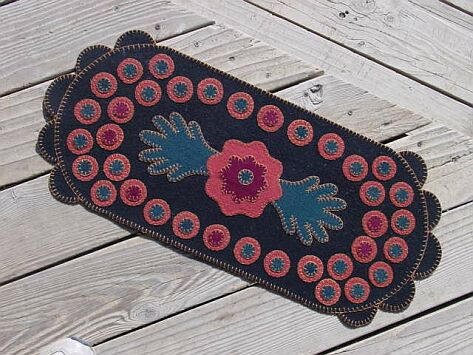
What’s also interesting is, the penny rug was not normally used as a rug at all, but rather, as a decorative cover for a bed, shelf, wall hanging, or table runner.

Pink and black penny rugRobin’s Rug

After cutting all of the different circle shapes, each color was put into it’s proper pile, where it would wait for it’s turn to become a part of the finished design.

The finished size was determined, then a piece of fabric (wool or felt) was chosen as the base for the rug. Each circle was then placed on top of the base in the desired pattern, so the creator could decide what the final design would look like. Once satisfied with the design, each piece was then secured with a straight pin so it could be stitched together.

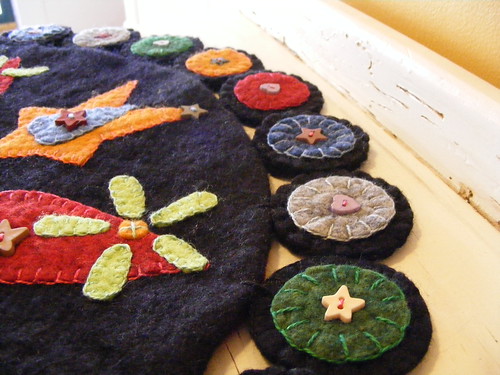
Although any style of embroidery stitch could be used, the one most commonly used to applique the individual pieces of fabric in the penny rug was the blanket stitch. Bright colors of thread, that were different from the piece of fabric being stitched, helped the pattern to stand out even more, and also added another creative layer to the piece. Depending on how intricate the creator wanted to be, the circles might also be stacked in several layers, each smaller and a different color than the one below it. Sometimes the rugs were backed with a piece of an old burlap bag or feed sack, and on special pieces, an actual penny was stitched under one of the circles to help weight it down.

Although circles were the main shape used in early designs, any shape imaginable could be used in current designs. I have seen some beautiful pieces made with shapes such as; stars, hearts, snowman, crow, and trees. There’s really no limit to the designs that you could come up with, you simply want to be sure that the pattern can easily be hand stitched around each edge.

wool penny rug

Materials to use in making your penny rug

Most penny rugs were made using wool, and felted wool. Although felt was handcrafted in years gone by, we are blessed to be able to buy felt by the square (usually a 12X12 square) or by the yard in most craft/fabric stores. Last year, I picked up some wonderful thick felt yardage, which came in colors such as dark mustard, chocolate, deep red, and cream. Check the prices, but I found that buying my felt by the yard was much cheaper than buying it by the square.

If you’re an adventurous soul, you could try your hand at felting your own wool!
Have you ever thrown a wool sweater into the washer/dryer without realizing it? Then, when you took it out, wondered who the tiny cute little sweater belonged to – only to realize that it used to be a human sized version of YOUR new sweater? Then you already have all the experience you need in felting wool 😉

Simply go to your local thrift store, yard sale, or your own closet, and pick out a cheap wool sweater (I suggest 100% wool) of your color choice. Keep your eyes open for sweaters with small holes or other damage, as these will turn out to be real bargains for you. First, cut down the side seems, separating the front from the back. Then, remove the arm sections, and cut down the long seem. Throw these pieces into the washer, and wash on the hot cycle with a bit of laundry soap. If you’d like, you could also throw the pieces into the dryer as well. You can expect the pieces to shrink up to 70% in size! When the material is dry, you can cut it into the desired shapes for your penny rug.

cutting shapes for your penny rug

Embroidery floss makes the best choice for sewing the pieces together, and you can buy nice large bundles of different colors at your local craft/fabric store.

How to Construct a Penny Rug


Free Penny Rug Patterns

Here are some free penny rug patterns, as well as a few how to articles to help you with ideas… but the best patterns come from your own creative ideas – just like the gals in the 1800’s 😉

Christmas Tree Penny Rug

Roosters & Flowers Penny Rug PatternThe Instructions

Circle Table Runner Penny Rug

Warm Hearts Penny Rug

Autumn Leaves Pattern

Penny Rug Coaster Pattern

Backyard Bling – Using Candles, Glass Beads, and Chandeliers to add Sparkle to Your Outdoor Space

colorful garden candle holders

I recently received a letter from a reader in response to an article that I had written about decorating with chandelier crystals.

After Rebecca saw the idea, she sent me this question…


Dear Pearl,
I think that your idea is so creative! But I am having a bit of a problem. Instead of taking crystals off of a chandelier, I want to put crystals on one. I have a really cute patio set that’s just begging for a little bit of light. I already have a wrought iron chandelier with some candles on it. I burned the candles for a while so they would get that cool drippy look, and now I would love to hang some crystals on it. I just can’t seem to find a place that sells them. Do you know of any places where I could buy some? Also, what do you hang them with? I want something a little more artsy than fishing line, but I don’t think that ribbon will hold up outside in the California summer. Any thing you can suggest? Thanks so much for your wonderful idea, I will have to try it sometime!
Rebecca


So… I thought I would share a few ideas to help get even more creative ideas flowing.

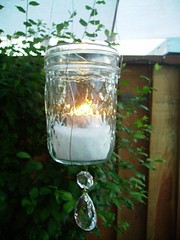
This sweet little candle holder is a simple glass jelly jar. I like to save jars from our pickles, jelly, and other sauces to use for other uses such as flower vases, candle holders, and pencil holders, etc. A simple jar, metal wire, a crystal bead, and a tealight candle can pull this look off for under $1! These little lights would be beautiful hung throughout your garden.
hanging candle holder with crystals

This display is made even more special by using different colors. It also appears as though the crystals are hanging on ribbon. The other beads that are threaded on the ribbons also make a very nice touch.
crystals with ribbons

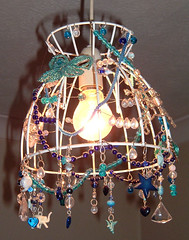
This is a nice example of a chandelier that someone has tied on different crystals and glass beads using different colored strands of metal. Also notice the use of tealight candles where electric fixtures may have once been.

lampshade chandelier

Many ideas come to mind while looking at this piece. You could take any metal lampshade – strip off the fabric – and use the frame for building your new artsy light fixture. Simply hang a jar from the center – or several jars around the outer edge for holding your tealight candles. You can then build your fixture by adding all of your special touches.

Also, you don’t have to stop with your chandelier crystals! You could also add any number of other items that you might have around the house such as; spoons, forks, vintage keys, strands of beads from old necklaces & bracelets, large seeds, buttons, shells, marbles, beach glass, small ornaments, charms – or anything else that pops into your creative mind 🙂

To hang your objects, you could use fishing line, metal wire, copper wire, ribbon, twine, or anything that will hold up outside. You could twist, knot, drill small holes, glue, or any number of different methods of holding everything together.

Make sure that any electrical element is made for outdoors if you plan to use it outside.

The final look of your piece will totally depend on your personal taste, and what kind of look & feel that you’re trying to accomplish. Just remember, the rule is… there is no rule! It’s your “nest” so use your imagination to feather it in any way you choose 😉

[Added Note]
* You can pick up crystals & other objects for your creations in a number of places. You can look in the local paper, yard sales, thrift stores, craigs list, or online stores such as ebay.
Below I’ve included a sample of things that you can find currently on ebay.

Several New How-to Articles Today!

Cherry Cottage Red Mosaic
Recent “Best of Home & Garden” Award Winners!

Cherry Cottage Red Mosaic

I wanted to share several new articles that I’ve added to the article bank today. I hope many of you are able to use the information in these new how-to resources. If you would like to share an article, tip, or resource with our readers, please feel free to send me a post below!


Your Own Family Homestead For Pennies on the Dollar

Ideas For Your Own Home Business

Back to School for Less

Head Lice – How to get rid of head lice quick, easy, and cheap!

Lavender – Fragrant Luscious Lavender for Your Garden