How To Eat An Artichoke

Artichoke? What’s that?

Seriously though, it wasn’t until the last few years that I had ever really eaten an artichoke. My family was from the south, and we usually stuck with your everyday “normal types” of veggies, so believe me when I tell you, that I wouldn’t have been able to tell you what an artichoke was if you had asked me!

Skip ahead to the last few years…

I LOVE ARTICHOKES!

My husband & I have raised our family smack dab in the middle of Italian country, and let me tell you, they love their artichokes! But even with my new found love of this veggie from heaven, I still have never been brave enough to buy them from the store & cook them myself… until now!

If you’re anything like me, you love the great artichoke recipes that you have out in your favorite restaurant, but haven’t braved the “cook your own at home” scenario yet 🙂

So… I’ve decided to share a few GREAT resources that I have recently come across, that I think will help you uncover the mystery of cooking artichokes at home. Even though there are several different ways to prepare artichokes, they are delicious any way you slice them!

How to Eat an Artichoke Video:

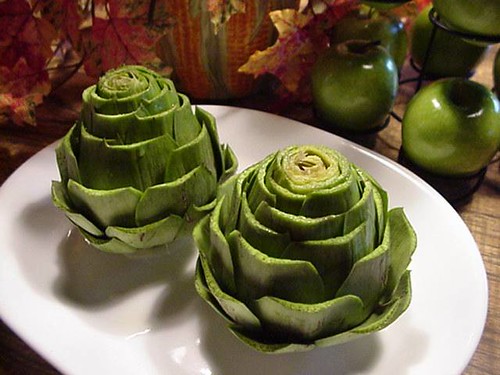
artichokes-trimmed

Click Here for a great step by step how to article, including detailed pictures

Secret Way to Always Get The Sale Price

I’ve heard people say things like… “if we just wait to shop until after Christmas, we can get everything so much cheaper, when it goes on sale!”

Well… I have a secret!

I know how you can shop, and still get the sale price… even if it doesn’t go on sale for another month!

Here’s a scenario that I know you have all been through at least once… and I know that you hate it as much as I used to!

– You go out shopping for a particular item

– You go from store to store trying to find the best deal

– You finally make a decision to buy thinking you’ve done your best in making the choice

– A week later, you are in the same store and notice that the item you bought last week now has a sale tag on it for $20 less than you paid!

UGH!!!

Well, when I learned this little secret, I didn’t have to worry about that scenario anymore!

When you’re used to being the person who does the shopping in your household, you learn lots of little tips to try to save a few dollars here and there.

Most of us know about money savers such as; shopping with coupons, finding clearance items, and price matching. But until now, maybe you’ve never heard of the “price guarantee”?

After you learn this method, here’s how your new shopping scenario unfolds!

– You go out shopping for a particular item

– You go from store to store trying to find the best deal

– You finally make a decision to buy thinking you’ve done your best in making the choice

– A week later, you are in the same store and notice that the item you bought last week now has a sale tag on it for $20 less than you paid!

– You take your receipt up to customer service & tell them you want a price guarantee for an item, and they scan the receipt. If you paid $40, but it is now on sale for $20… they hand you $20 back in CASH!

Did you catch that?

You don’t have to bring the actual item back in – you just hand them the receipt!

What does this mean for you?

If you bought aunt Mary a pair of gloves for Christmas for $40, and now they went on sale for $20, you can simply take in your receipt and get $20 cash back… and aunt Mary is none the wiser 😉

Think… holiday decorations, seasonal clothes, seasonal gifts, etc. – you know… the items that always tend to go on sale soon after the holiday. But don’t limit yourself to seasonal items! This method works for anything!

Here is the step by step process for making this work for you:

Step #1: When you are shopping, always keep a little ziplock bag, pen, & piece of paper with you

Step #2: Put your receipts in the ziplock bag

Step #3: While in the store check outline, look for the time frame for the price guarantee in the store policies. Some stores have a limit of 1 week, while others have up to 3 months! Their policies are usually posted at the checkout area, if not just ask. Jot down the store name & time limit for price guarantee on the piece of paper that you keep in the ziplock bag with your receipts. That way you’ll have it for future reference.

* Different stores have their own name for this service, and might be called something such as price match, price satisfaction, etc.

Step #4: If you see an item that is now on sale while you are out shopping – take out your little ziplock bag – check the store policy – look for the receipt with this item on it… then go get yourself some cash!

I hope this little tip comes in handy, and helps you save even more money while shopping!

Pearl
Easter Eggs – Elegant Ideas For Your Easter Eggs!

Have Some Fun With Your Easter Eggs This Year!

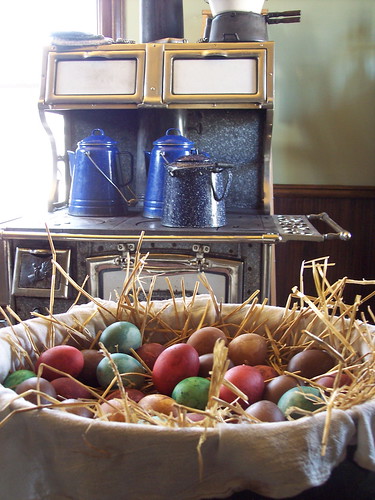
farm Easter eggs

I don’t know about you, but for me, there’s nothing like a pile of freshly boiled eggs and the smell of vinegar to bring back wonderful childhood memories of the day before Easter… around the table with my family!

And… because eggs are so inexpensive this time of year, you should take a few minutes around the kitchen table, to create some memories… and a masterpiece with your little ones!

The number of ways to decorate an egg are limitless, but I thought I would share a few of my favorites with you today.

Painted Eggs

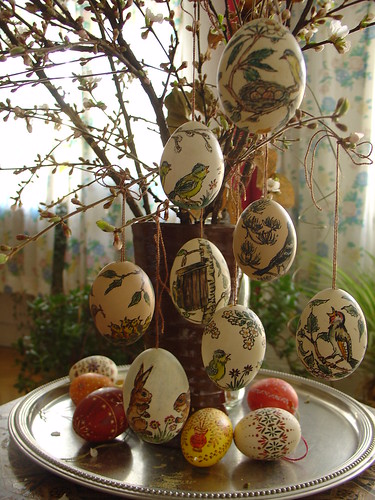
To keep your eggs to use every year, blow the egg out, wash & dry, then paint with regular acrylic paints. You could paint them to say “spring” with birds, nests, trees, and flowers, so you could leave them up all season… not just for Easter. Look at these BEAUTIFUL examples!

painted Easter eggs

I love how these painted eggs were hung on a “blooming” apple branch!

painted eggs

Stick Ons

Decorate with stickers, stamps, or scrapbook notions.

Natural Dye

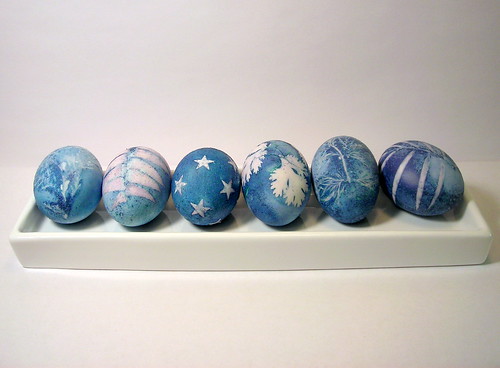
beautiful natural dye for eggs

This year, instead of purchasing a regular “same old, same old” egg dying kit, try using some of the food from your kitchen to color your eggs!

Spinach = Pale Green
Hibiscus tea = Green
Blackberries = Deep Purple
Red Cabbage = Robin’s egg Blue
Cranberries = Lavender
Beet Juice = Pale Pink
* The longer you leave the eggs in, the more the color changes

  • Decide what colors you would like to try
  • Depending on what color you’d like to try, add each item to it’s own small pot
  • Add enough water to cover eggs
  • Bring liquid to a low boil for approx. 10-20 minutes
  • Remove from heat & allow to cool slightly
  • Add 4 tablespoons of white vinegar
  • Gently add eggs and boil on low for 15 minutes
  • Turn off heat, cover, and leave eggs in dye bath until they reach desired color (can be 3 hours for deep shades)
  • Remove eggs with a slotted spoon and place on rack to dry
  • You can use a paper towel dampened with a bit of vegetable oil to rub the eggs & give them a slight shine, but I love the natural finish 😉


  • Optional: If you would like patterns on your eggs… wet a leaf of your desired herb (or other pattern), apply to egg, carefully wrap egg in a piece of old pantyhose & secure with a twist tie before placing in the dye bath to keep your pattern secure. Then, carefully unwrap after you remove the egg (using the directions above), and remove the item used for your pattern to reveal your beautiful design.

    dark colored eggs

    These eggs were colored with purple cabbage.

    natural dye Easter eggs

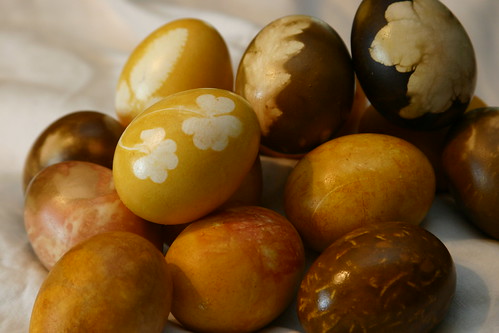
    Yellow Onion Skins

    onion skin dye

    I love the natural red color that the onion skins give to these eggs!
    natural colored eggs

    Grandma’s Quilt Eggs

    Cut tissue paper into small squares – make sure to use lots of different bright colors. Dip the boiled egg in water to make sure that it’s wet – apply the pieces of tissue paper – allow to dry – peel off paper to reveal that the dye was left on the egg for a beautiful patchwork quilt effect!

    Kaleidoscope Eggs

    Pick out some of your favorite colored crayons & sharpen them. Save the shavings & lay them out on a plate. Boil your eggs. While they’re still hot, take them out of the water, then roll them into the wax bits. The wax melts & sticks to the egg, giving it a special kaleidoscope effect.

    Mosaic Art

    Keep those beautiful colored egg shells that you worked so hard on! As you’re peeling your Easter eggs, be sure to keep the shells in a bowl. On a thicker piece of card stock paper, glue the colored pieces of egg shells into a pattern. The picture will turn out looking like a tile mosaic. Now you will be able to admire all of that time spent coloring your eggs for many years to come! * The kids love this project!


    Also… you might like this article that I wrote called, how to boil the perfect egg.


    Homemade Christmas Ornaments – Yummy Prim Gumdrops

    gumdrops1

    Homemade Christmas Ornaments

    Here is a great little project from Ewenique Treasures

    I love how she made these yummy little prim ornaments using only a few supplies… that you may already have around the house!

    Here’s how she made these beautiful little gumdrop Christmas ornaments:

  • To give the gumdrop shape, cut the bottoms off of a 2 1/2 inch Styrofoam ball
  • Using her fingers, she molded them into more of a gumdrop shape
  • Inserted a bit of rusty wire in each top with a drop of glue
  • Paint with different yummy gumdrop colors
  • While the paint is still wet, roll in clear glitter


  • Painted Pumpkin Ideas – Pictures of What Readers Have Done

    Now that Halloween is over, should we still consider pumpkins as a part of our decor? Absolutely! All the bits of harvest that I mentioned in the last post Decorating Pumpkins Without Carving – Making Beautiful Harvest Displays, are the exact ones that I use throughout November for my thanksgiving/harvest decor!

    As a matter of fact, I had such a great response to the painted pumpkin ideas article, that I wanted to share some of those responses with you.

    A group of ladies (from a church in Elkton, MD) had a special gathering. As a part of the evening’s events, they wanted to prepare a decoration for their home. They used the ideas from the painted pumpkin article, and turned each of their pumpkins into little pieces of art.

    I love their creative ideas!

    Way to go ladies!

    Amazing Way to Design Your Home, Fashion, and Art Like a Pro!

    Before I begin… let me warn you… the following information could be VERY dangerous! Please continue at your own risk!


    Actually, what I mean is… you’re going to love this website & the service that they provide so much, that it could become extremely addicting if you’re not careful 😉

    It’s called: Polyvore

    Let me try to sum up the service that they provide their members… they give you the technology to digitally arrange all of your favorite items into one beautiful collage.

    It’s very simple to get started. You just enter a few bits of information to become a member (free), and then you are able to start creating right away!

    After you log in, you will see a few examples of the completed collages that other members have made. I like looking through these, as they are great for ideas! Then, you can begin pulling all of your bits & bobs together to form your own new little pieces of art 😉

    You can choose from the huge selection of images already at the site, or you can use their “clipper” tool to snip bits from around the web. If you do choose to snip something, the item is always linked to it’s original location, so it also helps bring the original owner some great publicity. For example, say you make beautiful jewelry and you list your items on Etsy. If someone where to clip your item & add it to their collages, not only would they be able to use it, but now it would be available to all the other Polyvore members as well. Now think about what might happen if several members used your item to build their collages… 100s – 1000s of people will start seeing your pieces & want to click the link to see where they can buy one!

    * I’m thinking of all of my wonderfully talented friends (Madai 😉 out there who make such beautiful pieces! Now… I have some more ideas to help “spread the word” about their products!!!

    I can think of several uses for this wonderful service without even giving it much thought, so I thought I’d share a few over the next few days to help get you started on your creative way!

    I’m sure that you will be able to come up with many other great uses for this service… so be sure to share them with us in the comment section below!

    Today, I want to share some ideas about planning out your wardrobe.

    Now, you can pull all of the pieces together, and see how they look before you buy! And, since the links are all in tact for each item, you could simply purchase online & have them shipped to you – instead of having to actually go shopping 😉

    Look at some of these examples found at Polyvore.


    Next up? How about planning your wedding, special party, or room deocr using this tool?